Creating a training campaign
This article includes the procedures for creating, editing, canceling, and deleting a training campaign in BullPhish ID.
Prerequisites
- A partner administrator, partner agent, and privileged user can create, edit, cancel, and delete a training campaign.
- You must have an activated SMB organization.
- You must create at least one group in BullPhish ID. Refer to the articles Creating a group or Adding a directory sync.
Training campaign
In BullPhish ID, you can create training campaigns to effectively deliver security awareness training to your employees. There are three sections you complete when creating a training campaign:
- Details: The information you provide in this section includes the name of the campaign, the organization for which the campaign is being created, the rate at which the training emails will be sent, and the date and time the campaign will start.
The Select Template drop-down list enables you to select an existing training template to auto-populate the sections of the form with the values provided by the template. You can edit the auto-populated values as desired.
For more information about training templates, see Reusable campaign templates. - My Groups: In this section, you select the organization's groups that you want to include in the campaign.
- My Courses: Here, you select the training courses you want to include in the campaign.
How to...
- In the navigation menu, select Training & Awareness > Create Training Campaign.
- The Create Training & Awareness Campaign page is displayed. Complete the Details section.
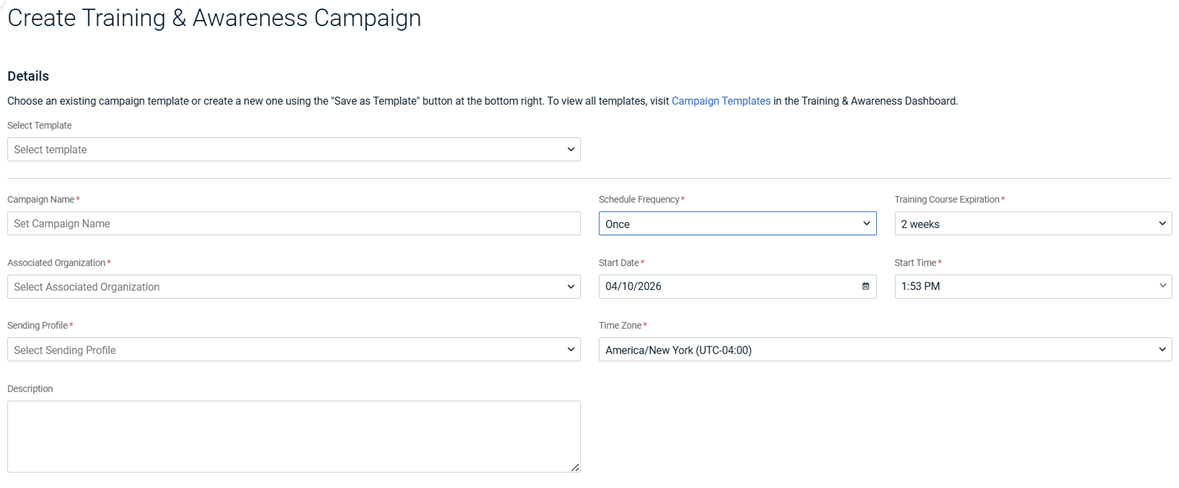
- Select Template (optional): Select a pre-existing training template to auto-populate the form with the values provided by the template. Global templates are identified by a global icon preceding the template name. You can edit the auto-populated values as desired.
- Campaign Name: Enter a name for your campaign.
- Associated Organization: Select the organization for which the campaign is being created.
- Sending Profile: A sending profile specifies the email address that will appear as the sender of the email. The Sending Profile field is automatically populated after selecting an organization from the Associated Organization drop-down list. The populated value will be the sending profile used in the last-created campaign for the selected organization.
The Sending Profile field will display Loading... until the value is automatically populated. If no previous campaigns exist, the field will remain empty and require manual selection.
Note: The populated sending profile will not be based on a campaign that has been deleted. If a sending profile was deleted, its assigned replacement will be populated. - Description (optional): You can enter a campaign description.
- Schedule Frequency: This is the rate at which the training emails will be sent. Options are Once, Weekly, Biweekly, Monthly, and Quarterly.
- Once: Campaign emails will be sent at once at the selected starting date & time.
- Weekly: Campaign emails will be sent periodically over the course of one week.
- Biweekly: Campaign emails will be sent periodically over the course of two weeks.
- Monthly: Campaign emails will be sent periodically over the course of 30 days.
- Quarterly: Campaign emails will be sent periodically over the course of 90 days.
- Training Course Expiration: The duration for which each course in the campaign is available to the targets.
- Start Date: The date the training campaign emails will begin sending. The current date is prepopulated.
- Start Time: The time the training campaign emails will begin sending. The current time is prepopulated.
- Time Zone: Select a time zone.
- Select Template (optional): Select a pre-existing training template to auto-populate the form with the values provided by the template. Global templates are identified by a global icon preceding the template name. You can edit the auto-populated values as desired.
- In the Groups drop-down list, the groups with active targets for the selected Associated Organization are listed. Select each group you want to include in the campaign.

- In the Courses section, all available courses for the selected Associated Organization are listed in the left pane.
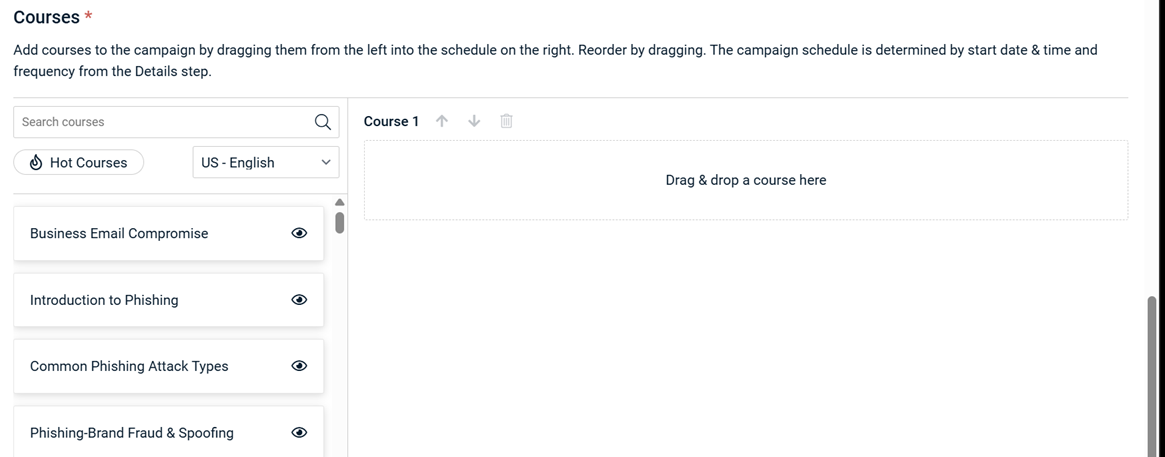
Note: For a list of courses available in other languages, see the article Available courses by language.- To search for a course, enter the name of the course (minimum three characters) in the Search Courses field and press Enter.
- To list only hot courses, click Hot Courses.
- If desired, select a language in the language drop-down list.
- To preview a course, click the View icon next to the course name.
The course opens in a new browser tab. Click the play button to preview the course.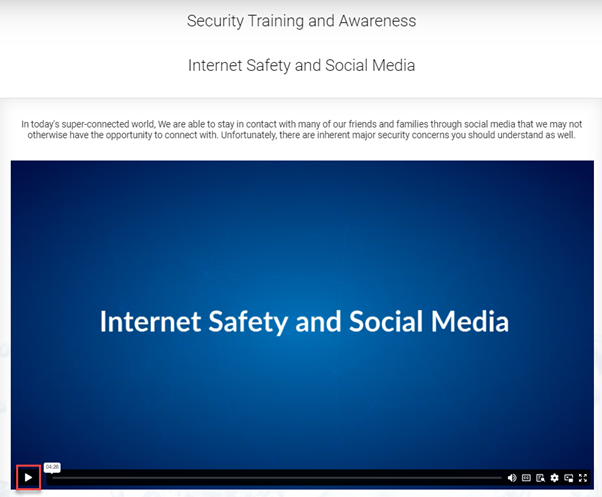
- For each you course you want to include in the campaign, drag and drop the desired course to the Drag & Drop area.
The available dates for each course, based on Start Date and Scheduled Frequency, are displayed. In this example, the available dates are calculated using a Start Date of 04/10/26, a Scheduled Frequency of Weekly, and a Training Course Expiration of 2 Weeks.
NOTE You can reorder the selected courses by dragging them into the desired position or by using the up and down arrows.
- Click the Create Campaign button. A campaign entry is created on the Training & Awareness Dashboard for each course in the campaign.
You can edit a training campaign while it is in Scheduled status. Available options depend on the campaign’s schedule frequency and whether it is part of a multi-course campaign.
The following lists which campaign components are editable.
Editable
- Campaign Name
- Campaign Description
- Sending Profile
- Training Course Expiration
- My Groups
- My Courses (replacement only; see Course replacement rules below)
- Campaign Start Date and Time + Time Zone
Non-editable or hidden
- Associated Organization (locked)
- Frequency (hidden and not editable)
Editing a multi-course campaign
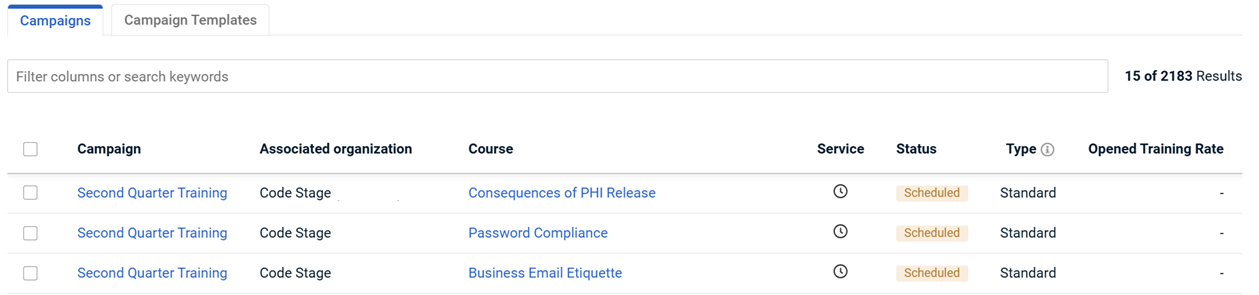
A campaign entry is created on the Training & Awareness Dashboard for each course in a multi-course campaign.
The editing options available for a campaign that is part of a multi-course campaign depend on the selected Schedule Frequency.
Edits made to a campaign whose Scheduled Frequency is Weekly, Bi-Weekly, Monthly, or Quarterly apply only to the edited campaign.
Campaigns whose Scheduled Frequency is Once are linked into a single logical set. When you make edits to one of the campaigns and save, a confirmation message is displayed. You can choose to:
- Update This Campaign: This applies changes only to the current campaign and unlinks it from the set. The training invitation is sent only for this campaign.
- Update All Linked Campaigns: This applies changes to all linked campaigns while keeping them linked. One training invitation is sent listing the courses for each campaign.
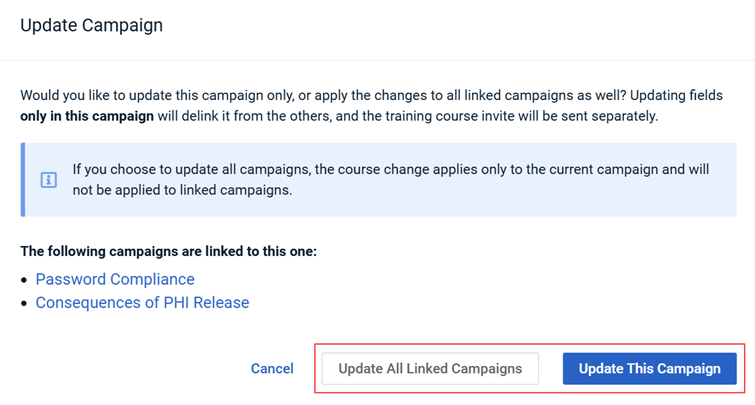
EXAMPLE You update the Sending Profile for a scheduled, linked campaign and click Save. The confirmation modal appears. If you click Update This Campaign, it unlinks and uses the new profile only for this campaign. If you choose Update All Linked Campaigns, all linked campaigns keep their association and adopt the new Sending Profile.
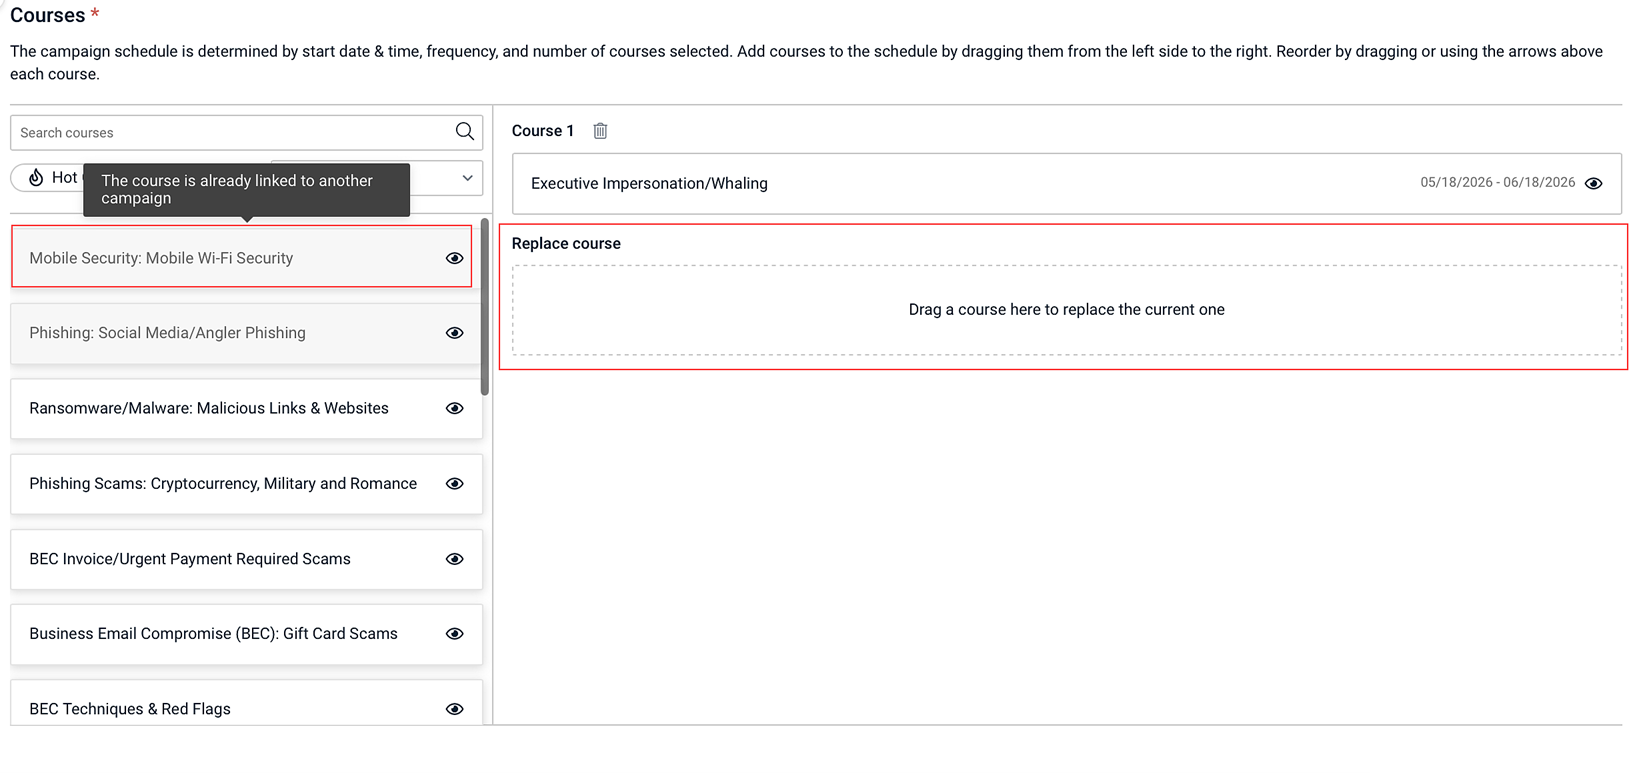
Course replacement rules
The following rules apply when replacing a training course:
- In the Courses list, courses already linked to other campaigns in the same logical set are unavailable. They appear grayed out with the tooltip: "The course is already linked to another campaign in this group."
- Only replacing a course is allowed. Multiple courses cannot be added to a single campaign row.
- If you choose to update all campaigns and you changed the course, the course change applies only to the current campaign and will not be applied to linked campaigns.
To edit a training campaign:
IMPORTANT A remedial training campaign (Type = Remedial) cannot be edited.
- In the navigation menu, select Training & Awareness > View All Training Campaigns.
- On the Training & Awareness Dashboard page, do one of the following:
- Click the name of the desired campaign.
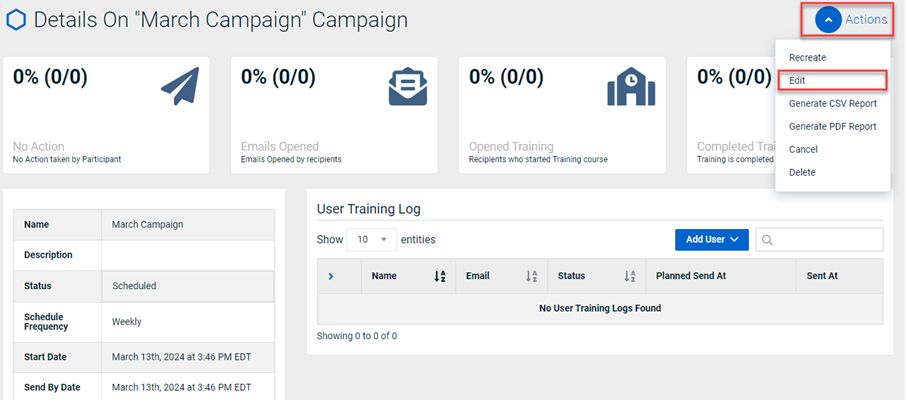
- In the last column, click the View icon.

- In the upper-right corner of the campaign’s Details page, select Actions > Edit.
- On the Edit Campaign page, make the desired edits.
- In the lower-right corner, click Save.
NOTE If you edited a campaign that is part of a multi-course campaign whose Scheduled Frequency is Once, you are prompted to update this campaign or update all linked campaigns. See Editing a multi-course campaign.
To cancel or delete a campaign, it must be in one of the statuses indicated:
- Cancel: Scheduled, Sending Emails, Running
- Delete: Scheduled, Sending Emails, Running, Completed, Cancelled
IMPORTANT A remedial training campaign (Type = Remedial) cannot be edited.
- In the navigation menu, select Training & Awareness > View All Training Campaigns.
- To cancel a campaign:
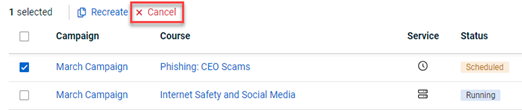
- On the Training & Awareness Dashboard page, select the check box of the desired campaign.

- Above the table, click Cancel.
- In the confirmation modal, click OK. The campaign’s Status column indicates Cancelled.

NOTE Another option for cancelling a campaign is to click the View icon in the last column and select Actions > Cancel.
IMPORTANT When canceling a remedial and/or standard training campaign, the confirmation message specifies the campaign type being canceled. It also states that course statistics will be recalculated and that all reports generated after the campaign is canceled will be updated. For remedial training campaigns, the message includes a link to the phishing campaign that triggered the training. To proceed, click the Cancel Campaigns button. To keep the campaign active, click the Keep Campaigns Running button.
- To delete a campaign:
- On the Training & Awareness Dashboard page, do one of the following:
- Click the name of the desired campaign.
- In the last column, click the View icon.
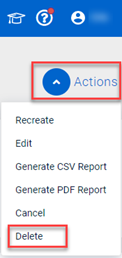
- In the upper-right corner of the campaign’s Details page, select Actions > Delete.
- In the Confirmation modal, type Delete and click the Delete button.
IMPORTANT When deleting a remedial training campaign, the confirmation message states that course statistics will be recalculated and that all reports generated after the campaign is deleted will be updated. It also includes a link to the phishing campaign that triggered it.
| Revision | Date posted |
|
Sending Profile: Added automatically populated info. |
7/15/24 |
| Added Important notes for remedial training campaigns. |
9/25/25 |
| Training campaign step 3: Added - The Available section displays up to 100 groups. For organizations with more than 100 groups, use the Search field to find the additional groups. |
12/11/25 |
| Added reusable template content, steps. |
4/16/26 |
| Added separate section: Edit a training campaign to address editing multi‑course training campaigns with a Scheduled Frequency of Once. |
5/14/26 |


