Creating a custom training course
In this article, you will learn how to create a custom training course.
Prerequisites
-
A partner administrator, partner agent, and privileged user can add, edit, and delete a custom training course.
Custom training course
BullPhish ID allows you to create your own custom training course in which you can add the following items: text, audio, video (any video formats recognized as mime-type video/* - see the Mime-type videos section below).
In addition, you can add Vimeo and YouTube videos by providing the URL to the hosted video. It is important to note that you are responsible for ensuring the use of the embedded Vimeo or YouTube video complies with the platform's terms and conditions. Kaseya has the right to remove any content from your BullPhish ID account that it believes violates the terms and conditions. When you add a Vimeo or YouTube video, a notice is displayed conveying such, as shown in this YouTube example.
A custom training course requires a quiz with a minimum of one question. Each question must be written as a true or false statement. For example, "BullPhish ID allows me to create custom training courses."
Mime-type videos
While BullPhish ID accepts any video/* MIME type, these are some common examples of video formats that are compatible with the platform:
- video/mp4
- video/webm
- video/ogg
- video/x-msvideo (for AVI files)
- video/quicktime (for MOV files)
- video/x-flv (for Flash video files)
- video/3gpp
Training Courses table
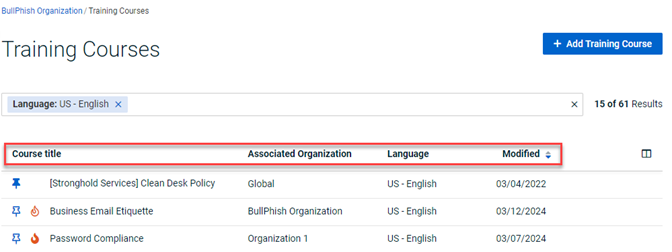
The Training Courses table lists all courses that are available for your organization when creating a training campaign. The table data is described below:
- Course title: The title of the course.
- Associated Organization: The organization for which the course was created. The course will only be available when creating a training campaign for this organization. If the Associated Organization: is an MSP, the course is available to all the SMBs that belong to the MSP. Global means the course is available to be used in training campaigns by all BullPhish MSPs and SMBs.
- Language: The language in which the course was created.
- Modified: The date the course was created or last modified.
Training course icons
Each course in the table includes icons that enable you to perform tasks:
- Pin: (
 ) You can click the pin icon and the course will appear at the top of the Training Courses table. The course will also appear at the top of the Available courses list when creating a training campaign.
 - Mark course as hot: (
 ) For courses created for a specific organization, you can click the Mark course as hot icon. When using the Only hot filter, only courses marked with the hot icon will be listed. A course remains marked as hot for two weeks, unless you click its Unmark course as hot icon. This icon does not apply to Global courses.
 - View: (
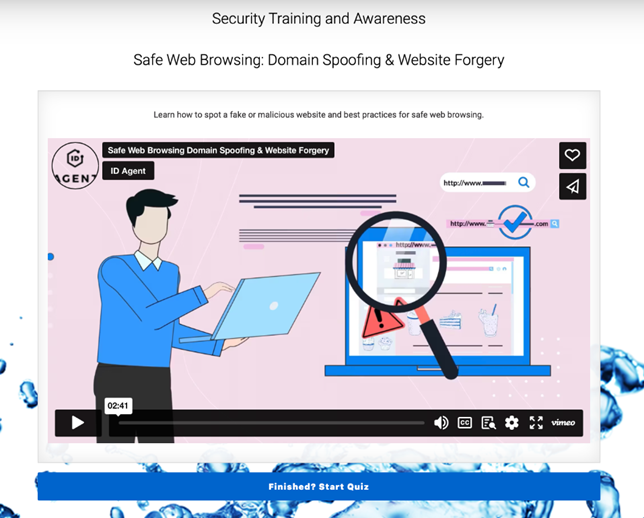
 ) Click the view icon to preview a course. You can preview the quiz by clicking Finished? Start Quiz.
- Edit: (
 ) You can edit courses created for a specific organization. You cannot edit Global courses.
 - Delete: (
 ) You can delete courses created for a specific organization. You cannot delete Global courses.
How to...
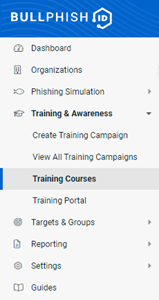
- In the navigation menu, select Training & Awareness > Training Courses.
- In the upper-right corner of the Training Courses page, click the + Add Training Course button.

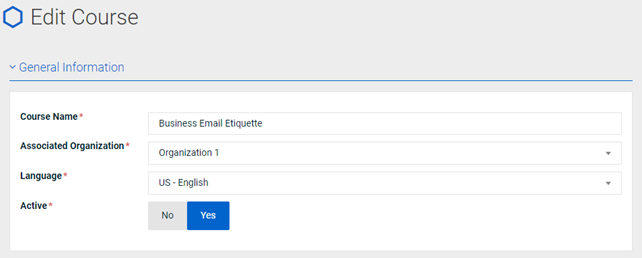
- In the General Information section, complete the following:
- Course Name: Enter a name for your custom course.
- Associated Organization: Select the organization for which the course is being created. The course will only be available when creating a training campaign for this organization. To make the course available to all your SMBs, select the name of your MSP.
- Language: Select the language in which the course is being created.
Active: A course must be active (Yes selected) for it to be available when creating a training campaign.
- In the Content section, enter a description of the course.

- Click Add Content Item and select an item.
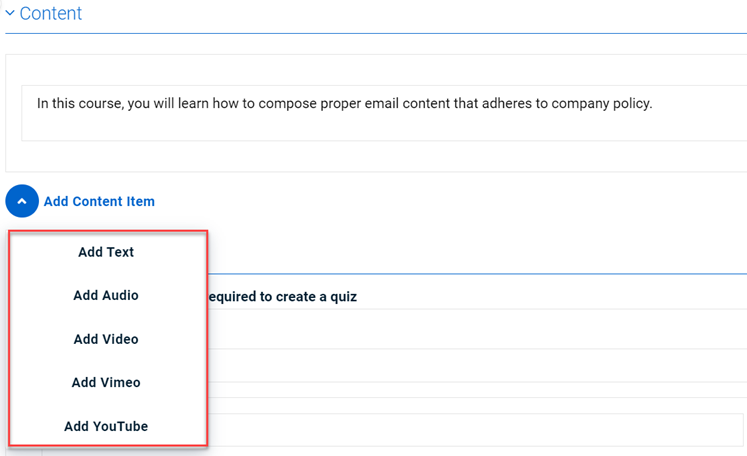
Note: When adding a Vimeo or YouTube video, enter the URL to the hosted video in the field provided.
- Continue to add the necessary items to your course. In this example, video was selected which created a field to add the video file.
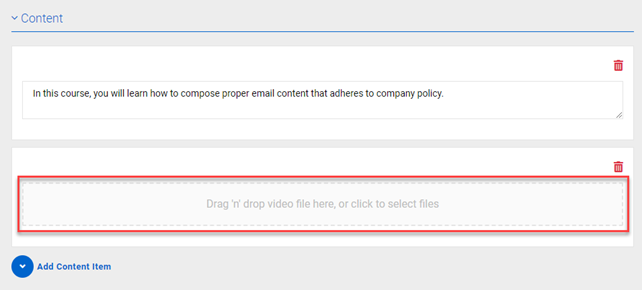
After adding the file, the filename is displayed in the field.
- In the Quiz section, in the Question Title field, enter a title for your quiz, for example, Test Your Knowledge.
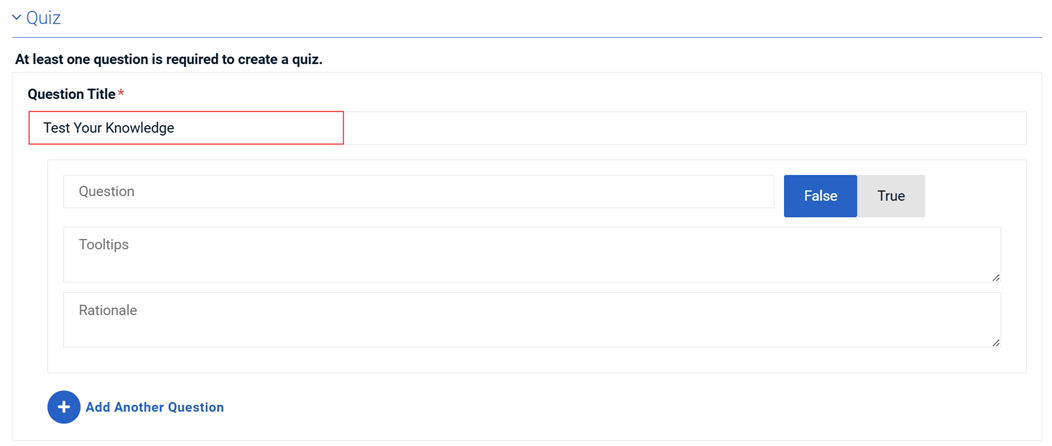
- In the Question field, enter a question in the form of a statement.

- False is selected as the default answer. If the statement is true, select the True button.
- If desired, in the Tooltip field, enter information to help the user select the correct answer.
- If desired, in the Rationale field, enter an explanation for the correct answer.
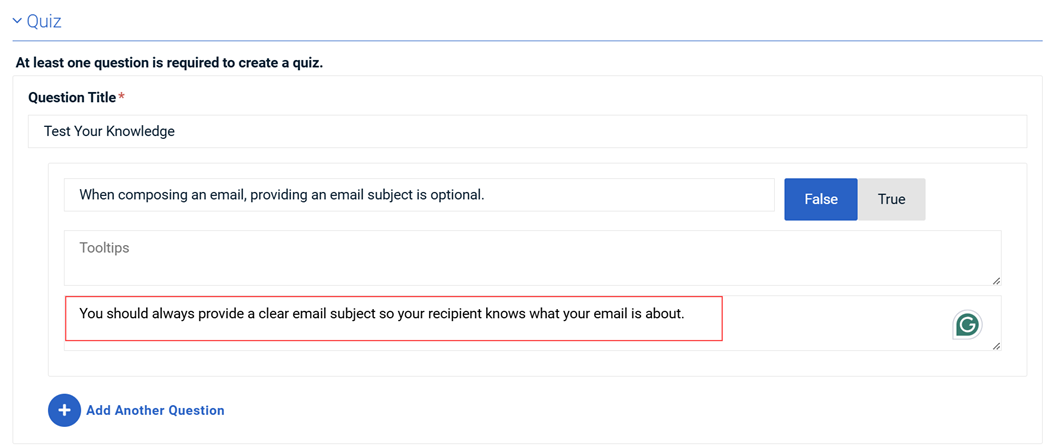
- If desired, click Add Another Question.

- Repeat steps 8 through 12 until you have created the desired number of questions.
- In the lower-right corner, click Save. Your course is listed on the Training Courses page.
Note: Using a filter makes it easier to find your course.
| Revision | Date |
|---|---|
| Added Mime-type videos section. | 9/24/25 |
| Edited steps to reflect minimum of one quiz question required. | 11/6/25 |


