Creating a custom email template
BullPhish ID provides two methods for creating custom email templates. Each method has a different entry point and purpose, but several tasks—such as using variables, adding required links, inserting images, testing, and saving—are similar regardless of the method used.
- Method 1: Settings > Email Templates — Use this method to create phishing or training templates from scratch or from a pre-existing template. This method supports both phishing and training template types.
- Method 2: Training & Awareness > Training Portal > Email Templates — Use this method to create or assign a training course invitation email template. It provides a streamlined workflow for creating and assigning training course email templates to specific organizations.
Method 1: Settings > Email Templates
On the Settings > Email Templates page, you can edit a template previously created by your organization or create new phishing and training email templates from scratch.
How to...
 Create a custom email template using a pre-existing template
- Log into your BullPhish ID portal.
- In the navigation pane, select Settings > Email Templates.
- In the upper-right corner, click
 .
- Click Start With Pre-Existing Template.

- The Select Existing Template dialog box is displayed. If desired, select filter criteria. The following filters are available:
- Template Name: Search for a specific template by name.
- Associated Organization: Select the Global Template toggle to display only global templates, or select an Associated Organization to display only templates belonging to that organization.
- Type: Select Phishing or Training.
- Language: Select a specific language to list only templates available in that language.

NOTE If a template's name is not completely listed in the Template Name column, mouse over the name. A tooltip displays the full name of the template. If you activate the Global Template option, the ability to select an Associated Organization is disabled.
- If desired, preview the template by clicking the view icon in the last column. The template opens on a new browser tab.
- Select the desired template.

- In the bottom-right corner, click Apply.
- If necessary, edit the following:
- Template Type
- Language
- Subject
- In the Template Name box, enter a name for your new template.

- The Body section displays the pre-existing template which can be edited. Make any desired edits. See the section "Tasks common to both methods."
Important: The Protect your account link in the example below is the {{.URL}} variable linking to the phishing landing page (or the training portal). Do not delete this link.
- Global Template is enabled automatically for partner and MME organizations. To create the template for a specific SMB:
a. Click the Global Template toggle to deactivate it (greyed out).
b. In the Associated Organization list, select the desired SMB.
- Click the Active Template toggle to make the template available.
IMPORTANT If you are creating a training template, go the Save & Set feature section.
- If you want to send a test email, go to step 15. Otherwise, click Save.
- To send a test email:
- Select the Send Test Email toggle to activate it.
- In the Sending Profile list, select a profile.
- In the Recipient list, enter the recipient's email address.
- Click Save and Send.
Create a new email template
- Log into your BullPhish ID portal.
- In the navigation pane, select Settings > Email Templates.
- In the upper-right corner, click .
- Complete the following fields:
- Template Type: Select Phishing or Training.
- Template Name: Enter a unique name for your template.
- Language: Select a specific language in which you will create the template.
- Subject: Enter the content you want targets to see in the email's Subject field.

- In the Body section, use the toolbar and variables to create the template's content.
IMPORTANT: Adding a link to the training portal or phishing landing page is required. See the section "Tasks common to both methods."
- Global Template is enabled automatically. To create the template for a specific SMB:
- Click the Global Template toggle to deactivate it (greyed out).
- In the Associated Organization list, select the desired SMB.

- To make the template available, click the Active Template toggle.
IMPORTANT If you are creating a training template, go the Save & Set feature section.
- If you want to send a test email of your phishing template, go to step 9. Otherwise, click Save.
- To send a test email of your phishing template:
- Select the Send Test Email toggle to activate it.
- In the Sending Profile list, select a profile.
- In the Recipient list, enter the recipient's email address.
- Click Save and Send.

IMPORTANT When a global template is saved by an MSP/MME, the template is automatically available to all of the MSP/MME organization's SMBs.
Use the Save & Set feature
The Save & Set feature is available when creating training templates only. After completing your training template, clicking the Save & Set button saves the template and redirects you to the Email Templates tab on the Training Portal page. Here, you assign your newly created template so it is used for all training emails.
The Save & Set button is enabled only when the Template Type = Training and the Active Template toggle is enabled.
When activating and completing the Send Test Email fields, the Save, Send & Set button is enabled. Clicking the Save, Send & Set button saves the template, sends the test email, and automatically navigates to the Email Templates tab on the Training Portal page.
To use the Save & Set feature:
- At the bottom of the template page, verify the Active Template toggle is enabled.
- If you don't want to send a test email go to step 3. If you do want to send a test email:
- Select the Send Test Email toggle to activate it.
- In the Sending Profile list, select a profile.
- In the Recipient list, enter the recipient's email address.
- Click Save, Send & Set.

- Go to step 4.
- Click Save & Set.

- The Training Portal page is displayed with the Email Templates tab selected. Verify, complete the following:
- Existing Template:Yes should be selected.
- Activate Custom Email:Yes should be selected.
- Language: Select the applicable language.
- Template: Select your new template from the list.
Tip: Type a few characters of the template's name to filter the results.
- At the bottom of the page, click Save. In the confirmation modal, click Save.
Method 2: Training & Awareness > Training Portal > Email Templates
This method allows you to create and activate training course invitation email templates directly from the Training Portal. To locate the training template, select Training & Awareness on the left navigation panel, followed by Training Portal, and then click the Email Templates tab.
How to...
Create a template for all organizations (parent organization)
As a parent organization, you have the ability to create a training course invitation that will be applied to all child organizations.
When you are on the Email Templates tab, you will see the following fields:
- Existing Template: Select Yes if you would like to reuse an existing template, or No if you would like to create a template from scratch.
- Activate Custom Email: Select Yes to activate the template. The next training campaign email will be sent using this template. Select No to save it as a draft (the default template will be used instead).
- Language: Select the language of the template.
- Template: Displayed when Yes is selected for Existing Template. Select a template. The following fields are automatically populated and can be edited:
- Name: Automatically populated with the selected template name. Any changes made to the template are saved as a new template. You can rename the template if needed.
- Email Title Users Will See: The subject line displayed to end users.
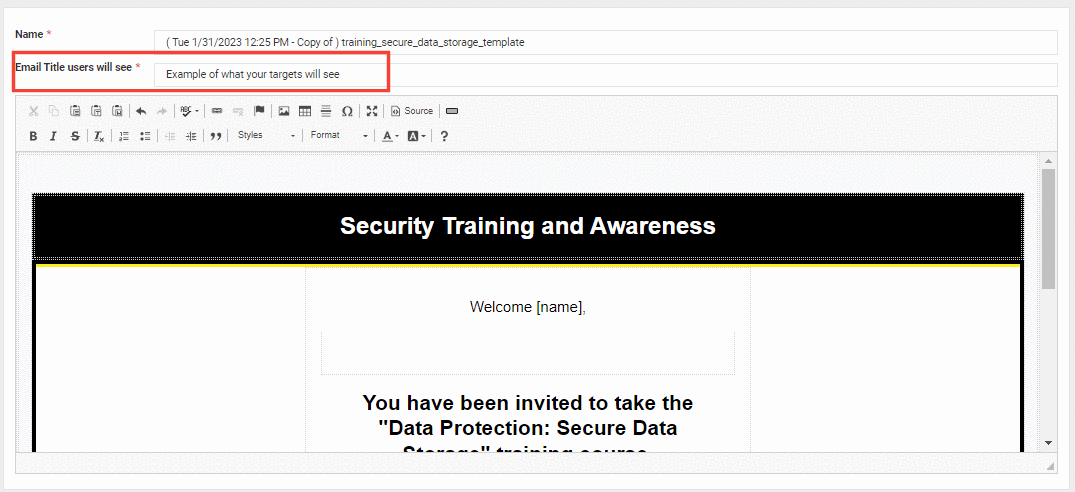
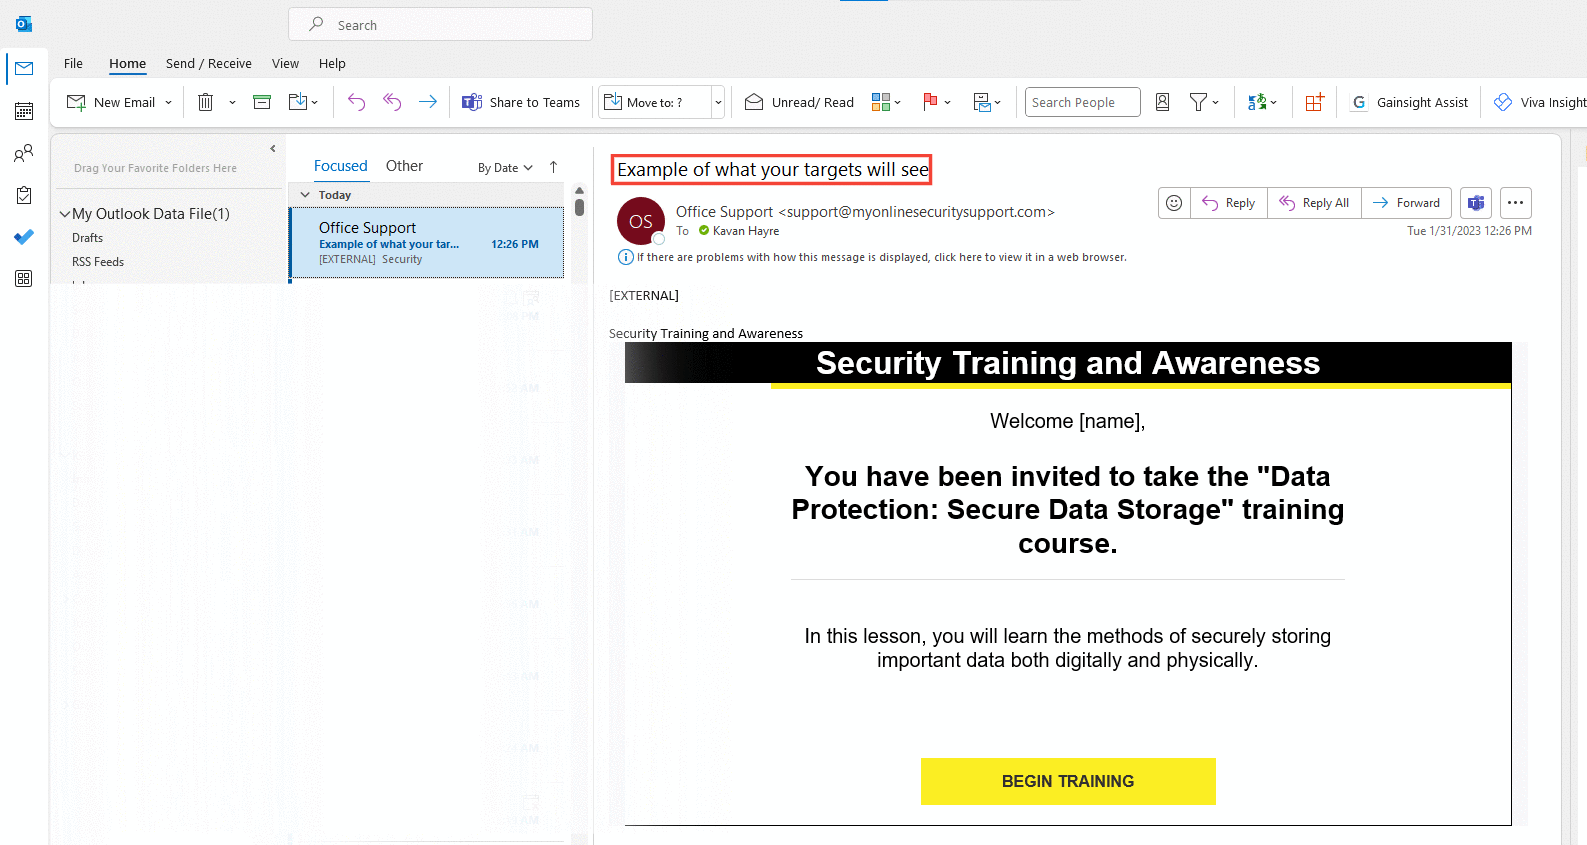
- HTML Body: Displays the selected template's content, which you can edit and customize, including adding images.
See the section "Tasks common to both methods."
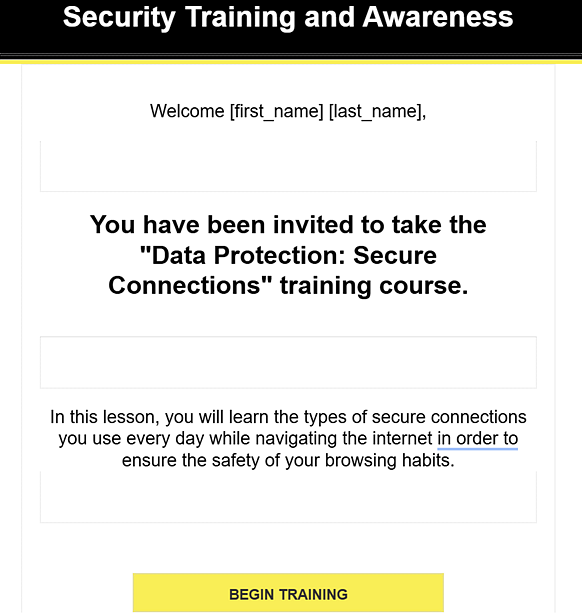
Important: The Begin Training link is the {{.URL}} variable linking to the training portal. Do not delete this link.
IMPORTANT Selecting No for Existing Template allows you to create a template from scratch. Therefore, Name, Email Title Users Will See, and HTML Body fields are left blank and must be completed manually, including adding a link to the training portal (See the section "Tasks common to both methods”).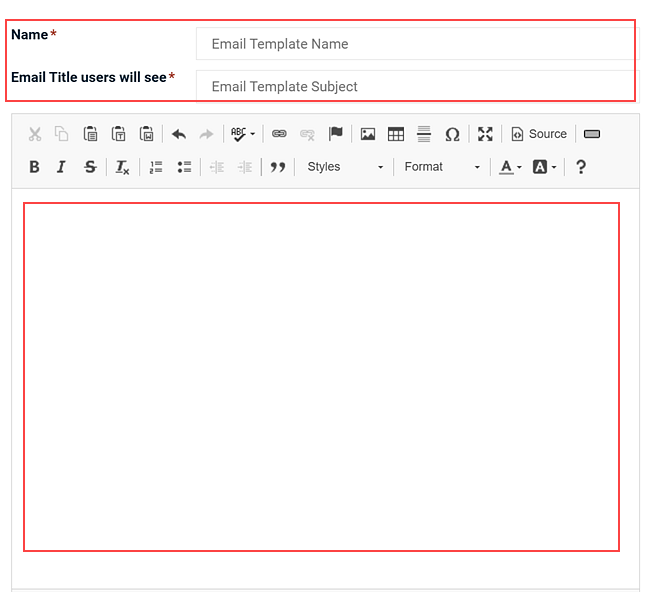
Create a template for an individual organization
To create a training email template for a specific SMB, click on the arrow next to your parent organization name to see the list of child organizations. You may search for your specific organization using the Search Bar.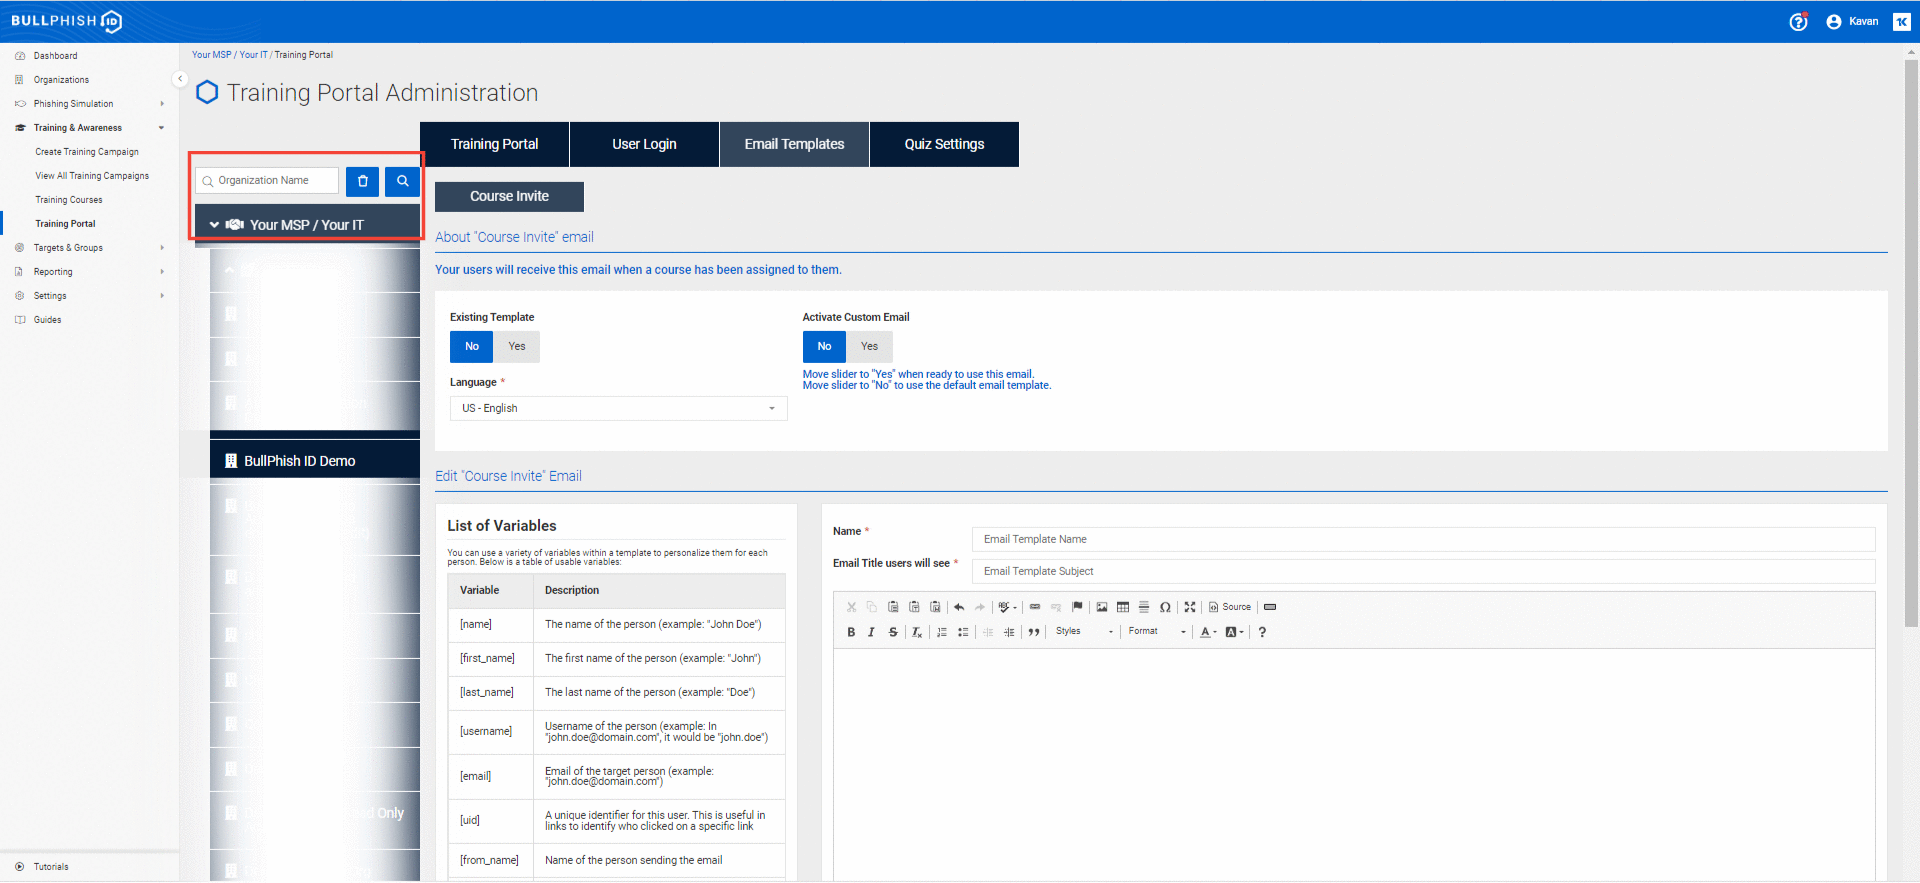
Once an organization is selected, it will be highlighted in the list. Settings on the Email Templates tab can now be configured for this SMB organization, along with settings on the remaining tabs.
Any changes made to the SMB organization will override the parent organization settings.
Tasks common to both methods
The following tasks apply regardless of which method you use to create a custom email template.
How to...
Edit/add email body content
In the Body section, use the toolbar and variables to edit or create the template's content.
Pre-defined variables
Whether creating an email template from the very beginning or using a pre-existing template, BullPhish ID provides a set of pre-defined variables you can use to personalize your template.
The variables are described in the following table:
| Variable | Description |
|---|---|
| [name] | Inserts email recipient's first and last name. |
| [first_name] | Inserts email recipient's first name. |
| [last_name] | Inserts email recipient's last name. |
| [username] | Inserts email recipient's username (e.g., john.doe). |
| [email] | Inserts recipient's email address (e.g., john.doe@domain.com). |
| [uid] | Inserts email recipient's unique identifier. This is useful in links to identify who clicked a specific link. |
| [from_name] | Inserts email sender's name. |
| [from_email] | Inserts sender's email address. |
| [now] | Inserts date and time the email is sent. |
| [courses] - Training template only | Inserts the list of courses attached to the campaign. |
|
{{.URL}} |
For a training campaign, inserts the URL to the training portal. For a phishing campaign, inserts the URL to the phishing landing page. |
To use a variable, you simply click the copy icon for the desired variable and paste it into the template. BullPhish ID replaces the variable with the correct data that applies to each email that is sent.
Example
In this example, the [name] variable is copied.
Then, the variable is pasted into the desired location in the template.
In the email received by the recipient, [name] will be replaced with the recipient's name (for example, "Welcome Tom Smith").
Create a link to the training portal or phishing landing page
You are required to create a link to the training portal (if creating a training template) or the phishing landing page (if creating a phishing template). To create a button link, go to step 2.
- To create a text link, follow these steps:
- In the Body section, select the text to be used for the link.

- On the toolbar, click the Link icon.

- In the Link modal, in the Protocol list, select <other>.
- In the URL box, enter {{.URL}}. It is recommended you copy and paste {{.URL}}. Do not edit the Display Text or Link Type values.

- Click OK.
- In the Body section, select the text to be used for the link.
- To create a button link, follow these steps:
- In the Body section, click the location you would like the button to appear.
- On the toolbar, click the Simple Button icon.

- In the Simple Button dialog box, in the Text field, enter the button text.
- In the URL field, enter {{.URL}}.

- At the bottom of the modal, click OK.
Add your logo to a template
Follow the steps below to add your logo to an email template. The first step is to convert your logo to a base64-encoded string.
- Go to https://www.base64-image.de/ and select Drag & Drop Images anywhere, Click Here.
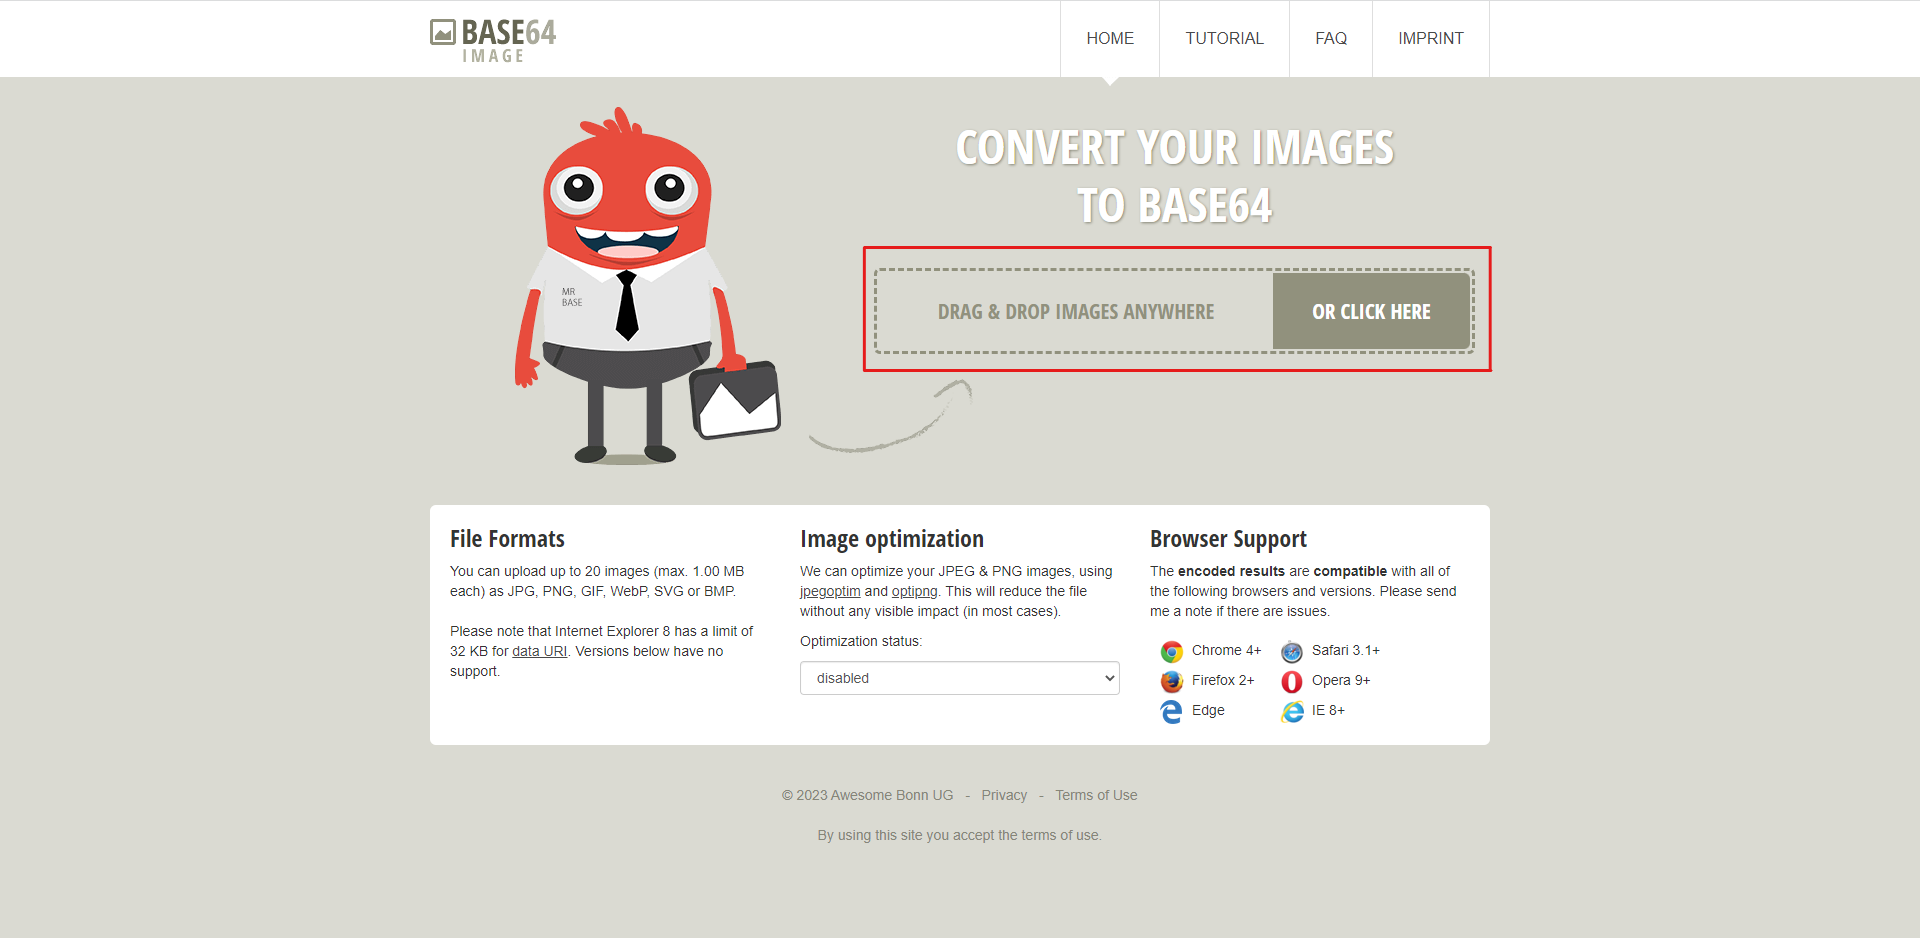
- Select the image or logo you wish to use on the template.
- The image will be encoded on a table on the bottom of the page, select the Show Code button.
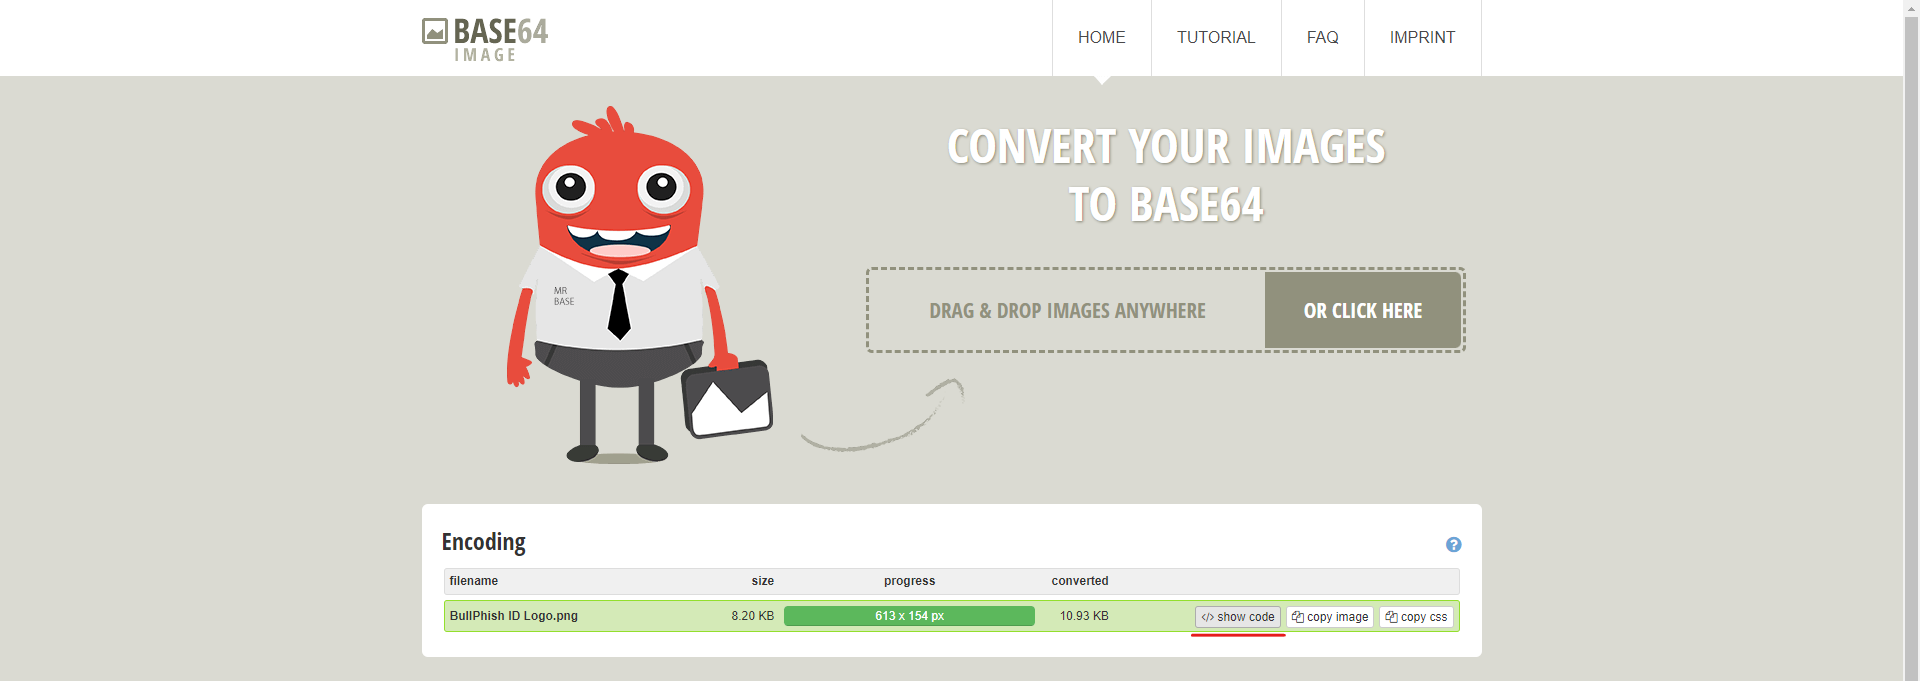
- A dialog box will appear and copy the For use in <img> elements code.
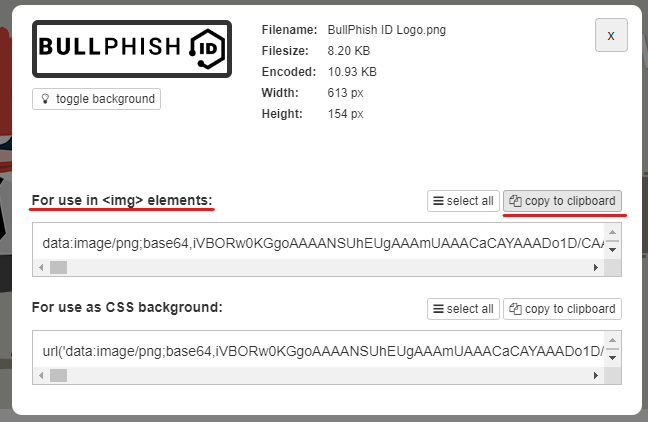
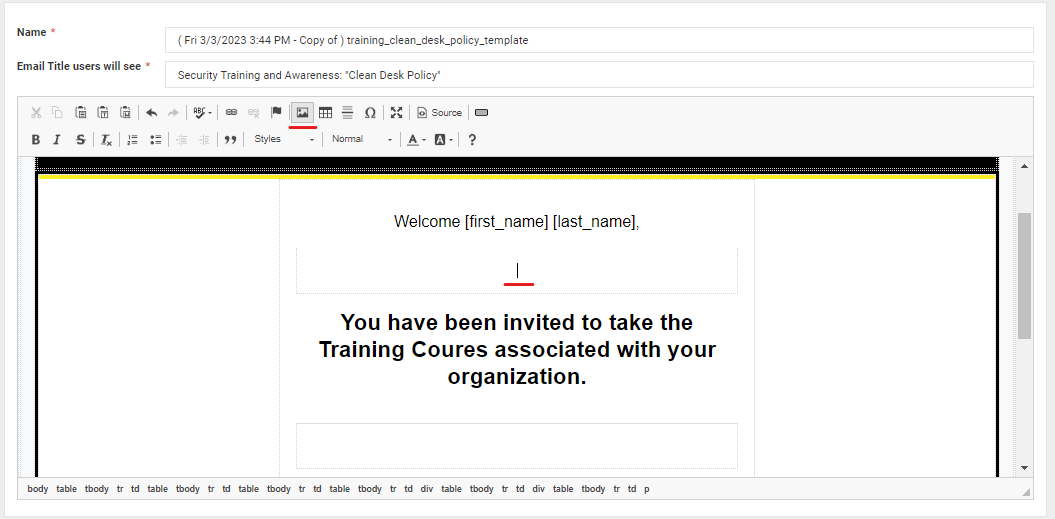
- After copying to clipboard. Go to your HTML template on BullPhish ID, select where you want your logo to appear, and then click the image icon in the left navigation panel.
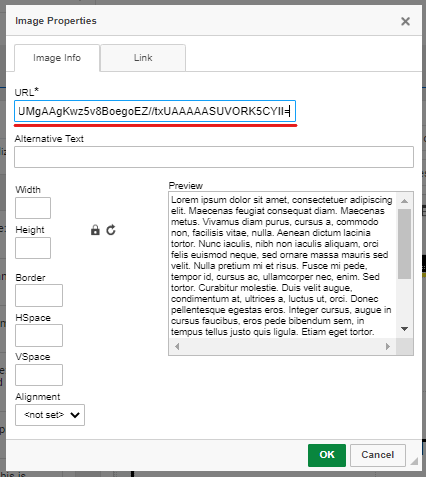
- A dialog box will appear. Paste what you previously copied in the URL field.
- Select OK.
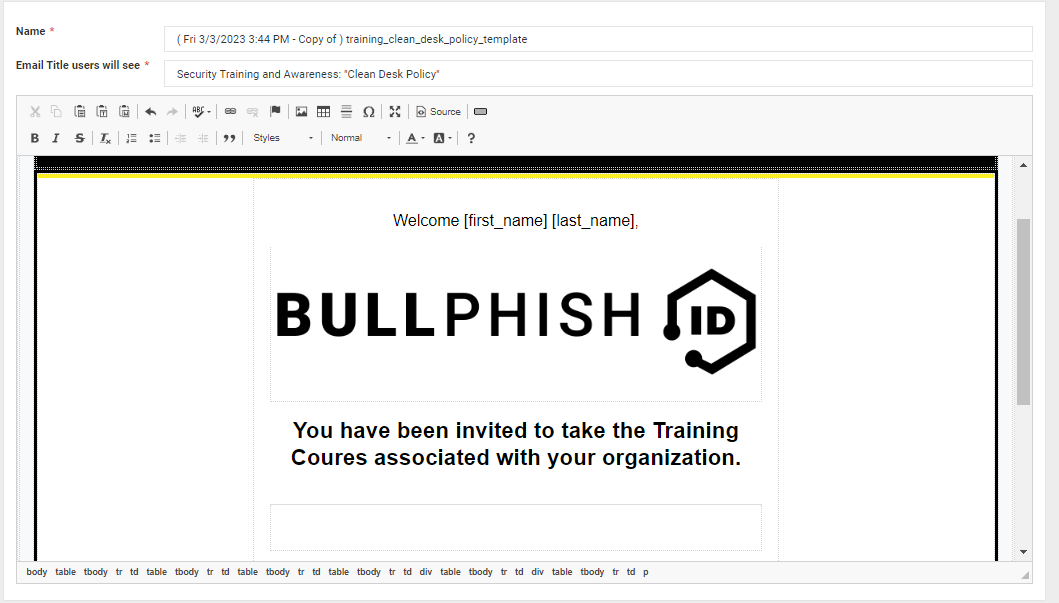
- Set the following image options as desired (all values entered are in pixels):
- Width: Indicates the default width of the image. The lock icon automatically adjusts the Height value proportionately. To set these values separately, click the lock icon to unlock it.
- Height: Indicates the default height of the image. The lock icon automatically adjusts the Width value proportionately.
- Border: Places a border around the image.
- HSpace: Adds space between the image and text based on the Alignment value selected.
- VSpace: Adds space below the image and the text below.
- Alignment: Sets the alignment of image to the left or right of the text.
- Click OK.
NOTE Another option for adding an image is by using its URL address. On the toolbar, click the Image icon. In the URL field, enter the image's URL address. Set image properties as desired.
Delete a template
When deleting an email template, the Delete Email Template modal is displayed to confirm the deletion. The modal content varies depending on the template type and whether it is currently in use.
| Template type | Scenario | Modal content |
|---|---|---|
| Phishing | Kits are associated with the template. | Indicates that continuing will delete any associated phishing kits. On-going/scheduled campaigns remain unaffected. The kits will be deleted from the backend when associated campaigns end. Lists the affected kit names. |
| Phishing | No kits are associated with the template. | Asks for confirmation; indicates no kits are associated. |
| Training | Organizations are currently using the template. | Asks for confirmation; warns that deleting the template will reset those organizations to the default training course invitation template. Lists affected organization names. |
| Training | No organizations are currently using the template. | Asks for confirmation; indicates no organizations are associated. |
To delete a template:
- In the navigation pane, select Settings > Email Templates.
- For the template you want to delete, in the last column, click the Delete icon.

- The Delete Email Template confirmation modal is displayed. In this example, the modal indicates the phishing template has a phishing kit associated with it.

- Click Delete.
| Revision | Date |
|---|---|
| Combined "Creating a custom email template" and "How do I customize a training course email template?" into single article. | 10/26/26 |


