Google admin safelisting guide
Google Admin configuration settings for BullPhish ID to ensure phishing simulation email delivery
You must take several steps to deliver BullPhish ID email templates successfully. This is a direct result of Google's competency at pre-filtering, quarantining, flagging, and notifying end users of potentially malicious activities in their inboxes. This is great for your organization but can also make things tedious when trying to deploy tools designed to simulate malicious activity for your employees.
The following guide ensures you take the necessary steps to successfully deliver BullPhish ID emails based on standard Google Admin configurations. Perform the steps in the order presented. As a note, this is in addition to the safelist if you have third-party spam filters deployed in your environment.
Setting the BullPhish ID IP address as an inbound gateway
- Log into the admin console for your G-Suite account.
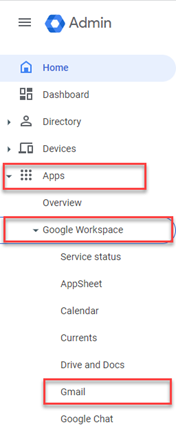
- In the navigation menu, select Apps > Google Workspace > Gmail.
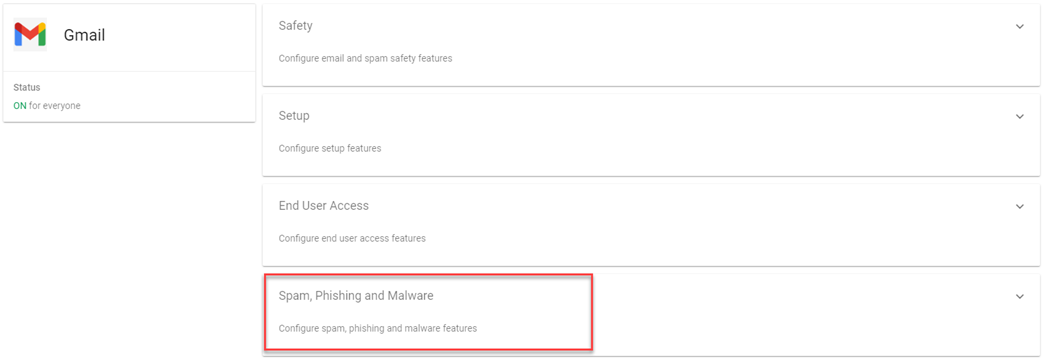
- Scroll down and click Spam, Phishing, and Malware.
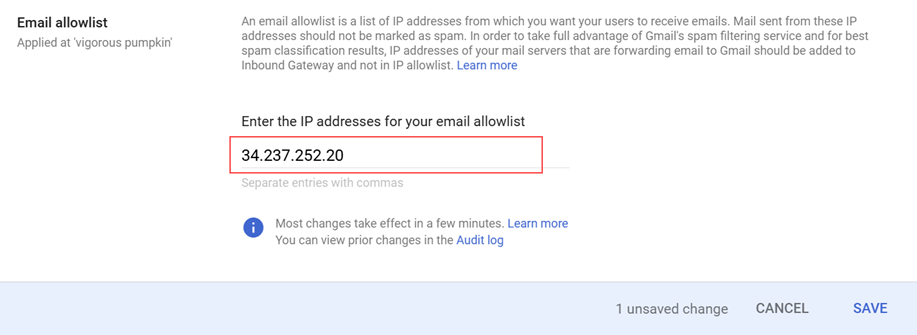
- In the Email Allowlist section, hover in the upper-right corner and click the edit icon.

- Copy the following IP address: 34.237.252.20
IMPORTANT If you plan to deploy INKY now or in the future, you must add the add the IP addresses specified in the following INKY article: Phishing simulations. Separate each entry with a comma.
- Click Save.
- Scroll to the Spam section and click Configure.

- In the Add setting modal, in the required description field, enter a description, for example BullPhish ID.

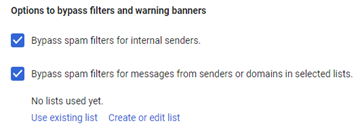
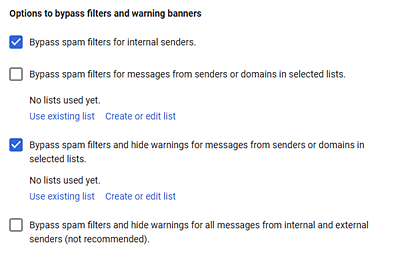
- In the Options to bypass filters and warning banners section, verify the check boxes are selected for the following:
- For the Bypass spam filters for messages from senders or domains in selected lists option, click Create or edit list.
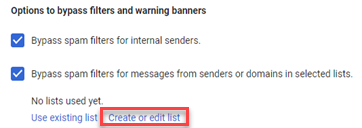
- In the Manage address lists card, click Add Address List.

- In the Name field, enter a name for the list (e.g., BullPhish ID).
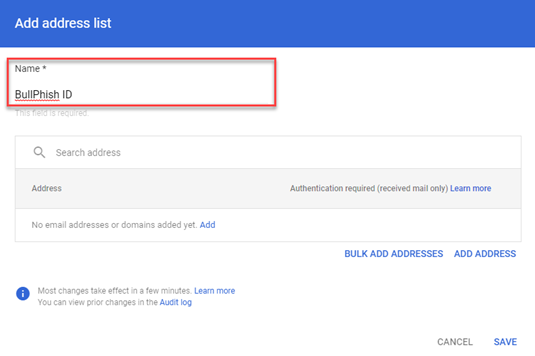
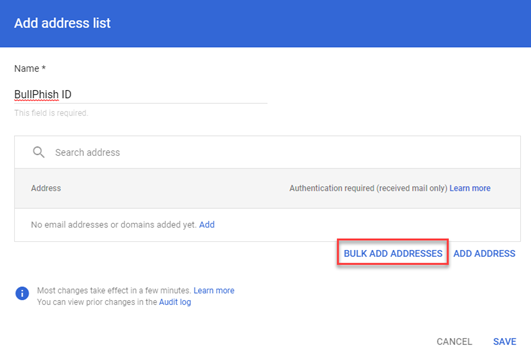
- Click Bulk Add Addresses.
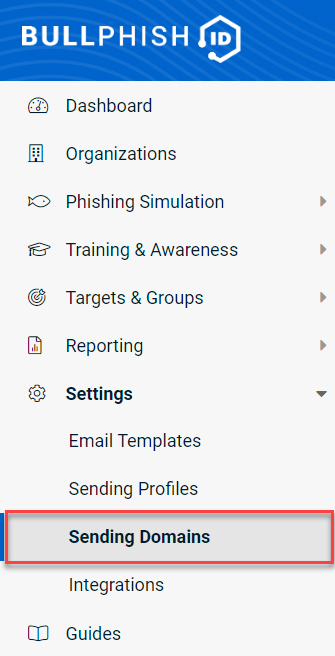
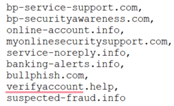
- Download the list of available sending domains that you can use in your training and phishing campaigns.
- Open the Sending_Domains.csv file in a text editor.
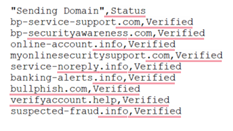
- Edit the file:
- Copy all of the sending domains at once.
- In the Email address or domain name field, past the sending domains. Leave Require sender authentication selected.
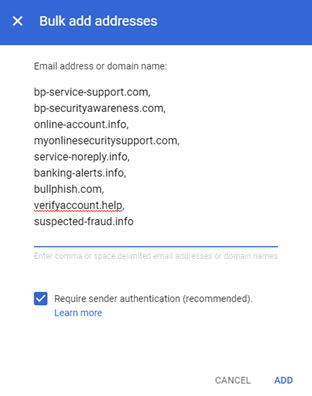
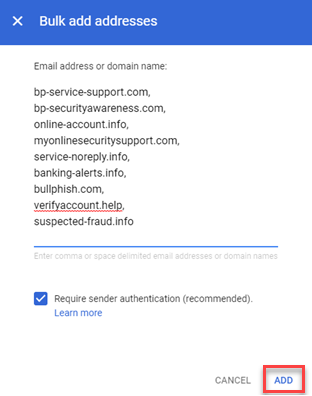
- Click Add.
The domains are listed and enabled in the Add address list modal.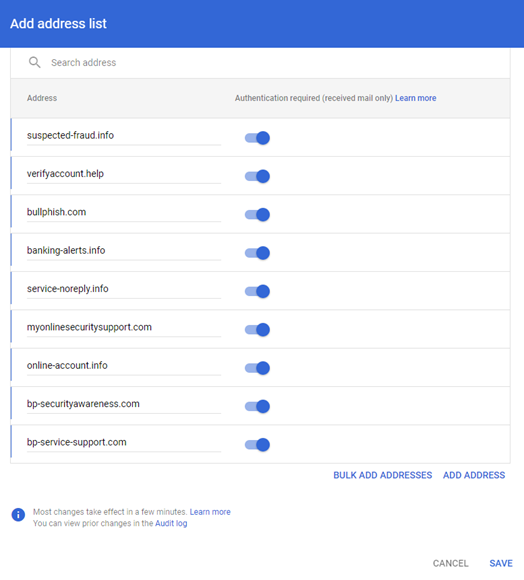
- In the lower-right corner, click Save. The list you created is added to the Manage address lists table.

- In your browser, navigate back to the tab displaying the Add setting modal.
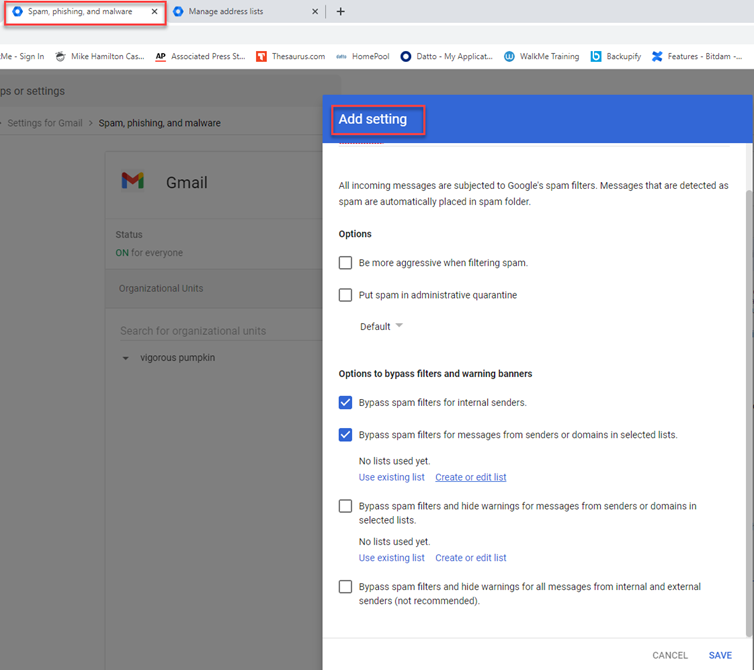
- Under the Bypass spam filters for messages from senders or domains in selected lists option, click Use existing list.
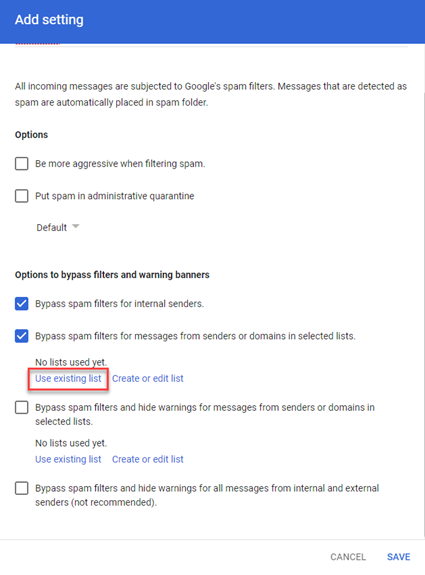
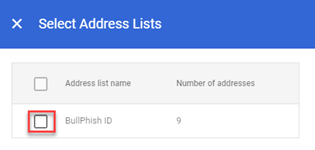
- In the Select Address Lists modal, select the check box for your list.
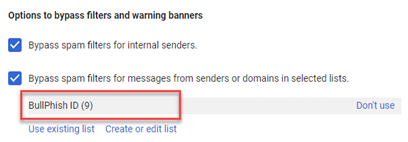
- Click the X to close the modal. The list is added under the Bypass spam filters for messages from senders or domains in selected lists option.
- In the lower-right corner, click Save.
If you plan to deploy INKY now or in the future, you must configure a spam filter specifically for INKY.
- Scroll to the Spam section and click Add Another Rule.

- In the Add setting modal, in the required description field, enter a description, for example INKY.

- In the Options to bypass filters and warning banners section, clear the Bypass spam filters for messages from senders or domains in selected lists check box.
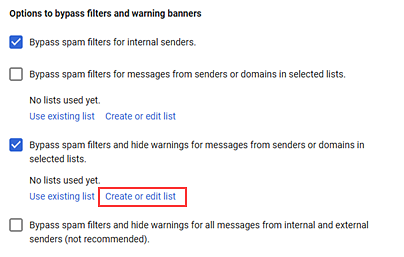
Select the following check boxes: - For the Bypass spam filters and hide warnings for messages from senders or domains in selected lists option, click Create or edit list.
- In the Manage address lists card, click Add Address List.

- In the Name field, enter a name for the list, for example, INKY.
- Click Add Address.
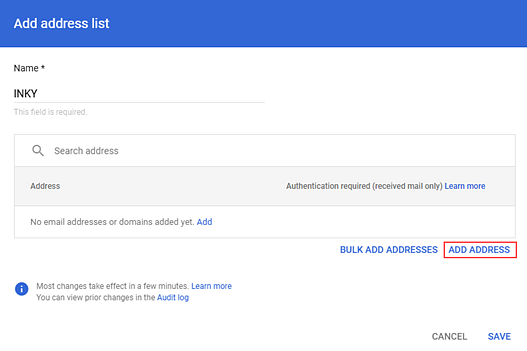
- In the Address field, add the domain specified in the following INKY article: Phishing simulations.
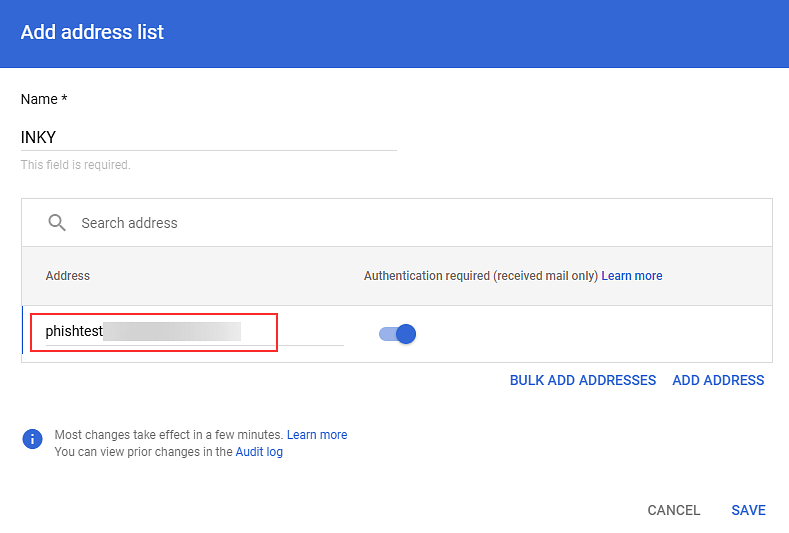
- In the lower-right corner, click Save. The list you created is added to the Manage address lists table.

- In your browser, navigate back to the tab displaying the Add setting modal.
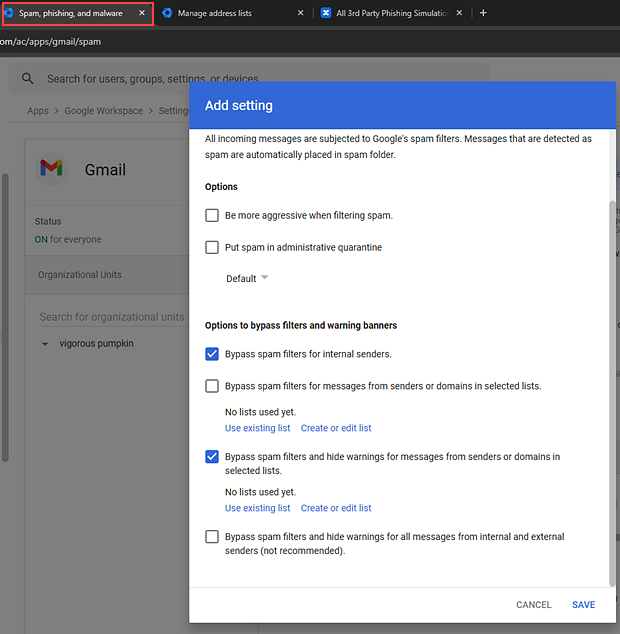
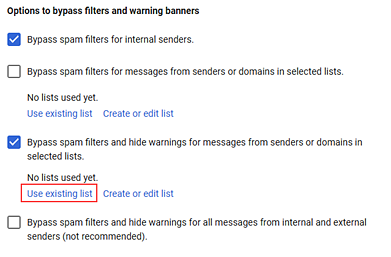
- Under the Bypass spam filters and hide warnings for messages from senders or domains in selected lists option, click Use existing list.
- In the Select Address Lists modal, select the check box for your list.
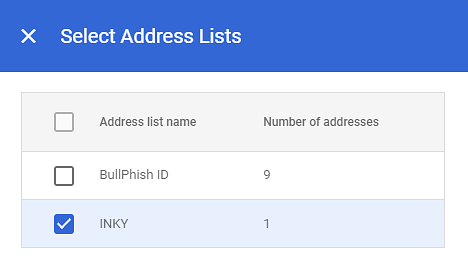
- Click the X to close the modal. The list is added under the Bypass spam filters and hide warnings for messages from senders or domains in selected lists option.
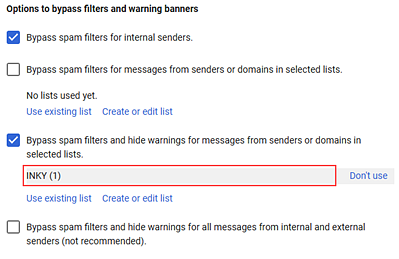
- In the lower-right corner, click Save. The rule is added to the Spam table.

If you use email gateways, follow these steps to improve spam handling.
- In the Inbound gateway section, hover in the right corner and click the edit icon.

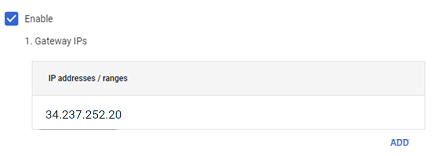
- Select Enable.
- In the Gateway IPs step, click Add.
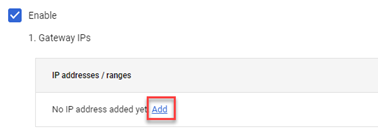
- Copy the IP address 34.237.252.20. The phishing & training campaign emails are sent from this SMTP Server IP address.
- In the Add IP Address/Range modal, paste the IP address.
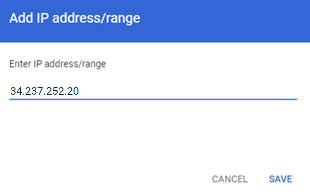
- Click Save. The IP address is listed in the Gateway IPs table.
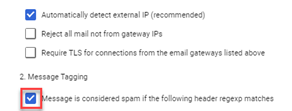
- Clear the Reject all mail not from gateway IPs check box.

IMPORTANT If you don't clear the Reject all mail not from gateway IPs check box, you may experience issues receiving email.
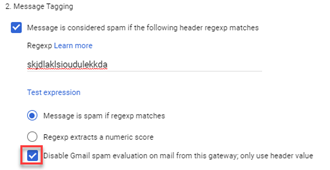
- In the Message Tagging section, select Message is considered spam if the following header regexp matches.
- Copy the following text: skjdlaklsioudulekkda
- In the Regexp field, paste the copied text.

- Select the Disable Gmail Spam Evaluation on mail from this gateway; only use header value check box.
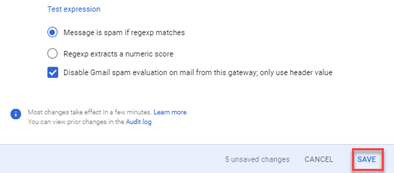
- In the lower-right corner, click Save.
Configuring an image URL proxy safelist
When your users open email messages, Gmail uses Google's secure proxy servers to serve images that might be included in these messages. It protects your users and domain against image-based security vulnerabilities and hides the IP address and User-Agent header. We have to safelist our domains to have proper E-mail Opened status tracking and information about IP address and User-Agent.
- Log in to your Google Admin console.
- In the navigation menu, select Apps > Google Workspace > Gmail.
- Scroll down and click End User Access.

- In the Organizational Units list, select your top-level organization.

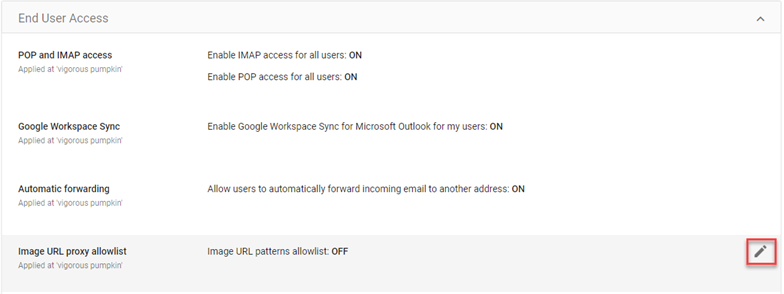
- In the End User Access card, in the Image URL proxy allowlist section, hover in the right corner and click the edit icon.
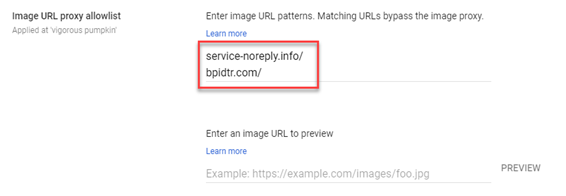
- Copy the following URLs all at once.
service-noreply.info/
bpidtr.com/ - In the Enter image URL patterns field, paste the URLs. Make sure each appears on its own line.
- In the bottom-right corner, click Save. Changes may take up to 24 hours to propagate to all users.
Allowlisting BullPhish ID by email header
In addition to setting BullPhish ID IP Addresses as inbound gateways, end users may still experience the following warning in their inboxes:
- Select Apps > Google Workspace > Gmail.
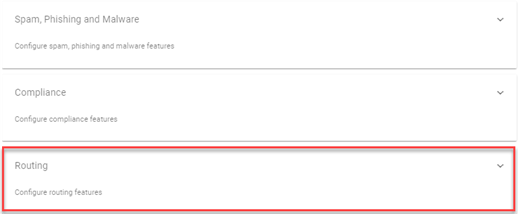
- Scroll down and click Routing.
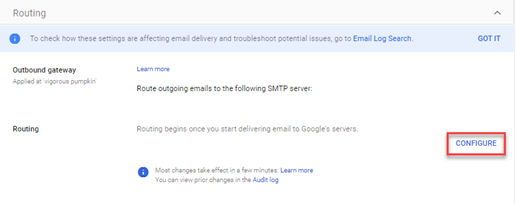
- For the Routing setting, click Configure.
- In the Add setting modal, in the Routing field, enter BullPhish ID.
- In 1. Email messages to affect, select Inbound.
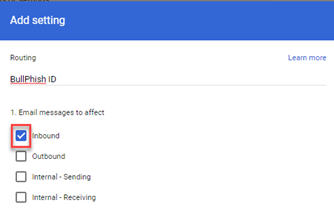
- In 2. For the above types of messages, do the following leave Modify message selected.
- In the Headers section, select Add custom headers.
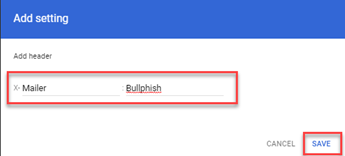
- In the Custom Headers section, click Add.
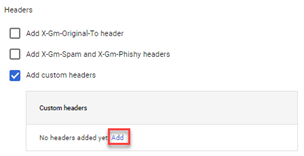
- In the Add Setting modal:
- Under Spam, select Bypass spam filter for this message.
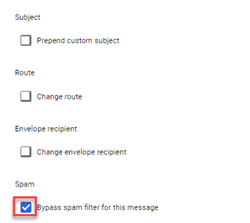
- At the bottom of modal, click Show options.
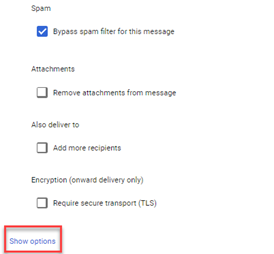
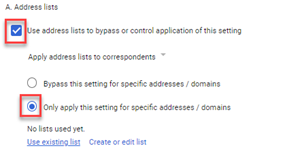
- Under section A. Address lists, select Use address lists to bypass or control the application of this setting and then select the Only apply this setting for specific addresses/domains.
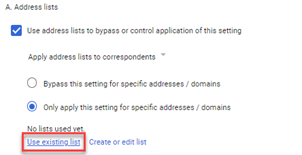
- Click Use existing list.
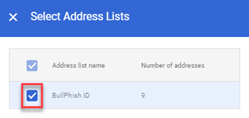
- Select your list.
- Click the X to close the modal.
- In the lower-right corner of the Add setting modal, click Save.
| Revision | Date |
| Guide audited, updated. | 7/7/23 |
| Updated BPID IP address list. | 10/19/23 |
| PR: Configuring email gateways: Edited steps 4 - 7 so required IP address is done first. Step 8 - Added Important note. | 3/22/24 |
| Added INKY info, PR: Configuring an INKY spam filter. | 12/15/25 |
