Microsoft Office 365 safelisting guide
Microsoft 365 Defender Third Party Phishing Simulation Configuration
Prerequisites
- You must be a member of the Security Administrator role group in the Microsoft Security & Compliance Center.
- You must be a member of the Organization Management role group in Microsoft Exchange Online.
- You need a Microsoft 365 Business Standard or E3 subscription to access the Advanced delivery page in Microsoft 365 Defender.
- For more information about Microsoft permissions, see the Microsoft articles Microsoft Defender for Office 365 permissions in the Microsoft Defender portal and Permissions in Exchange Online.
- Download the list of sending domains. To do so, in BullPhish ID, select Settings > Sending Domains. Then click Export Sending Domains.

Introduction
BullPhish ID uses specific domains and IP addresses to send phishing and training campaign emails to your end users. In addition, phishing emails include simulation URLs.
For campaign emails to be successfully delivered to your end users, you are required to configure various Microsoft 365 components to prevent campaign emails from being blocked.
Complete all sections in the following order:
- Configure Microsoft 365 Defender.
- Manually add safe sender domains to Microsoft Outlook. To prevent email content from being blocked, you need to add the BullPhish ID sending domains to the Safe Sender list in Outlook for each of your end users.
NOTE If you want the BullPhish ID sending domains to be added to each user's Safe Senders list in Outlook automatically, refer to article Microsoft Office 365: Automatically adding safe senders to Microsoft Outlook.
- Prevent Microsoft Defender from rewriting BullPhish ID campaign links.
- Prevent an email non-delivery error.
NOTE If you are using third-party services to filter incoming emails before they are delivered to Microsoft Office, see the following guides to properly configure connections between Microsoft and the third-party service:
- If you want to use enhanced filtering for connectors:
Manage mail flow using a third-party cloud service with Exchange Online.
- If you don't want enhanced filtering for connectors:
Use mail flow rules to set the spam confidence level (SCL) in messages in Exchange Online.
How to...
To prevent Microsoft 365 Defender from blocking phishing and training campaign emails, you must allowlist the BullPhish ID domains, IP addresses, and simulation URLs in Microsoft 365 Defender.
At least one sending domain and one sending IP address must be configured. Also, you must allowlist simulation URLs to ensure they are not blocked when included in the campaign emails.
A maximum of 10 entries can be configured for each item. There must be at least one match between a sending domain and a sending IP.
Allowlist BullPhish ID domains, IP addresses, and simulation URLs in Microsoft 365 Defender
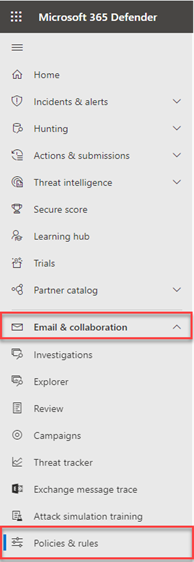
- In the Microsoft 365 Defender navigation menu, select Email & collaboration > Policies & rules.
- On the Policies & rules page, click Threat policies.
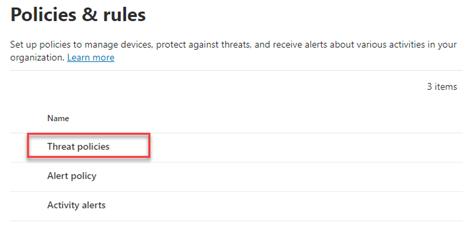
- On the Threat policies page, in the Rules section, click Advanced delivery.

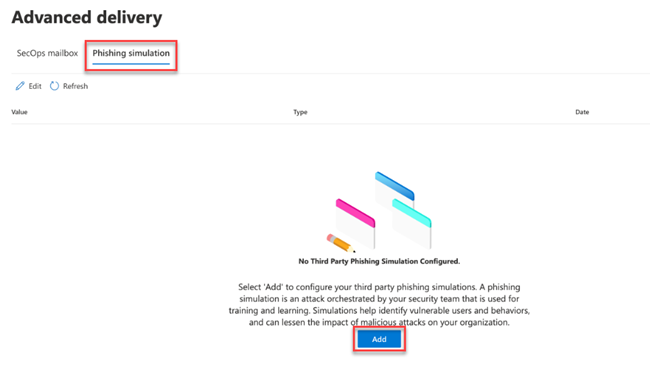
- On the Advanced delivery page, click the Phishing simulation tab and perform one of the following steps:
- In the Add/Edit third-party phishing simulations modal, configure sending Domain entries:
- Open the Sending_Domains.csv file you downloaded as directed in the Prerequisites.
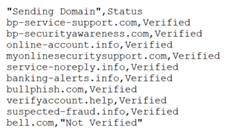
- Copy one of the sending domains you would like to use in your campaigns. For example, bp-service-support.com (do not copy the word Verified).
Important: Your CSV file will include any custom-sending domains you have created, the status of which may currently be Not Verified. For example, in the step above, bell.com is a custom domain that has not been verified. A domain must be verified before it can be used in a phishing simulation. However, you can still configure a custom domain currently in the Not Verified status as long as you have completed the steps to verify the domain. It can take up to 48 hours for a custom domain to be verified. For more information, see the article Configuring a custom domain. - In the Add/Edit third party phishing simulations modal, click Domain.
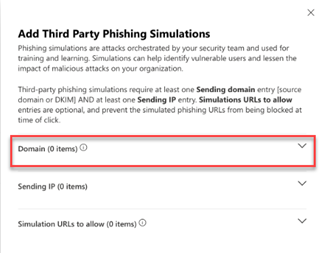
- Past the copied domain and press Enter.

- For each of the sending domains you would like to use in your campaigns: in the CSV file, copy the sending domain, paste it into the Domain field, press Enter.
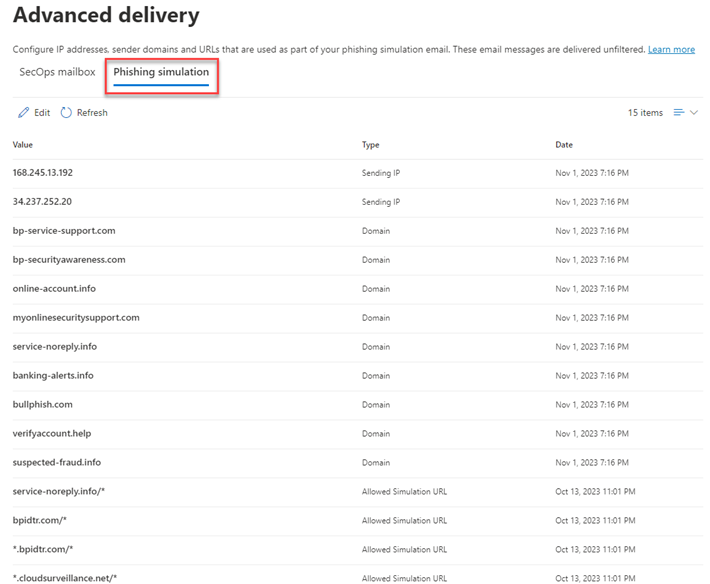
If adding all global domains, the Domain field appears like the following: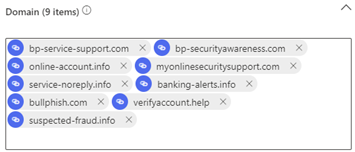
- Open the Sending_Domains.csv file you downloaded as directed in the Prerequisites.
IMPORTANT If you plan to deploy INKY now or in the future to protect your organization from phishing and email threats, you must add the domain specified in the following INKY article to the Domain field: Phishing simulations. This ensures proper handling of phishing simulation emails and prevents false positives.
NOTE Later on, if you add a custom sending domain, download a new Sending_Domains.csv file as directed in the Prerequisites. To add the domain to the allowlist, perform steps 1 through 5.
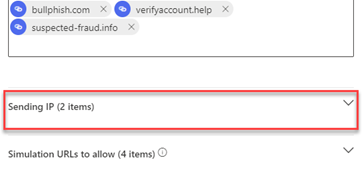
- In the Add/Edit third-party phishing simulations modal, configure Sending IP entries:
IMPORTANT If you plan to deploy INKY now or in the future, you must add the IP addresses specified in the following INKY article to the Sending IP field: Phishing simulations. This ensures proper handling of phishing simulation emails and prevents false positives.
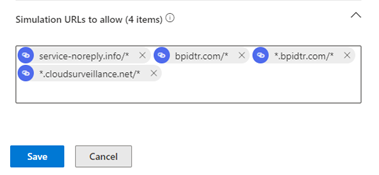
- In the Add/Edit third-party phishing simulations modal, configure sending Simulation URLs to allow entries:
IMPORTANT You must add any future URLs provided by BullPhish ID to the Simulation URLs to allow field.
Emails sent from domains not in your organization's Safe Senders list in Outlook may display a message that some email content, including images, may be blocked.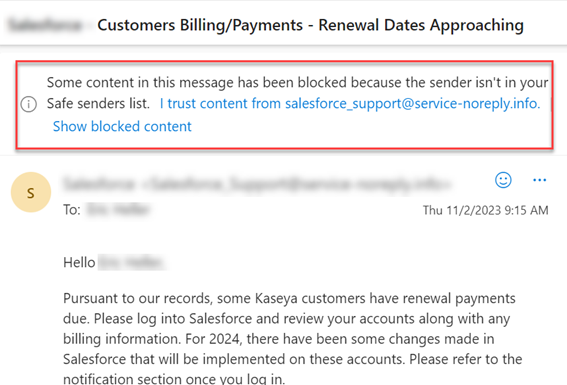
To prevent email content from being blocked, you need to add the BullPhish ID sending domains to the Safe Sender list in Outlook for each of your end users.
IMPORTANT Perform these steps to add BullPhish ID sending domains manually to each user's Safe Senders list in Outlook. You will need to run this script every time you add new users to ensure all users have the BullPhish ID sending domains added to their Safe Senders list.
IMPORTANT If you want the BullPhish ID sending domains to be added to each user's Safe Senders list in Outlook automatically, refer to the article Microsoft Office 365: Automatically adding safe senders to Microsoft Outlook.
If you do perform the steps to automatically add the BullPhish ID sending domains to each user's Safe Senders list in Outlook, you must come back to this article and complete the following sections:
- Preventing Microsoft Defender from rewriting BullPhish ID campaign links
- Preventing an email non-delivery error
- On your taskbar, click the Windows icon.
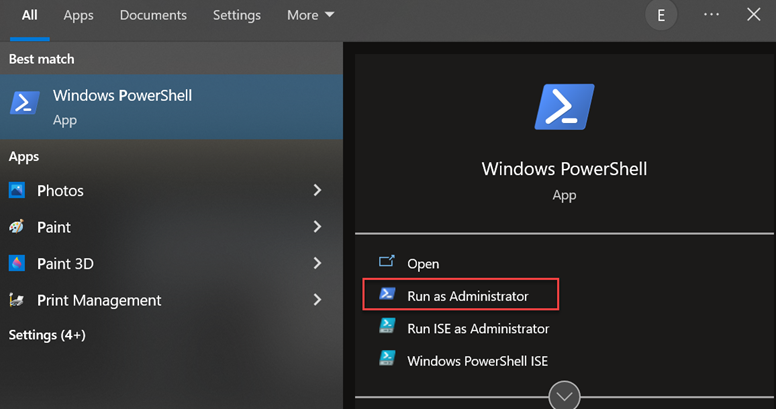
- Start typing Powershell. In the Windows Powershell pane, click Run as Administrator.
- Copy the following command. Paste it into PowerShell and press Enter.
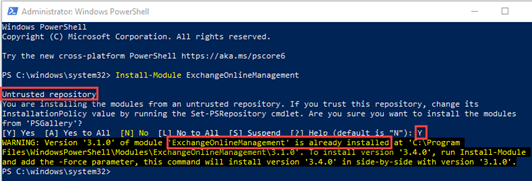
Install-Module ExchangeOnlineManagement
If Untrusted repository is displayed, type Y and press Enter.
NOTE A message is displayed if ExchangeOnlineManagement is already installed.
Execute the following command to import the module:
Import-Module ExchangeOnlineManagement
- Execute the following command to connect to Exchange Online.
Connect-ExchangeOnline -UserPrincipalName UPN
NOTE UPN is your account in user-principal name (UPN) format, for example, xxxxx@contoso.com.
- Copy the following code and paste it into a text file. Replace the example text in the $senders = command line with the sender domains you wish to add to the user's safe senders list. Each domain must be entered in quotes. Each domain must be separated by a comma.
NOTE The list of sending domains is in the Sending_Domains.csv file you downloaded as directed in the Prerequisites.
$users = Get-EXOMailbox -ResultSize unlimited
$senders = "example@example.com" #add safe senders here, in quotes and comma-separated
foreach($user in $users){
$out = 'Adding Trusted Senders to {0}' -f $user.UserPrincipalName
Write-Output $out
Set-MailboxJunkEmailConfiguration $user.UserPrincipalName -TrustedSendersAndDomains @{Add=$senders}
}
Write-Output "Finished!"
Example
$users = Get-EXOMailbox -ResultSize unlimited
$senders = "bp-service-support.com","bp-securityawareness.com","online-account.info",
"myonlinesecuritysupport.com","service-noreply.info","banking-alerts.info","bullphish.com",
"verifyaccount.help","suspected-fraud.info"
foreach($user in $users){
$out = 'Adding Trusted Senders to {0}' -f $user.UserPrincipalName
Write-Output $out
Set-MailboxJunkEmailConfiguration $user.UserPrincipalName -TrustedSendersAndDomains @{Add=$senders}
}
Write-Output "Finished!"
- Copy the script from the text file, paste it into PowerShell and press Enter. The Outlook mailboxes to which the domains are being added are listed.

- To verify the domains have been added to each user's safe senders list, copy the following code and paste, execute in PowerShell.
$users = Get-EXOMailbox -ResultSize unlimited
foreach($user in $users){
$out = ‘Getting Trusted Senders from {0}' -f $user.UserPrincipalName
Write-Output $out
Get-MailboxJunkEmailConfiguration $user.UserPrincipalName
}
Write-Output "Finished!"
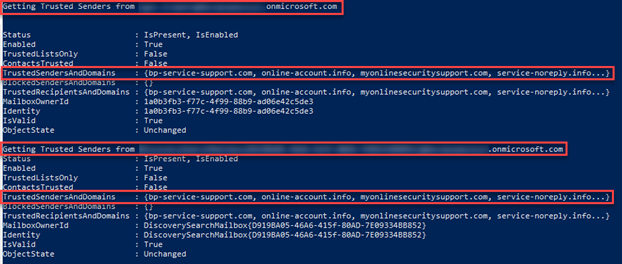
The TrustedSendersAndDomains field lists the added domains for each user's mailbox.
NOTE For more information about connecting to Exchange Online PowerShell, see the article Connect to Exchange Online PowerShell.
IMPORTANT Running the script below will remove domains from each user's Safe Senders list in Outlook. After the domains are removed, any emails sent from these domains may be blocked.
- Copy the following code and paste it into a text file. Replace the example text in the $senders = command line with the sender domains you wish to remove from the user's safe senders list. Each domain must be entered in quotes. Each domain must be separated by a comma.
$users = Get-EXOMailbox -ResultSize unlimited
$senders = "example@example.com" #add safe senders here,
in quotes and comma-separated
foreach($user in $users){
$out = 'Removing Trusted Senders from {0}' -f $user.UserPrincipalName
Write-Output $out
Set-MailboxJunkEmailConfiguration $user.UserPrincipalName -TrustedSendersAndDomains @{Remove=$senders}
}
Write-Output "Finished!"
Example
$users = Get-EXOMailbox -ResultSize unlimited
$senders = "bp-securityawareness.com"
foreach($user in $users){
$out = 'Removing Trusted Senders from {0}' -f $user.UserPrincipalName
Write-Output $out
Set-MailboxJunkEmailConfiguration $user.UserPrincipalName -TrustedSendersAndDomains @{Remove=$senders}
}
Write-Output "Finished!"
- Copy the script from the text file.
- In PowerShell, paste the code and execute.
- To verify the domains have been removed from each user's safe senders list, copy the following code and paste, execute in PowerShell.
$users = Get-EXOMailbox -ResultSize unlimited
foreach($user in $users){
$out = ‘Getting Trusted Senders from {0}' -f $user.UserPrincipalName
Write-Output $out
Get-MailboxJunkEmailConfiguration $user.UserPrincipalName
}
Write-Output "Finished!"
To ensure the BullPhish ID links included in campaign emails are not rewritten, the sending domains must be allowlisted. You need to create a rule in the Exchange admin center that prevents Microsoft from falsely indicating that a campaign link was clicked. Without such a rule, campaign results will not be accurate.
- Log into the Exchange admin center.
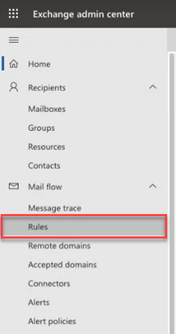
- In the navigation menu, select Mail flow > Rules.
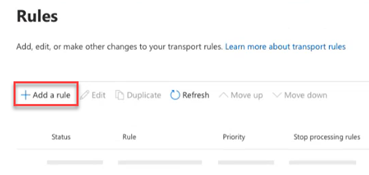
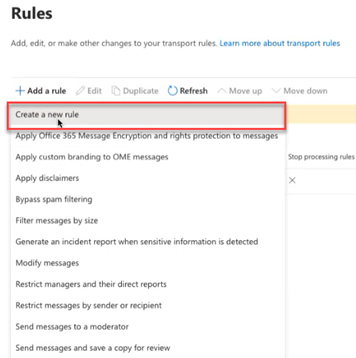
- On the Rules page, click Add a rule.
- Select Create a new rule.
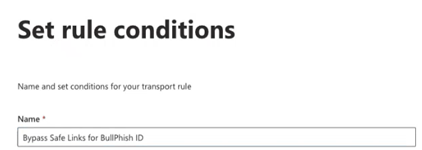
- On the Set rule conditions page, in the Name field, enter a name for the rule. For example, Bypass Safe Links for BullPhish ID.
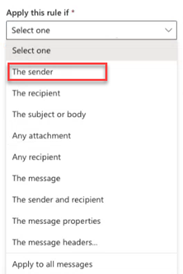
- In the Apply this rule if list, select The sender.
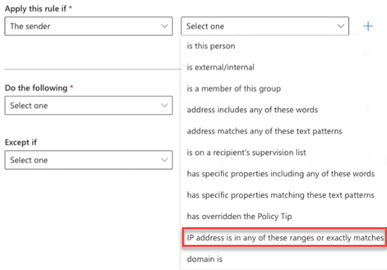
- In the list box to the right, select IP address is in any of these ranges or exactly matches.
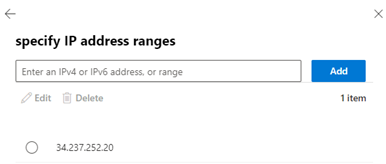
- Copy the IP address listed below and paste it into the specify IP address ranges field. Click Add.
- When finished, in the lower-left corner of the modal, click Save.
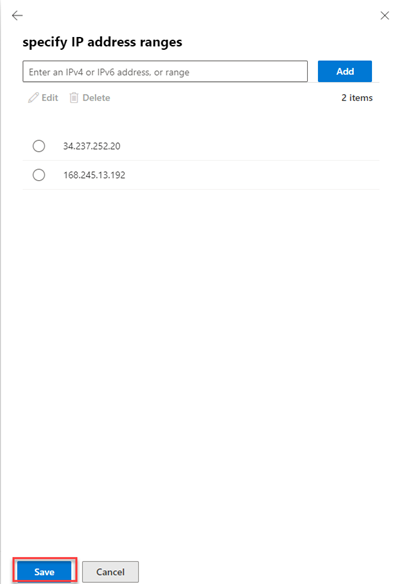
- In the Do the following section:
- In the first list, select Modify the message properties.
- In the list to the right, select set a message header.

- In the sentence Set the message header... click the first Enter text.

- Copy the following text: X-MS-Exchange-Organization-SkipSafeLinksProcessing
. - In the message header field, paste the text.

- In the lower-left corner of the modal, click Save.
- In the sentence Set the message header... after to the value, click Enter text.

- In the message header field, enter 1.

- In the lower-left corner of the modal, click Save.
NOTE Don't make any selections in the Except if section.
- In the lower-left corner of the Set rule conditions page, click Next.
- On the Set rule settings page, leave the settings selected by default and click Next.
- On the Review and finish page, click Finish. It may take a moment for the rule to save.
- When the message Transport rule created successfully is displayed, at the bottom of the page, click Done.
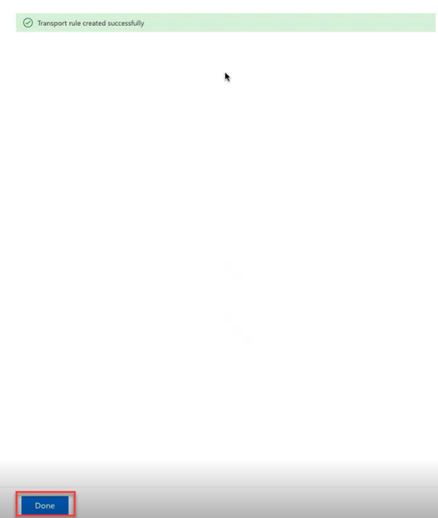
- In the Rules table, for the rule you just added, click Disabled.
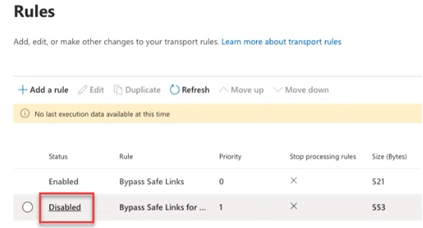
- In the modal, click the toggle to enable the rule.
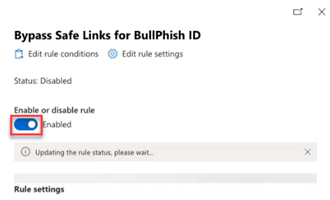
It may take a moment for the rule status to update to Enabled.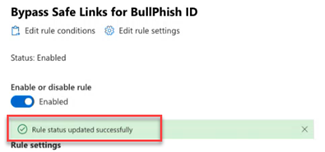
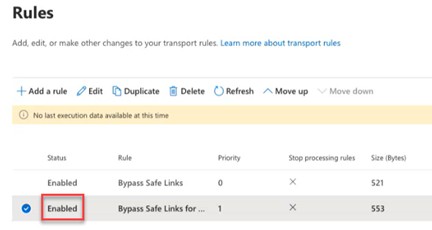
- To close the modal, in the upper-right corner, click the X. In the Rules table, the rule's Status is Enabled.
If your organization sends a large volume of campaign emails that may possibly overwhelm the Microsoft Office 365 email servers, you may receive a non-delivery error. To resolve this issue, you can configure a connector from the BullPhish ID server(s) to Microsoft Office 365.
- Log into the Exchange admin center.
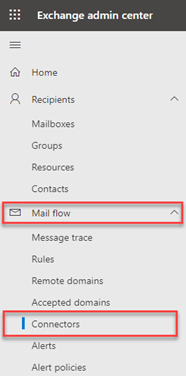
- Select Mail Flow > Connectors.
- Click Add a connector.

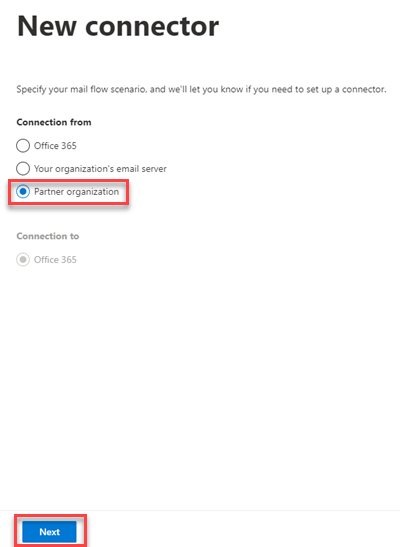
- In the Connection From section, select Partner organization and click Next.
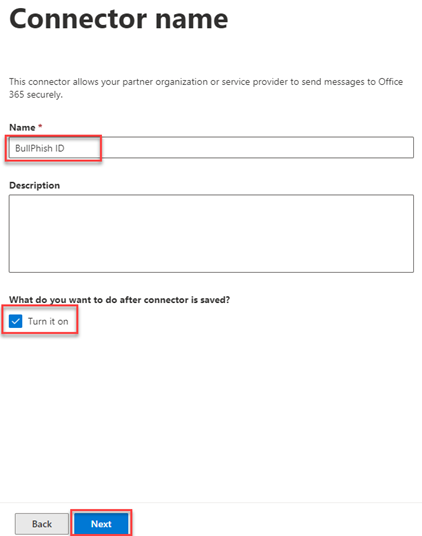
- In the Name field, enter a name for the connector. Description is optional. Leave Turn it on selected. Click Next.
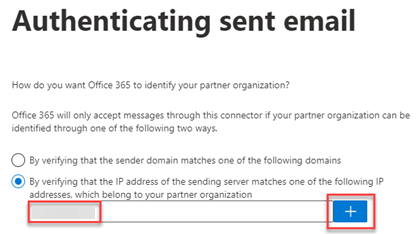
- Select By verifying that the IP address of the sending server matches one of the following IP addresses, which belong to your partner organization.
- If your organization:
- uses a third-party service for email delivery, enter the third-party's IP address into the IP address field. Click the plus button.
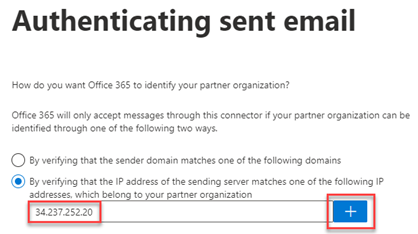
- does not use a third-party service for email delivery, copy the IP address 34.237.252.20 and paste it into the IP address field. Click the plus button.
To learn more, see the Microsoft article Manage mail flow using a third-party cloud service with Exchange Online.
- uses a third-party service for email delivery, enter the third-party's IP address into the IP address field. Click the plus button.
- Click Next.
- On the Security restrictions page, leave Reject email messages if they aren't sent over TLS selected. Click Next.
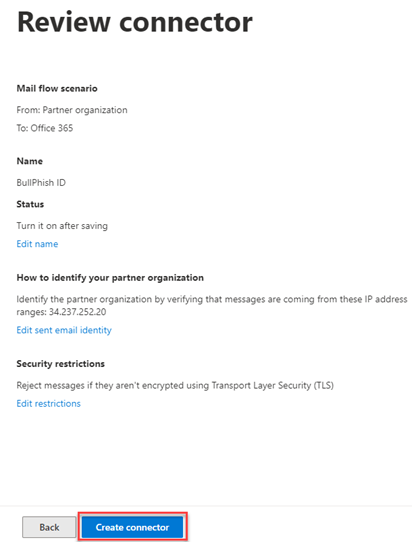
- On the Review connector page, click Create connector.
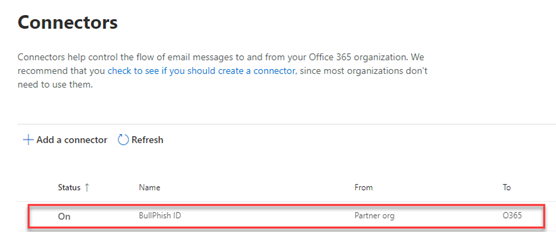
- On the Connector created page, click Done. The connector is listed in the Connectors table.
Revisions
|
Section |
Details |
Date of Change |
|
Section B Step 11-14 Point 2: |
Steps added for the routing setup |
November 16th, 2021 |
|
Sending Domains |
Added a new SMTP server "34.237.252.20" to improve email deliverability |
November 29th, 2021 |
|
Section 3 |
Added a new SMTP server to fix email delivery issues for error code "451 4.7.50" Server is busy in Exchange Online. |
January 27th, 2022 |
|
Section 2, Step 5 |
Exporting Sending Domains links updated |
January 28th, 2022 |
|
Section 2, Simulation URLs to allow |
Old URL "*.secureawareness.net /*" replaced with "*.cloudsurveillance.net |
February 10th, 2022 |
|
Updated Section 2, Step 5 |
Prevent Outlook from blocking content in your emails and displaying a Safe Senders Warning |
April 10th, 2022 |
|
Preventing Microsoft Defender from rewriting BullPhish ID campaign links |
New procedure. |
July 10, 2023 |
|
Fix email delivery issues procedure |
Step 6: Added BullPhish ID IP addresses |
July 19, 2023 |
|
First section and Fix email delivery issues for error code "451 4.7.50 Server is Busy" section. |
Updated BPID IP address list. |
October 19, 2023 |
|
Global |
More definitive sections created and details added for clarity. |
November 30, 2023 |
| Pre-reqs: | Added: You need a Microsoft 365 Business Standard or E3 subscription to access the Advanced delivery page in Microsoft 365 Defender. |
7/1/25 |
| Preventing an email non-delivery error | Step 7 - Added: uses a third-party service for email delivery, enter the third-party's IP address into the IP address field. |
9/26/25 |
|
Allowlist BullPhish ID domains, IP addresses, and simulation URLs in Microsoft 365 Defender |
Added INKY info. |
12/15/25 |

