Integrating with Google Workspace
Directory sync allows you to integrate your BullPhish ID client organization with Google Workspace to import targets and groups. Imported groups and targets are automatically synchronized with Google Workspace to keep group information up to date in BullPhish ID.
This integration allows BullPhish ID to sync targets from Google Workspace, making it easy to manage phishing and training campaigns.
Integrating BullPhish ID with an organization's Google Workspace involves three main steps:
- Configuring a project in Google Cloud.
- Syncing BullPhish ID with Google Workspace.
- Syncing the desired groups in BullPhish ID.
Prerequisites
- Only partner administrators can configure the integration.
- You must have access to both BullPhish ID and Google accounts.
IMPORTANT You must have at least one group in Google Workspace for the integration to be successful.
How to...
Create a project
- In Google Cloud's Identity and Access Management (IAM) Access application, navigate to the Select a project page.
- Log into the Google Cloud Platform with your Super Administrator credentials.
- In the upper-right corner on the Select a project page, click Create Project.

- Enter a Project Name. Organization and Location are prepopulated but you can edit these if necessary.
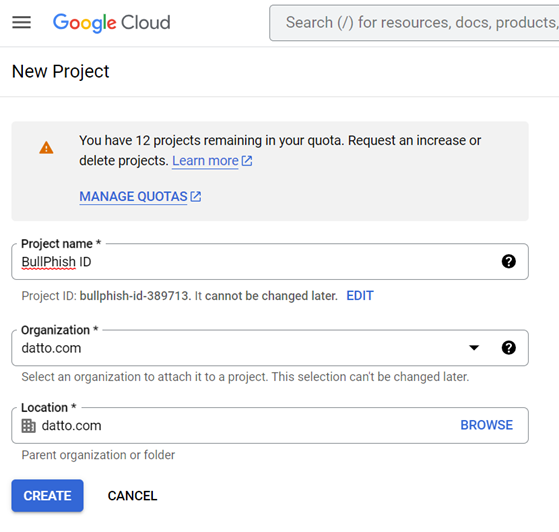
- Click Create.
Enable the Admin SDK API for your project
Enabling the Admin SDK API for your project allows you to view and manage resources such as users and groups.
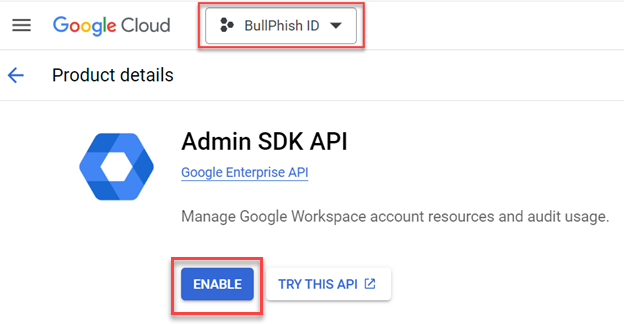
- Go to the following page: https://console.cloud.google.com/apis/library/admin.googleapis.com.
- The project you created is already selected.
- Click Enable.
Create the service account and credentials
A service account and credentials are required for Google Workspace domain-wide delegation of authority.
- Open the Service Accounts page.
- Select the project you just created.
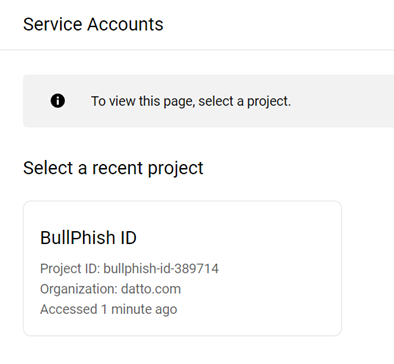
- At the top of the page, click + Create Service Account.

- In the Service Account Name box, enter a name for the service account. The Service Account ID is auto-populated.
- In the Service Account Description box, describe what this service will do.
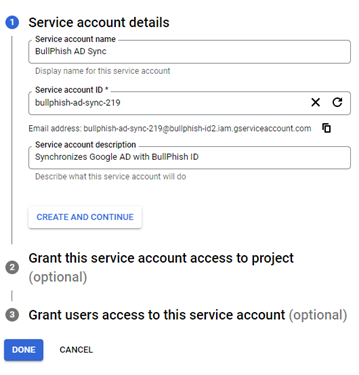
- Click Done.
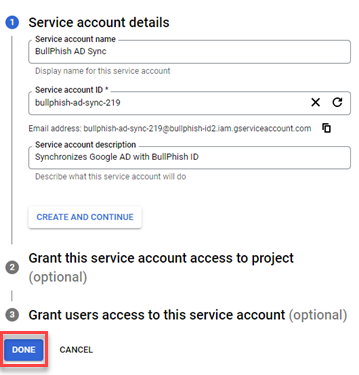
NOTE Clicking Create and Continue takes you through optional steps 2 & 3.
The service account is added to the project's Service accounts table.
- Copy the service account's OAuth 2 Client ID by hovering over the ID number and clicking the Copy to Clipboard icon.

IMPORTANT Make sure you copy the OAuth 2 Client ID, NOT the Key ID. You will need this ID number in the next procedure, Delegate domain-wide authority to your service account.
- In the Actions column, click the three-dot menu and select Manage keys.

- Select Add Key > Create New Key.

- In the Create private key modal, JSON should be selected. Click Create.
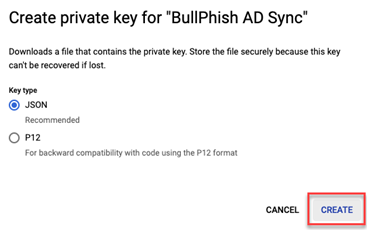
- Your new public/private key pair is generated. Save it on your computer. The JSON file is the only copy of this key. In the confirmation modal, click Close.
NOTE For information about service accounts, see the article Managing service account keys.
Delegate domain-wide authority to your service account
To allow BullPhish ID access to user data on a Google Workspace domain, you need to grant access to the service account that you created. For more information about domain-wide delegation, see Control Google Workspace API access with domain-wide delegation.
- Access the Google Admin console.
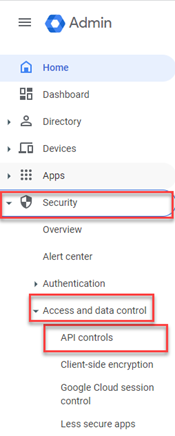
- In the navigation menu, select Security > Access and Data Control > API Controls.
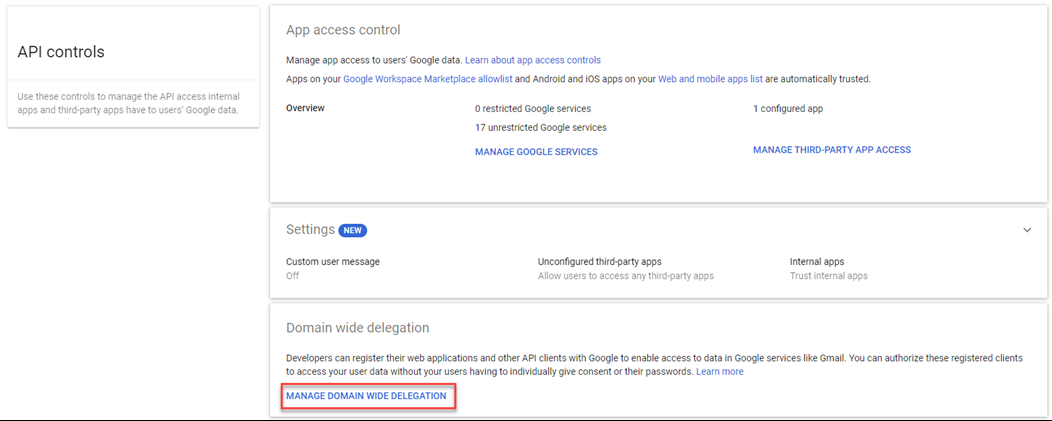
- In the Domain-wide delegation section, click Manage Domain Wide Delegation.
- Click Add new.

- In the Client ID field, paste the OAuth 2 Client ID you copied in step 7 in the previous procedure, Create the service account and credentials.
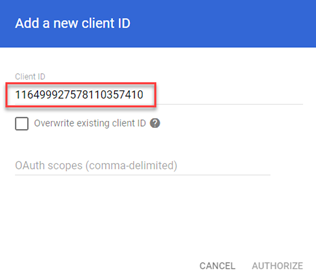
NOTE If you need to copy the OAuth 2 Client ID again, click the Service accounts - IAM & Admin tab in your browser. If this tab is not available, open the Service Accounts page.
- Copy the first scope URL listed below and paste it into the OAuth Scopes field. Be sure to include the comma at the end. Copy and paste the remaining scope URLs (a space after the comma is not required) after the previous one. Note that there is not a comma after the last URL.
https://www.googleapis.com/auth/admin.directory.group.readonly,
https://www.googleapis.com/auth/admin.directory.user.readonly,
https://www.googleapis.com/auth/admin.directory.group.member.readonly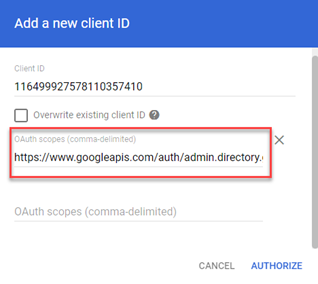
- Click Authorize.
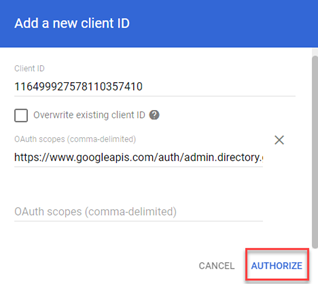
Your service account now has domain-wide access to the Google Admin SDK Directory API for all your domain users. You are ready to instantiate an authorized Admin SDK Directory service object on behalf of your Google Workspace domain's users.
To sync BullPhish ID with Google Workspace, you will use account information that was created when you completed the procedures above.
- Log into the BullPhish ID portal.
- In the navigation menu, select Targets & Groups > Directories.
- Click the + Add Directory Sync button.
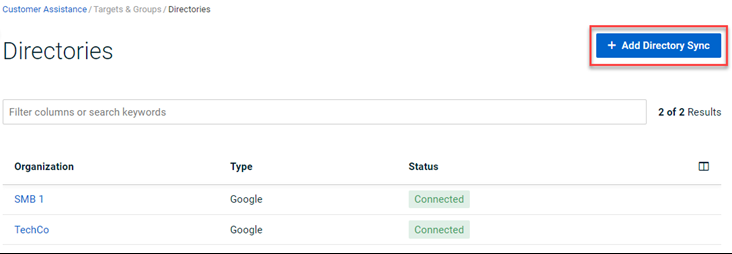
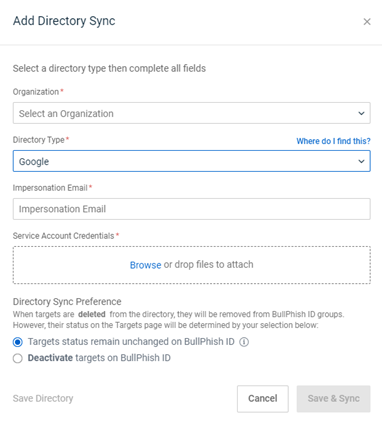
- In the Add Directory Sync modal, complete the following:
- Organization: Select the applicable organization
- Directory Type: Select Google.
- Impersonation Email: Only users with access to the Admin APIs can access the Admin SDK Directory API. Therefore, your service account needs to impersonate one of those users to access the Admin SDK Directory API. This means that in the Impersonation Email box, you need to enter the user's email address who has access to Admin SDK Directory API. It could be the email address of your account.
- Service Account Credentials: Upload the JSON file you saved in step 11 in the procedure Create the service account and credentials.
- Directory Sync Preference: Select an option for handling targets in BullPhish ID after they have been deleted from Google.
- Do one of the following:
- Click Save.
- Click Save & Sync. The sync is executed and the Edit Directory page for the organization is displayed.
Now you are ready to import and sync groups or targets from Google Workspace. Refer to the article, Syncing groups and targets.
NOTE The error below will be displayed if there is an issue completing the integration. If you don't have at least one group in Google Workspace when attempting the integration, the same error will be displayed.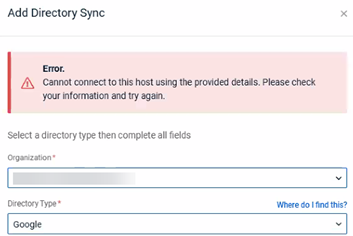
| Revision | Date posted |
| Reviewed and edited. | 7/24/23 |
|
Syncing BullPhish ID with Google Workspace - Step 4: Updated Directory Sync Pref screenshot. |
12/4/23 |
| Added prereq: You must have at least one group in Google Workspace for the integration to be successful. Added same to PR Sync BullPhish ID with Google Workspace, step 5 Note. |
1/17/25 |
| Delegate domain-wide authority to your service account: Formatted scope URLs for easier copying. |
3/12/25 |
|
Delegate domain-wide authority to your service account: Revised OAuth 2 Client ID note. |
4/7/25 |


