Integrating with Microsoft Entra ID
Directory sync allows you to integrate your BullPhish ID client organization with Microsoft Entra ID to import targets and groups. Imported groups and targets are automatically synchronized with Microsoft Entra ID to keep group information up to date in BullPhish ID.
This integration allows BullPhish ID to sync targets from Microsoft Entra ID, making it easy to manage phishing and training campaigns.
BullPhish ID supports dynamic and nested groups in Microsoft Entra ID.
Integrating BullPhish ID with an organization's Microsoft Entra ID involves three main steps:
- Configuring Microsoft Entra ID.
- Syncing BullPhish ID with Microsoft Entra ID.
- Syncing the desired groups in BullPhish ID.
Prerequisites
- Only partner administrators can configure the integration.
- You must have access to both BullPhish ID and Azure accounts.
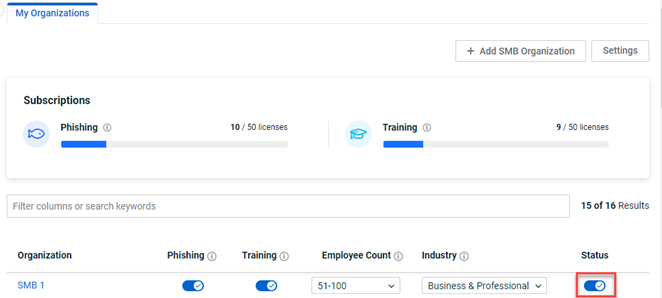
- The BullPhish ID client organization you want to integrate with Microsoft Entra ID must be in active Status.
-
BullPhish ID does not support the use of distribution lists as these lists are managed by Exchange, not Entra ID. As a result, Entra ID only contains a limited representation of these groups. Because Microsoft Graph is not the authoritative source for Distribution List membership, it cannot guarantee complete or accurate member data.
NOTE The Microsoft Entra ID license type is not relevant when synchronizing with BullPhish ID. If API credentials can be created for the account and appropriate permissions assigned, BullPhish ID can be synchronized with Microsoft Entra ID.
How to...
Grant API Access to Microsoft Entra ID
- Log into Azure Portal.
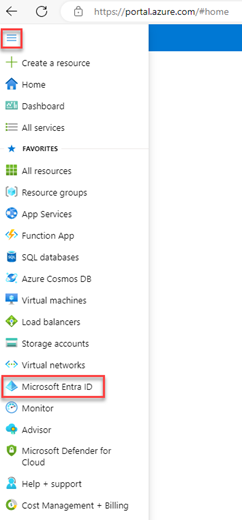
- In the upper-left corner, click the menu icon.

- Select Microsoft Entra ID.
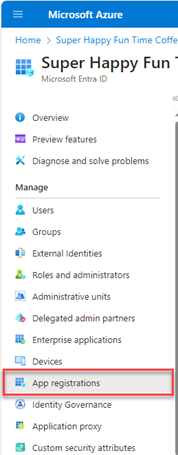
- Select App registrations.
- In the top menu bar, click + New Registration.
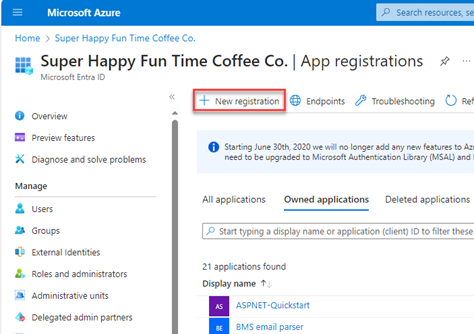
- On Register an application page, enter an application name.
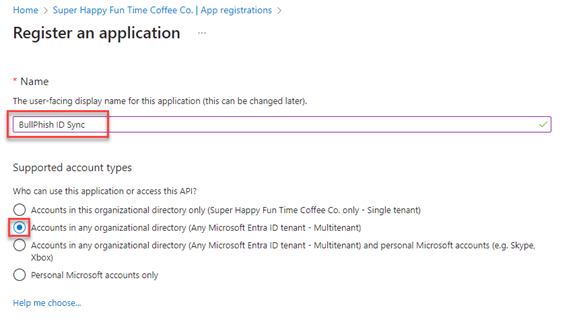
- In the Supported account types section, select an option per the following recommendations:
- If you currently have, plan to have, or are unsure whether you will have more than one tenant, choose the Multitenant option. This option provides greater flexibility as it allows you to connect to multiple tenants using the same credentials.
- If you're confident that you will have only one tenant, you may leave the Single tenant option selected. With this option, the connection will be limited to a single tenant. If you try to connect to another tenant, you will receive an error as this option only supports one tenant and generates credentials exclusively for that tenant.

- Click the Register button. An Application (client) ID, Object ID, and Directory (tenant ID) are displayed. The IDs are needed to authenticate in BullPhish ID.

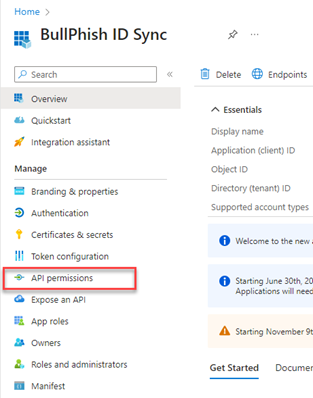
- In the navigation menu, click API permissions.
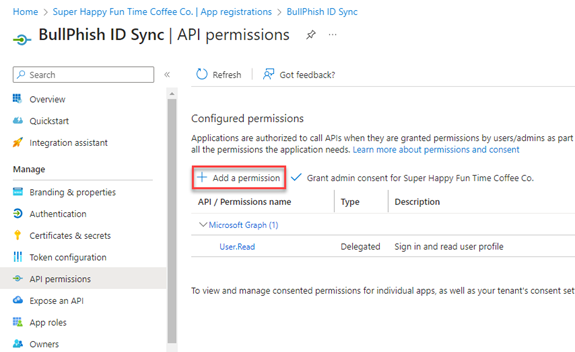
- Click Add a permission.
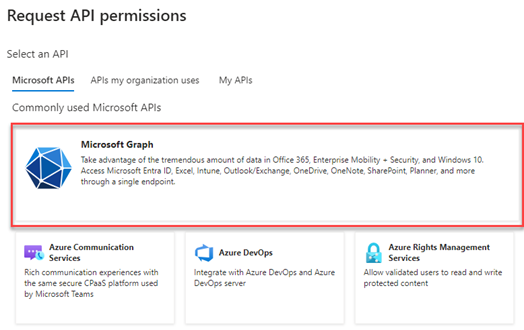
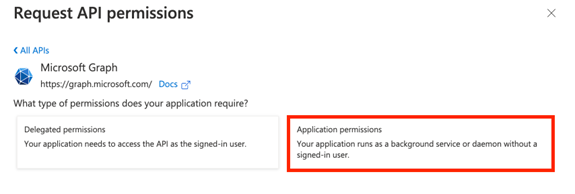
- Click Microsoft Graph.
- Click Application permissions.
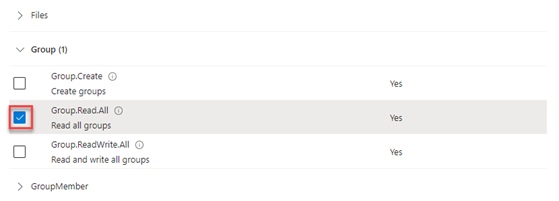
- Scroll down to Group, click the dropdown and select Group.Read.All.
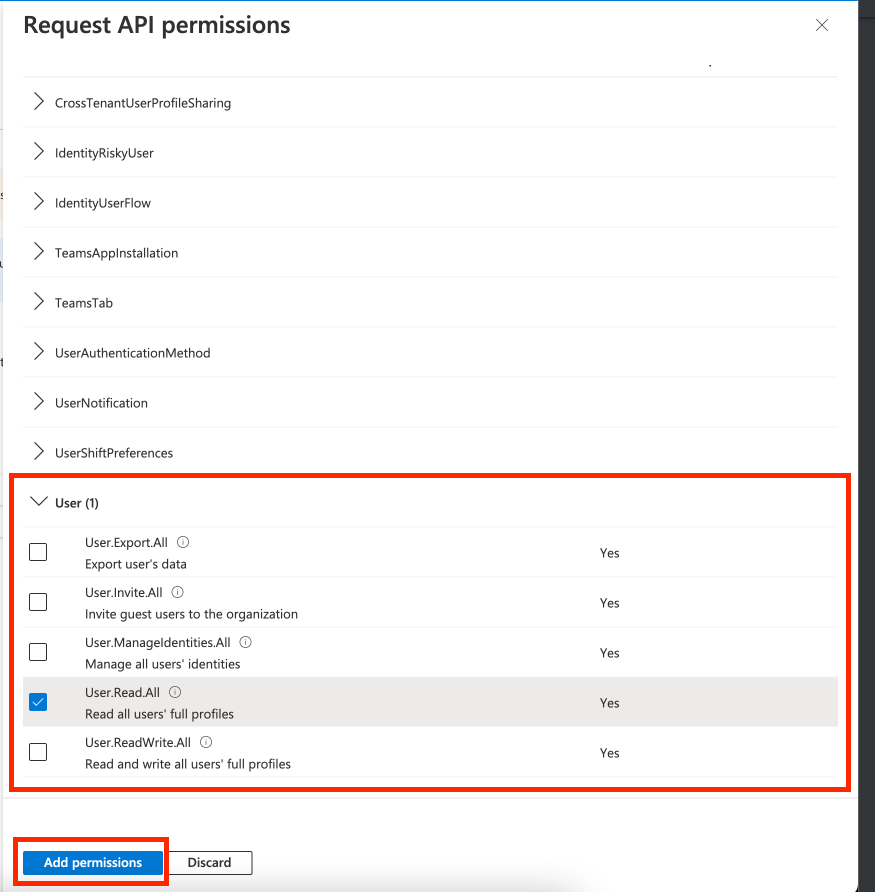
- Scroll down to User, click the dropdown and select User.Read.All. Click Add permissions.
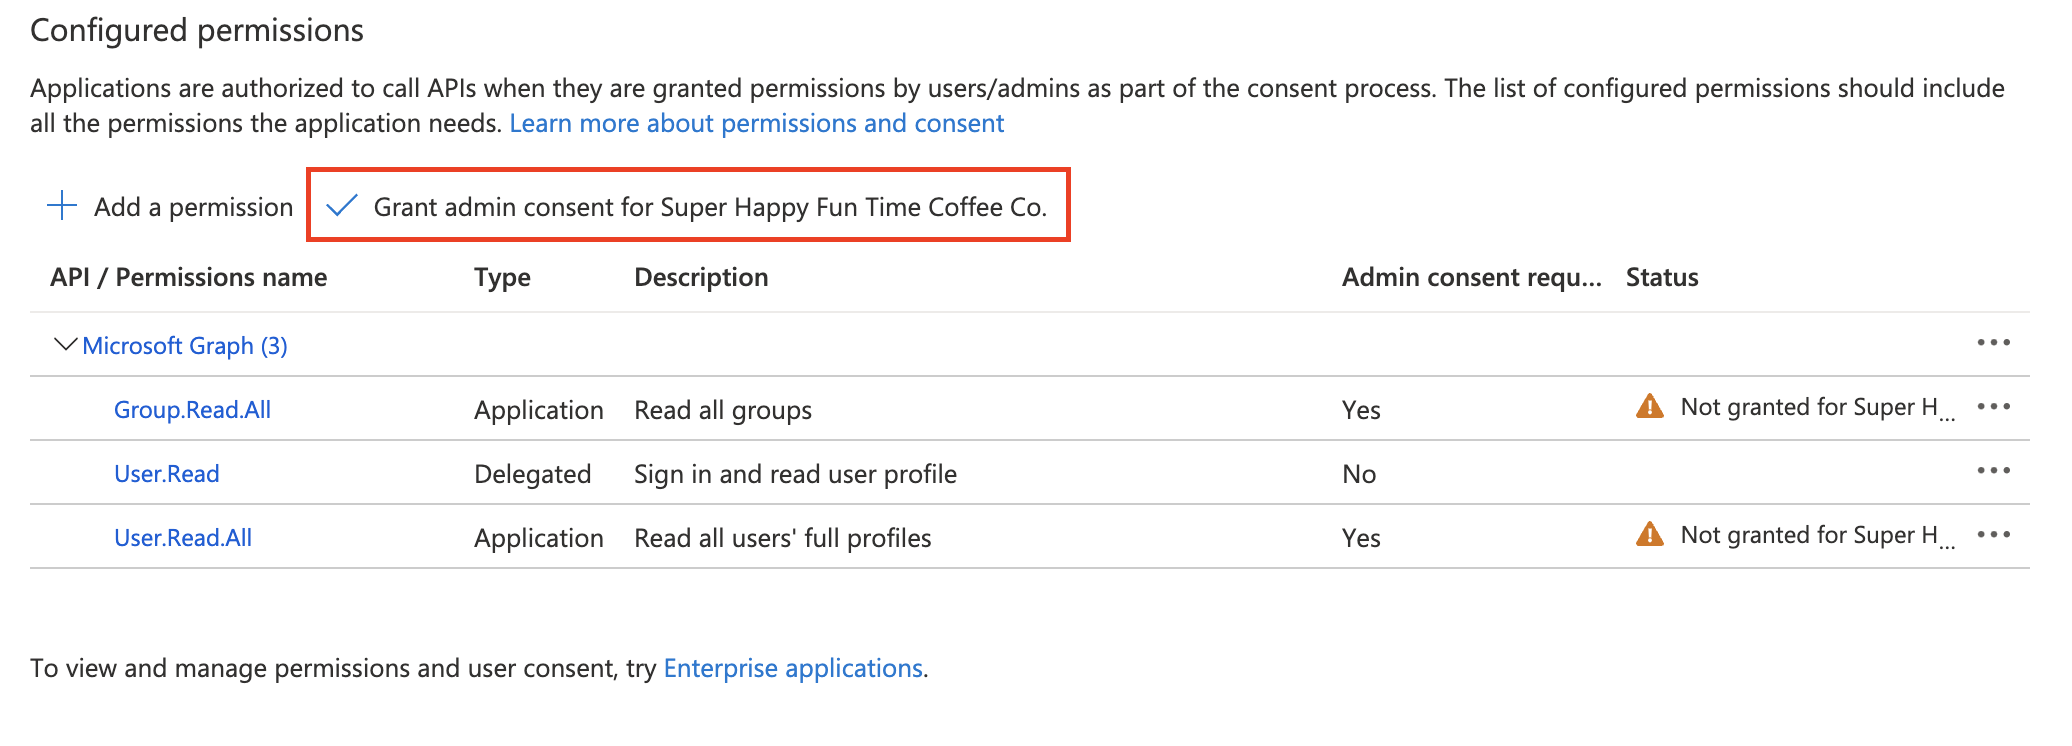
- On the API Permissions page, click Grant admin consent for Default Directory. This action requires admin-level access.
- In the confirmation modal, click Yes.
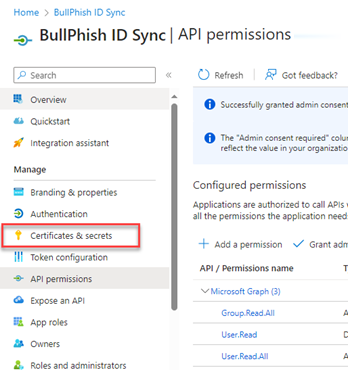
- In the navigation menu, click Certificates & secrets.
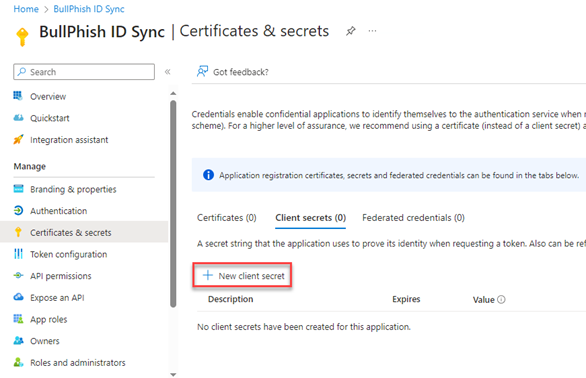
- Click +New client secret. This secret is needed to authenticate with BullPhish ID.
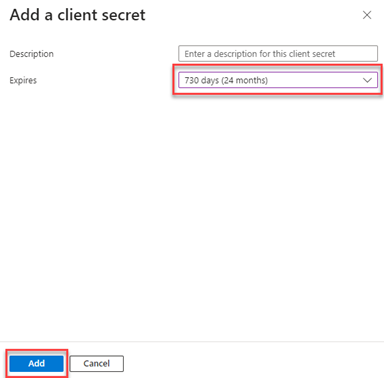
- In the Add a client secret pane, providing a Description is optional. In the Expires list, select when the secret should expire. Click the Add button.
- Copy the Value field from the client secret you just created. You will need this value in the next procedure.

IMPORTANT Make sure you copy the Value field, not the Secret ID number. The client secret is only visible temporarily and should be safely recorded or used, as it will not be retrievable later.
NOTE To delete a client secret, click the delete icon at the end of the row. To create a new client secret, perform steps 17 through 19.
To sync BullPhish ID with Microsoft Entra ID, you will use account information that was created when you completed the procedures above.
- Log into BullPhish ID.
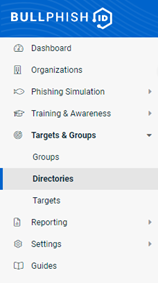
- In the navigation menu, select Targets & Groups > Directories.
- in the upper-right corner, click + Add Directory Sync.
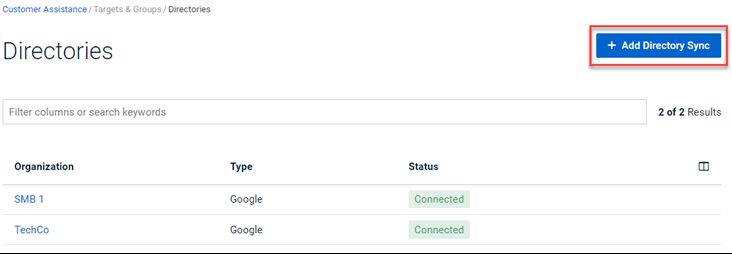
- In the Add Directory Sync modal, complete the following:
- Organization: Select the applicable organization.
- Directory Type: Select Azure.
- Client Secret: Paste the secret value you copied in step 18 from the previous procedure.
Note: If you need to copy the secret value again, in Microsoft Azure, in the navigation pane, select Certificates & secrets, copy the Value field.
- In Microsoft Azure, on the breadcrumb trail, click App registrations.

- On the All applications tab and click the name of your application.
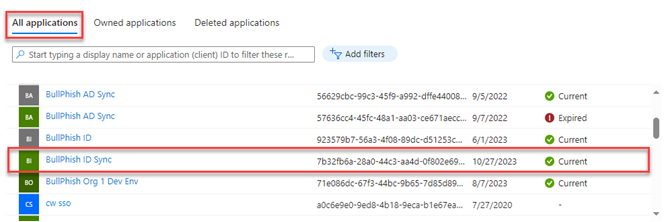
NOTE If you don't see your application listed, refresh the page.
- On the App registration page:
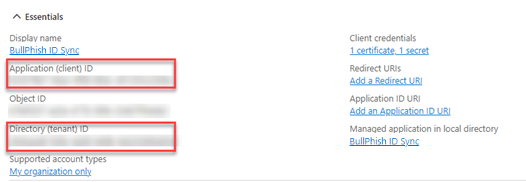
- Copy the Application (client) ID and paste it into the Client ID field in the Add Directory Sync modal.
- Copy the Directory (tenant) ID and paste it into the Tenant ID field in the Add Directory Sync modal.
- Directory Sync Preference: Select an option for handling targets in BullPhish ID after they have been deleted from Azure.
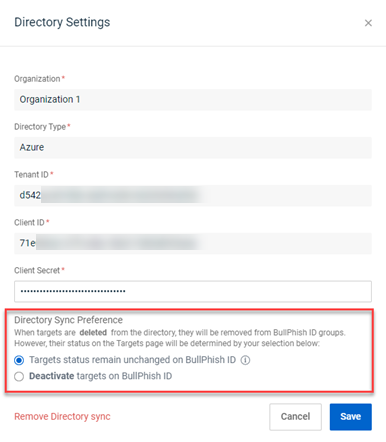
- Do one of the following:
- Click Save.
- Click Save & Sync. The sync is executed and the Edit Directory page for the organization is displayed.
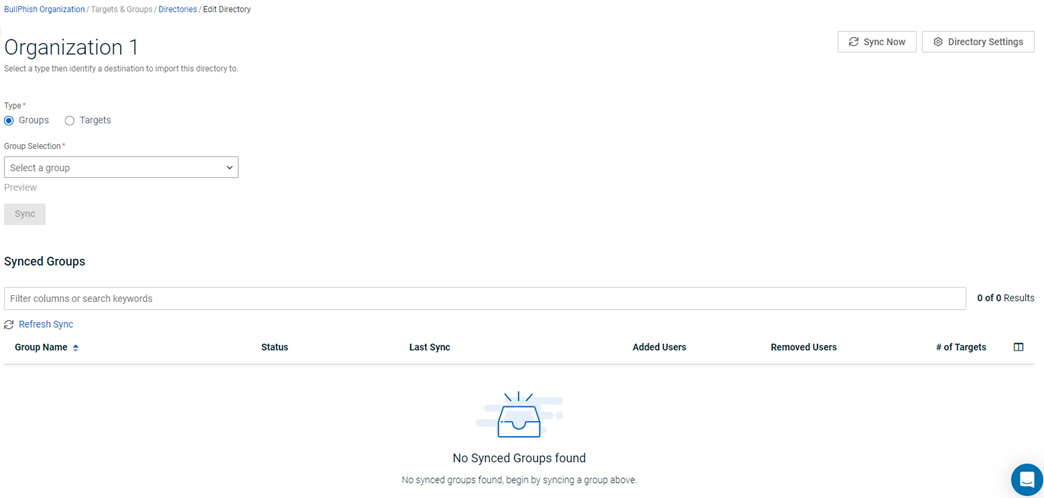
Now you are ready to import and sync groups or targets from Azure Active Directory. Refer to the article, Syncing groups and targets
| Revision | Date posted |
| Reviewed and edited. | 7/24/23 |
| Added prereq: Org must be active. PR: Configuring Azure step 18 added Description field is optional. PR: Synching BP step 6: Added note. Global: Changed Azure to Entra ID. |
12/14/23 |
|
Removed Test from Azure app name (BullPhish ID Sync) in all screenshots. |
1/19/24 |
|
Intro para: Added - BullPhish ID supports dynamic and nested groups in Microsoft Entra ID. |
2/21/24 |
| Added prereq: BullPhish ID does not support the use of distribution lists because they are managed by Exchange, not Entra ID. As a result, Entra ID only contains a limited representation of these groups. |
2/2/26 |


