Creating a group
This article includes the procedures for creating a group and adding targets to a group.
NOTE A video tutorial is available at the end of this article.
Prereqs:
-
A partner administrator, partner agent, and privileged user can create, edit, and delete groups.
-
You have determined the method by which you will add your targets to BullPhish ID. See the article Adding, editing, and deleting targets.
Group
Before you can conduct a phishing or training campaign, you have to add your targets to BullPhish ID and then add those targets to a group.
A group is a collection of targets identified by a group name for which phishing and training campaigns can be assigned. Only one organization can be associated with a group and only targets associated with that organization can be added to the group. An organization can have multiple groups.
You can create a group in BullPhish ID:
- From the Groups page.
- By creating a directory sync. Refer to the article Adding a directory sync.
This article focuses on creating a group from the Groups page.
NOTE The Continuous Target Sync feature, when enabled, controls target behavior in training campaigns. This functionality is automatically enabled for new BullPhish ID accounts created after July 4th, 2023 and cannot be disabled. Therefore, the Continuous Target Sync toggle is hidden for those accounts. For more information, see the article Adding new targets to ongoing training campaigns.
How to...
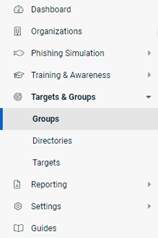
- In the navigation menu, select Targets & Groups > Groups.

- In the upper-right corner, click the + Create Group button.

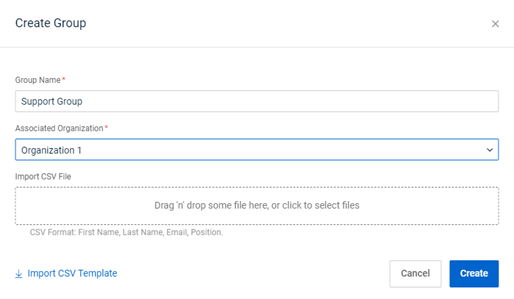
- In the Create Group modal, complete the following fields:
- Group Name: Enter a name for the group.
- Associated Organization: Select the name of the organization for which the group will be created.
- Import CSV file: To automatically add targets to your group, you can import a CSV file. Drag and drop your CSV file or click in the field to select your CSV file. For more information about creating a CSV file, refer to the article How do I use the Import CSV button?

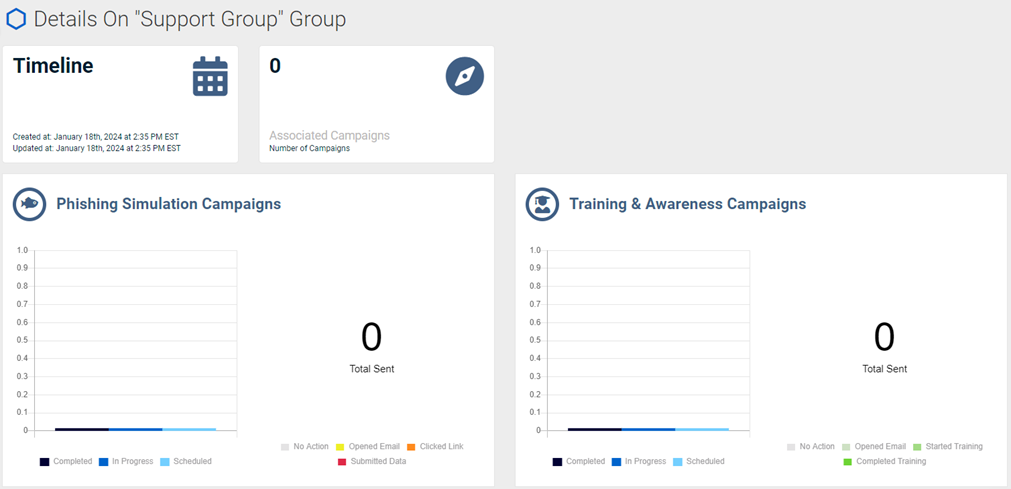
- Click the Create button. The group is created and the group’s Details page is displayed.

To add targets to this group, go to Add targets to a group just created.
NOTE You don’t have to add targets at the same time you create a group. To add targets later, see the procedure Add targets to an existing group.
- On the group’s Details page, scroll to the Targets in Group section.

- Click the Add Targets to Groups button.

- All targets associated with the organization for which the group was created are listed in the Assign Targets...table. For each target you want to add to the group, in the Actions column, click the Add icon.

- Each target you select is added to the Selected Targets table.

If you decide you don’t want to add a selected target to the group, do one of the following: - To add the targets to the group, click the Add Selected Targets button.

A confirmation message is displayed and the targets are listed in the Targets in Group table.
NOTE For groups created via directory sync, refer to the applicable directory sync article.
- In the navigation menu, select Targets & Groups > Groups.

- On the Groups page, click the name of the desired group.

- In the Targets in Group table, click the Add Targets to Groups button.

- For each target you want to add to the group, in the Actions column, click the Add icon.

- Each target you select is added to the Selected Targets table.

If you decide you don’t want to add a selected target to the group, do one of the following: - To add the targets to the group, click Add Selected Targets.

A confirmation message is displayed and the targets are listed in the Targets in Group table.
NOTE For groups created via directory sync, refer to the applicable directory sync article.
This procedure includes the steps to edit a group name, delete a group, and remove targets from a group.
- In the navigation menu, select Targets & Groups > Groups.

- On the Groups page, click the name of the desired group.

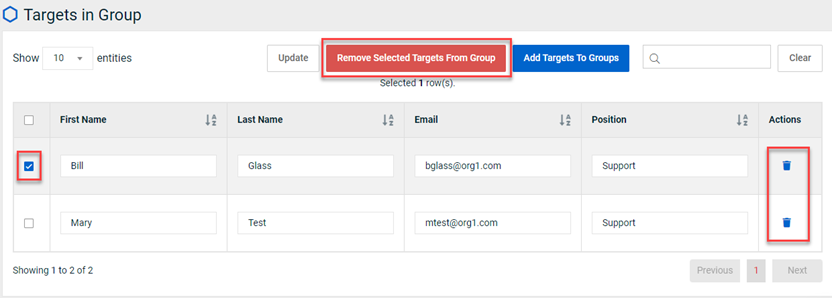
- Do one of the following:
- In the Actions column for the applicable target, click the Delete icon.
- Select the check box of the desired target(s) and click the Remove Selected Targets From Group button.

- In the confirmation modal, click Remove.

Tutorial: Targets & Groups


