Integrating with IT Glue
Introduction
This guide is designed for users who want to enable BullPhish ID integration with IT Glue. This integration ensures simplified organization management. It improves user onboarding by importing SMB organizations and contacts from IT Glue into BullPhish ID. This article walks you through the step-by-step integration process.
To learn how to sync contacts from IT Glue to BullPhish ID, see the article Syncing contacts - IT Glue .
Prerequisites
- You must have access to both BullPhish ID and IT Glue accounts.
- Only partner admins can configure the integration.
- In IT Glue, allowlist the BullPhish ID IP addresses listed in the article IP Access Control: 3rd Party Vendor IPs.
Generating an API Key
All API endpoints require authentication using a private API key. You can generate one or more API keys for your account. To generate a new API key:
- Log into IT Glue.
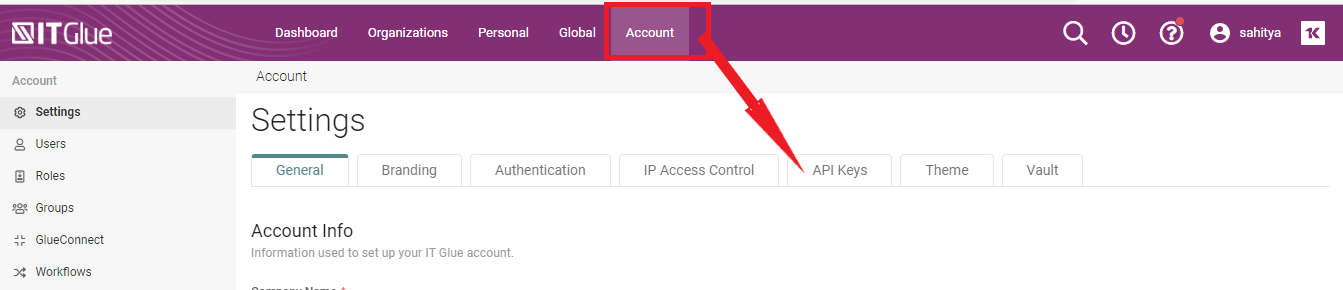
- Users with an administrator role can navigate to Account > Settings.
- Click on API Keys > Custom API Keys.
- Enter a name for the key and click Generate API Key. You will not be able to view a key again after it has been generated.
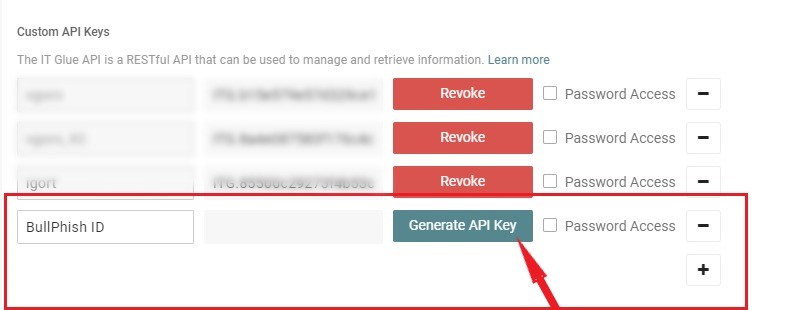
- For security, an optional Password Access setting is provided for each API key. Password values can only be accessed from the Passwords API if this setting is enabled.
- Click the plus "+" sign icon to generate multiple API keys.
NOTE Click the "-" icon to stop the integration.
IMPORTANT Whenever you send a request to the API, you send your key with it so that we know it's you. Anyone with your key can access your data, so it's important to keep it private. You can revoke an old API key and generate a new one at any time from your IT Glue account. Any requests made using your old key will no longer work.
For more information, see How do I use the Revoke button?
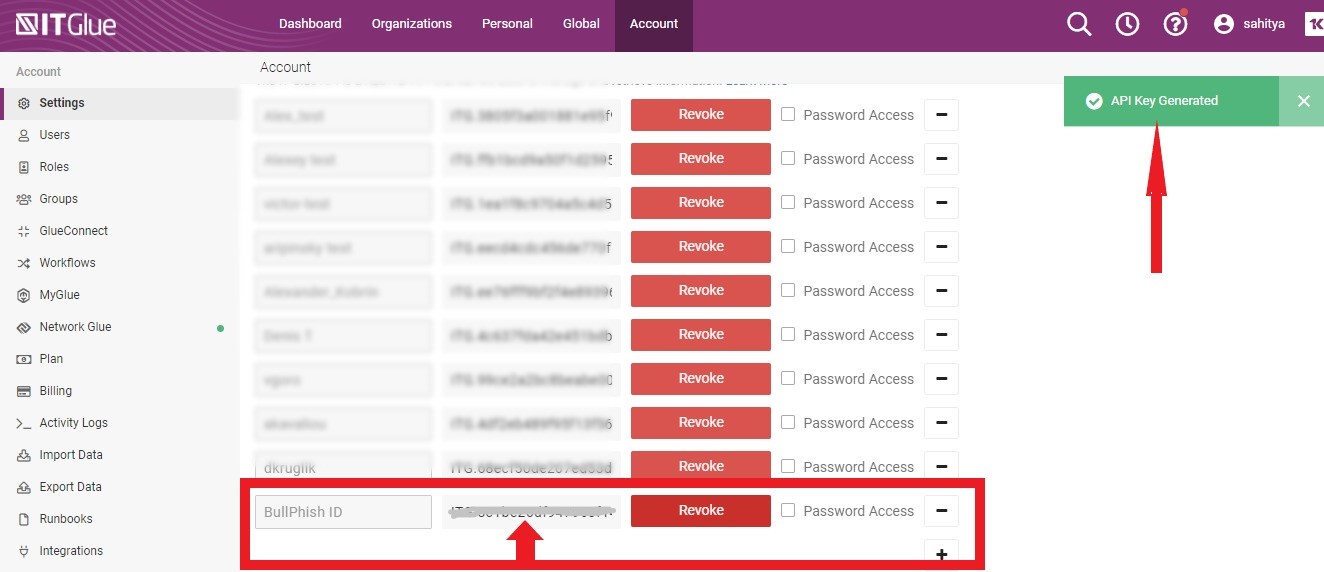
- Once the API key is generated, you can see the message on the top-right corner of the screen. Copy the generated API key from the field.
- Log into your BullPhish ID account.
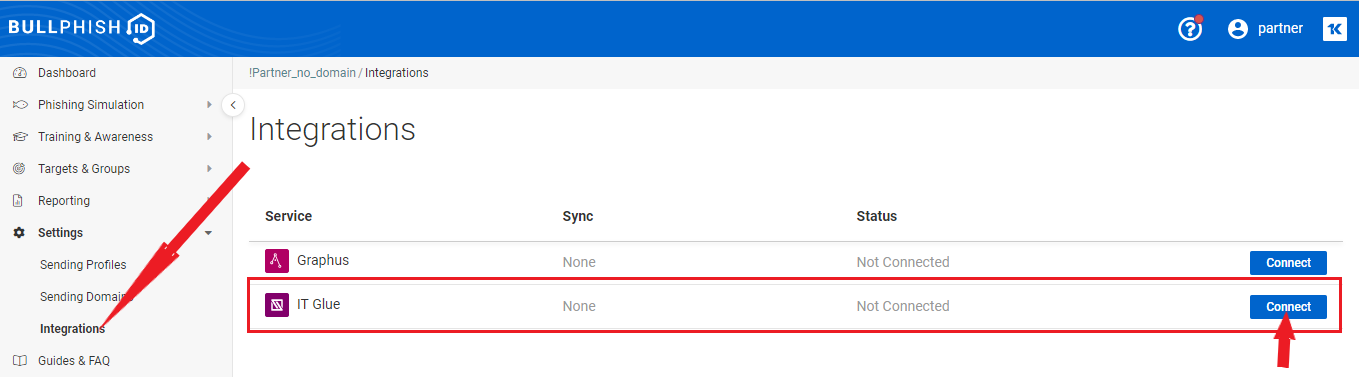
- Navigate to your left side menu of the screen and click Integrations under Settings.
- For IT Glue, click Connect.
- Enter the API key you copied from the IT Glue portal, select the Region, and click Connect.
Note: Region identifies the data center location from where data is being fetched. Available data centers are in the United States, Europe, and Australia.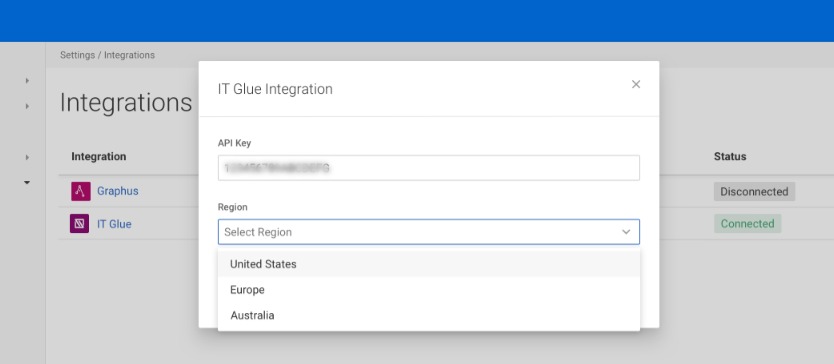
NOTE An error message appears on the screen if you enter an invalid API key.
If the API key is valid, you have successfully enabled integration; a pop-up message appears on the bottom left corner of the screen.
Now you can see integration in Syncing status with the message Syncing in Progress. This might take a while. Refresh the page in a few minutes.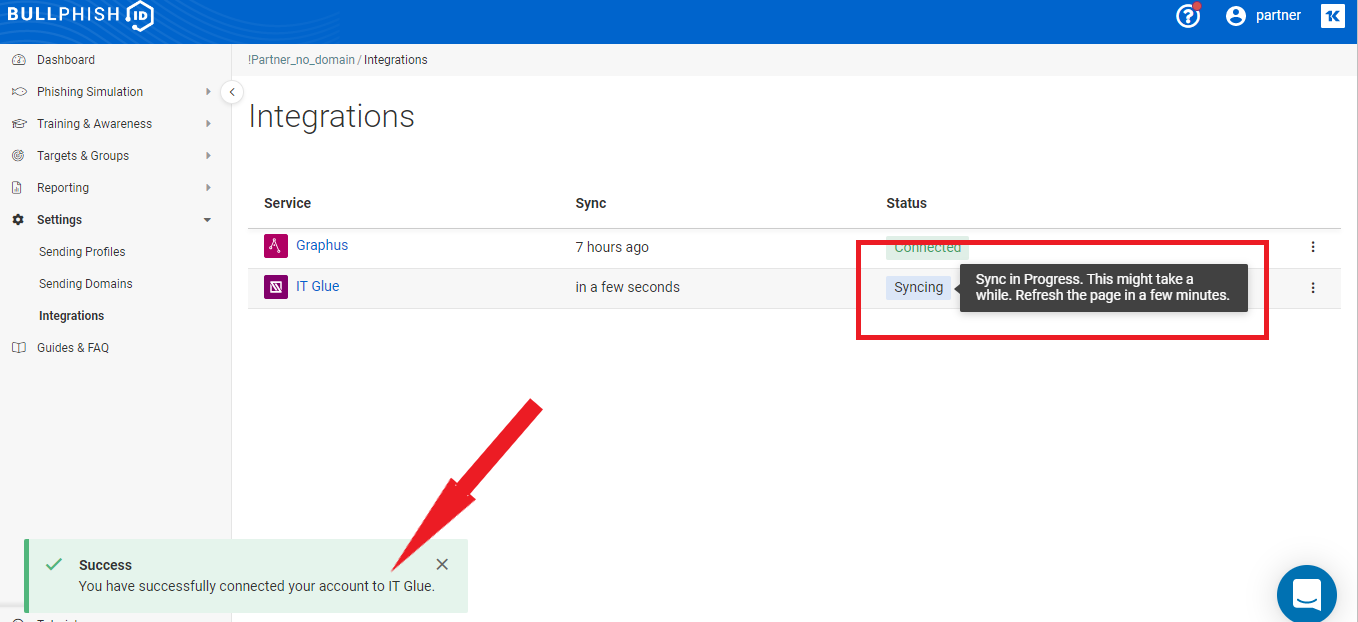
Once you refresh the page, you can see integration in Connected status, meaning the BullPhish ID account is successfully connected to IT Glue.
If you are a new user of BullPhish ID and an existing user of IT Glue, you can import SMB organizations from IT Glue to BullPhish ID using the Add from IT Glue button. Select the section Import SMB organizations from IT Glue manually.
Import SMB organizations from IT Glue automatically
Once synchronization is completed and enabled, you will see a list of SMB organizations linked with IT Glue on the integration page.
When organizations get in sync from IT Glue to BullPhish ID, the link will automatically establish between similar names of SMB organizations.
For example, if BullPhish ID has an SMB organization with the name Test SMB and IT Glue has an SMB organization with the name Test SMB the synchronization link automatically establishes, and organization names are fetched from IT Glue to the BullPhish ID account.
You can see, BullPhish ID SMB organizations from the first column synced with similar names of IT Glue organizations from the second column.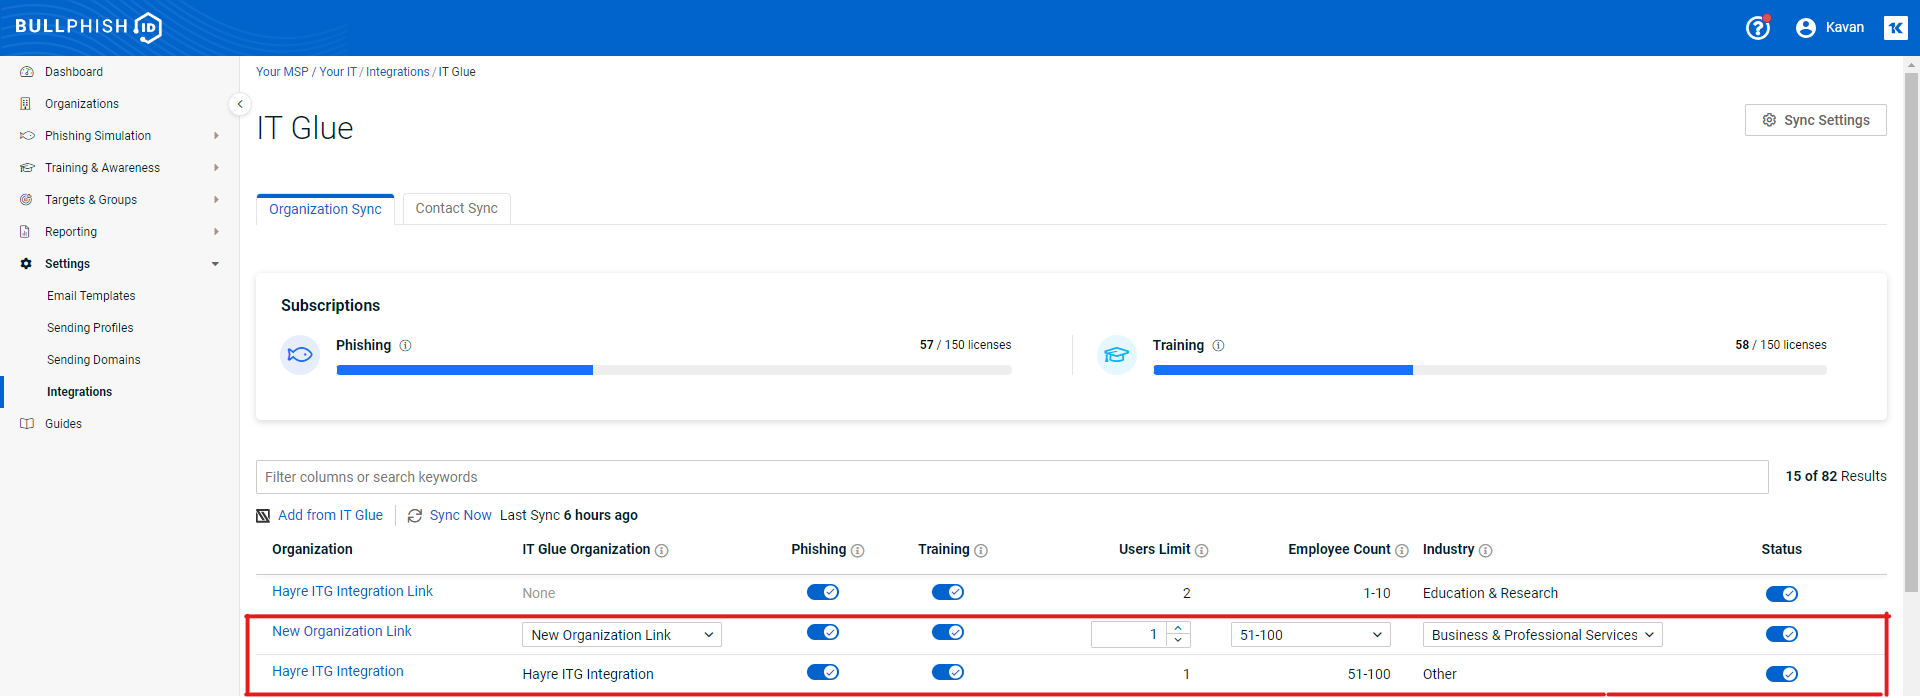
NOTE One IT Glue organization can only be linked with one organization in BullPhish ID.
IMPORTANT Fields required while creating an SMB user are listed on the table. By default, all these fields are set to inactive. You can directly enable/disable these fields from the integration page as a partner admin.
- Phishing/Training: You can provide access to Phishing Simulation and Training & Awareness modules using the toggle.
- Employee Count: Provide the employee count. You can select the range from 1 to 251+. By default, Employee Count is 11-50.
- Industry: Select the type of industry to which the SMB belongs. By default, Other is selected.
NOTE Industry and Employee Count are the mandatory fields.
IT Glue cards
The IT Glue integration page features two additional cards for the MSP account. These cards display license consumption information about Phishing/Training (i.e., license consumed vs. licenses in total).
The license limit is further explained when you hover over the Information icon. You can contact your account manager if you would like to upgrade your current subscription plan.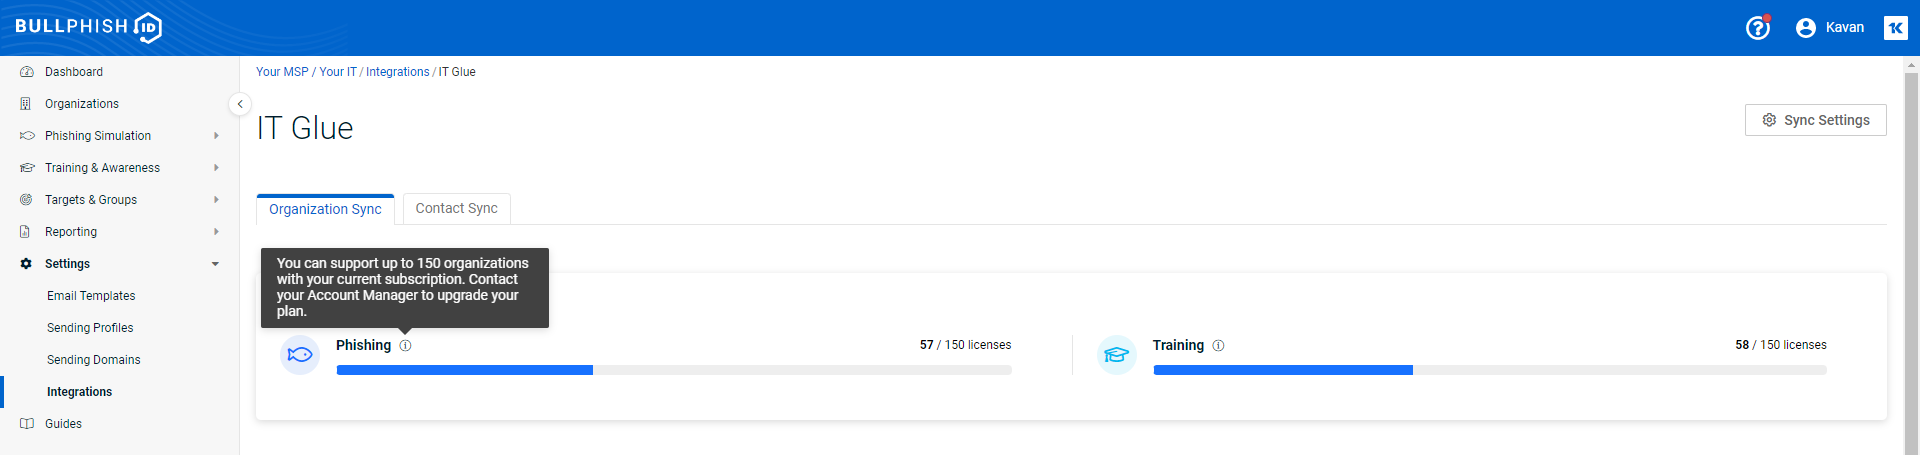
How to...
There are two methods to add organizations from IT Glue. You can either add your IT Glue organizations to BullPhish ID or both the organization and contacts to BullPhish ID. To learn more about adding IT Glue contacts to BullPhish ID, see the article Syncing contacts - IT Glue
Add organizations to BullPhish ID from IT Glue:
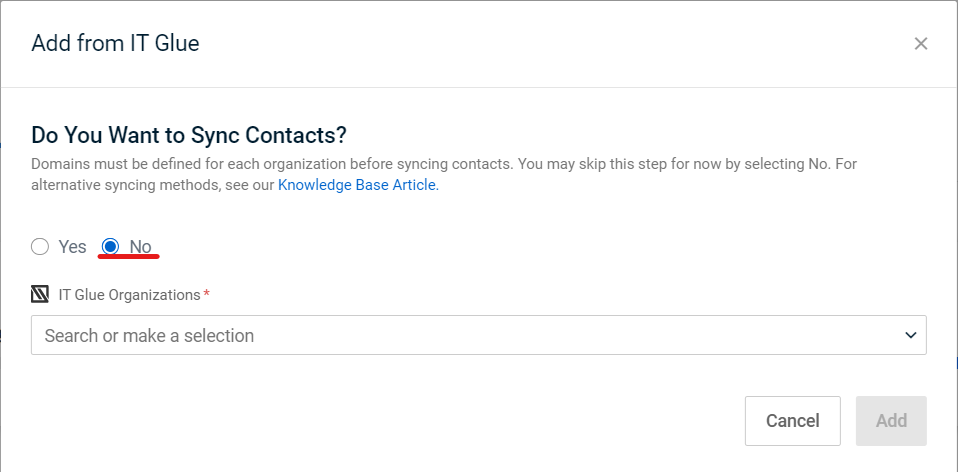
- Click the Add from IT Glue button.

- Select No for Do You Want to Sync Contacts?
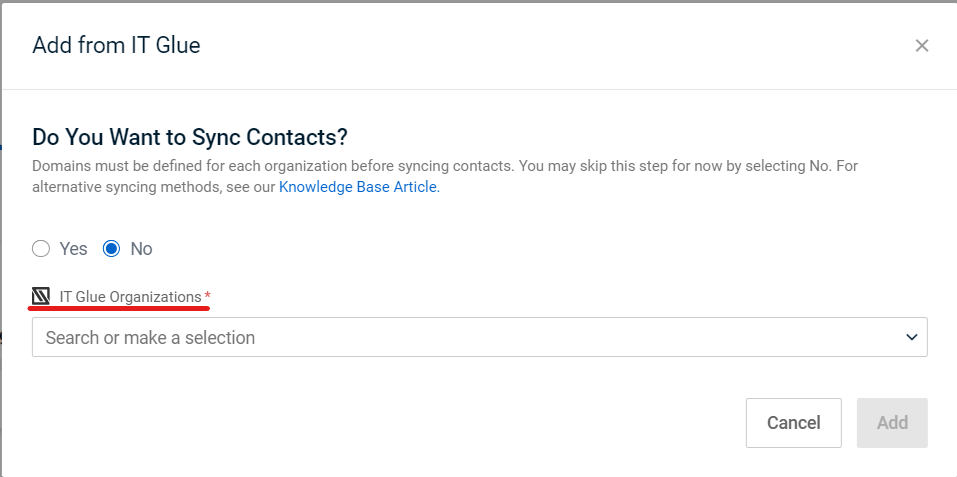
- Click the dropdown to add organizations from IT Glue.
- Select a list of organizations you want to import from IT Glue to BullPhish ID.
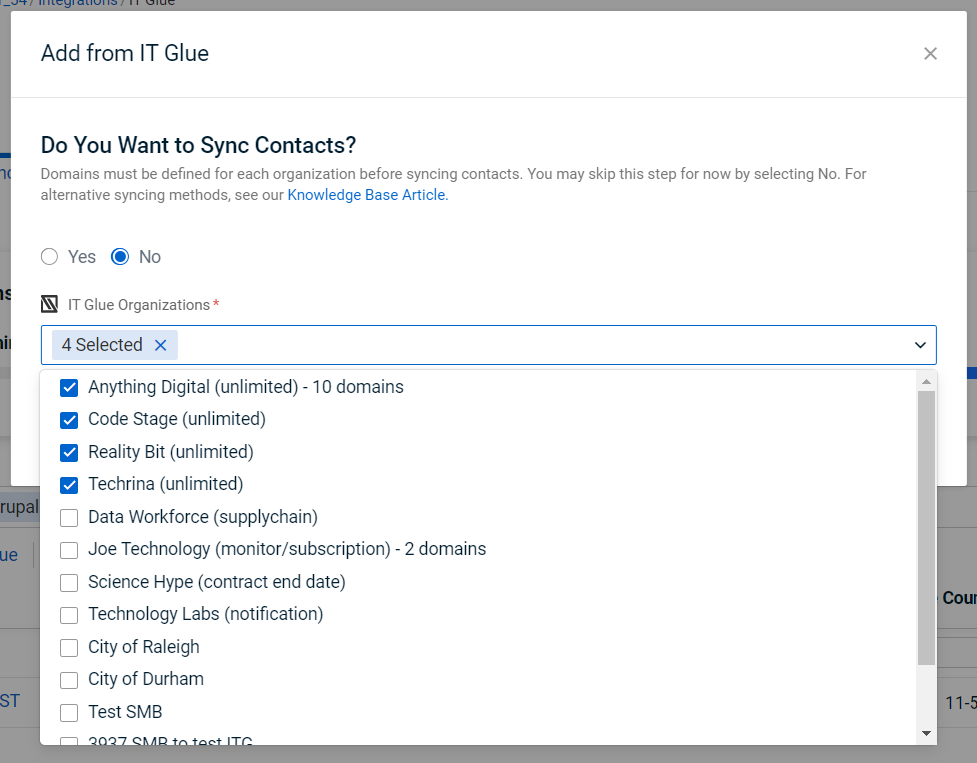
IMPORTANT You can search only by the full name of an organization. Meaning, that if you want to search for some particular organization to be imported, you should ultimately provide the name into the search input or scroll through the list. Linked organizations already existing in a table do not appear in the list.
- You can see the count of selected organizations from the page. Click Import.
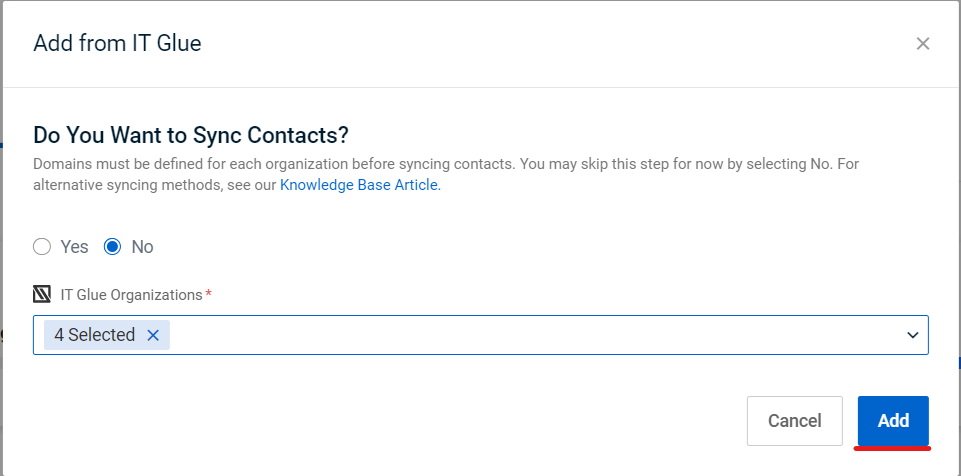
You can see the import is in progress.
- Once you click import, IT Glue organizations successfully import to the BullPhish ID account with the last sync time. Scroll down to the last rows of the table to see the updates.
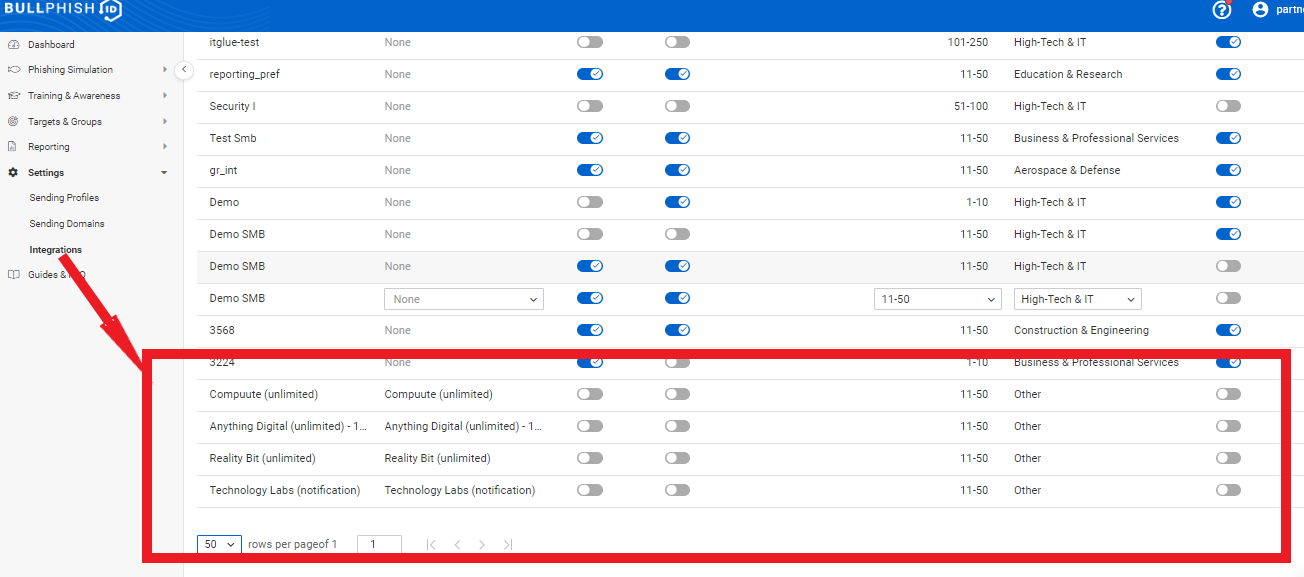
NOTE When you request a new import selection, you cannot see the previously selected and imported list of organizations from Add from IT Glue.
Once the synchronization gets enabled, you can still manually change organization settings and click Save.
You can directly link organizations from IT Glue with BullPhish ID on IT Glue table view integration page.
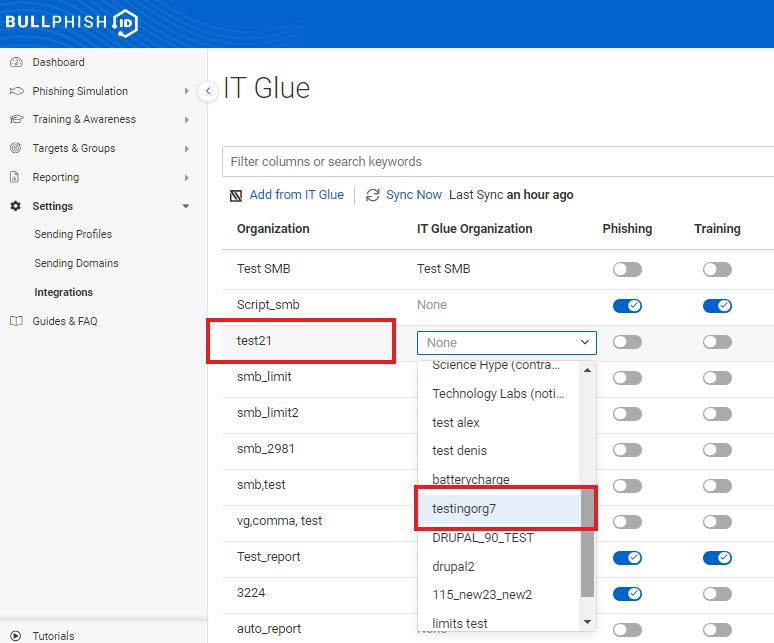
For example, if you want to link IT Glue SMB organization testingorg7 with BullPhish ID SMB organization with the name test21; follow the below steps:
- Go to the BullPhish ID SMB organization that you want to link with the IT Glue organization; for example, test21.
- Click the dropdown button from the IT Glue SMB organization column; for example, testingorg7.
- Click Save.
Once the integration is saved, you can see the organization name of BullPhish ID is updated.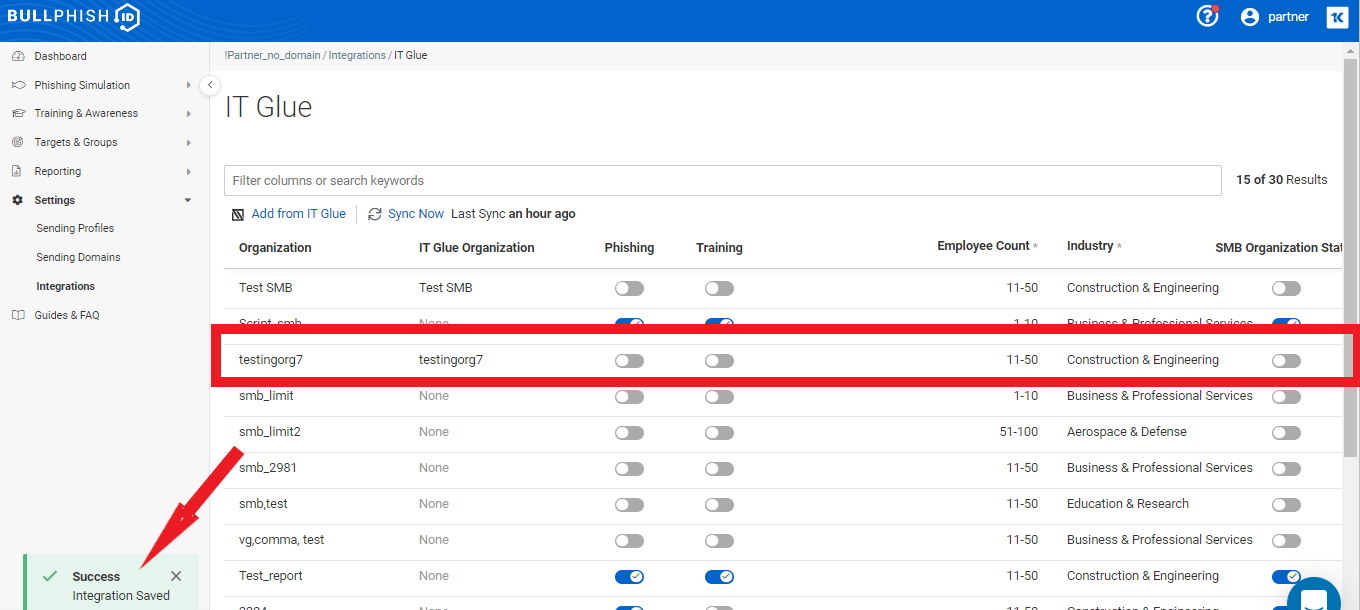
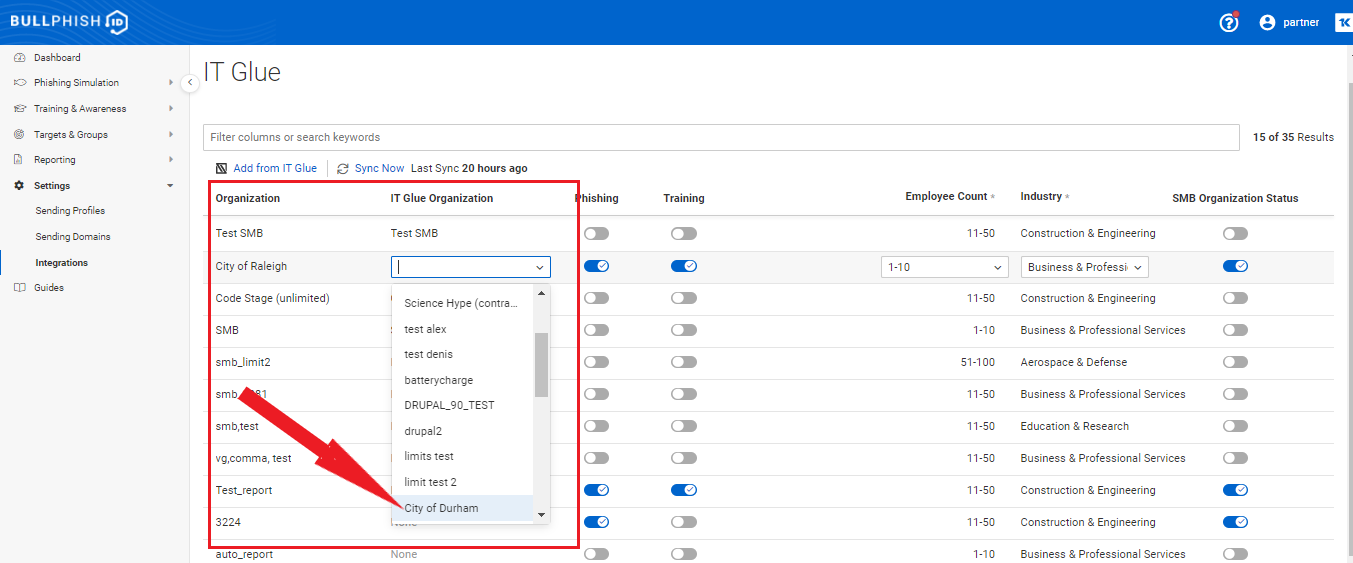
You can directly remove an existing IT Glue organization link with a specific BullPhish ID organization and manually link it to another IT Glue organization.
- Select the existing IT Glue SMB organization that you want to remove the link with a specific BullPhish ID organization; for example, City of Raleigh.
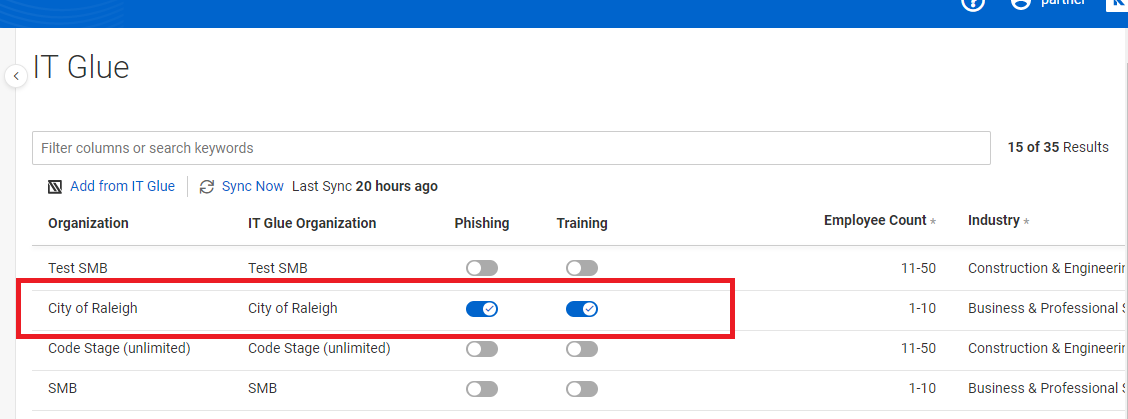
- Click the dropdown button from the IT Glue SMB organization column and select a new IT Glue organization from the list; for example, City of Durham.
- Click Save. The organization name is updated.
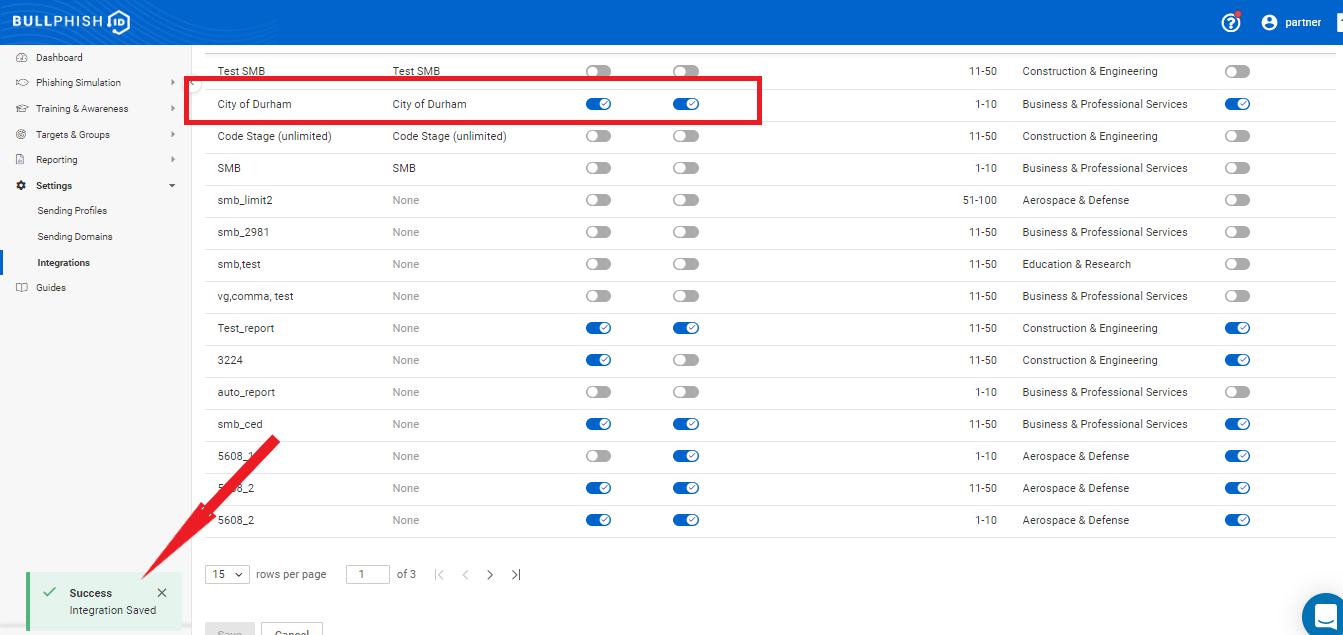
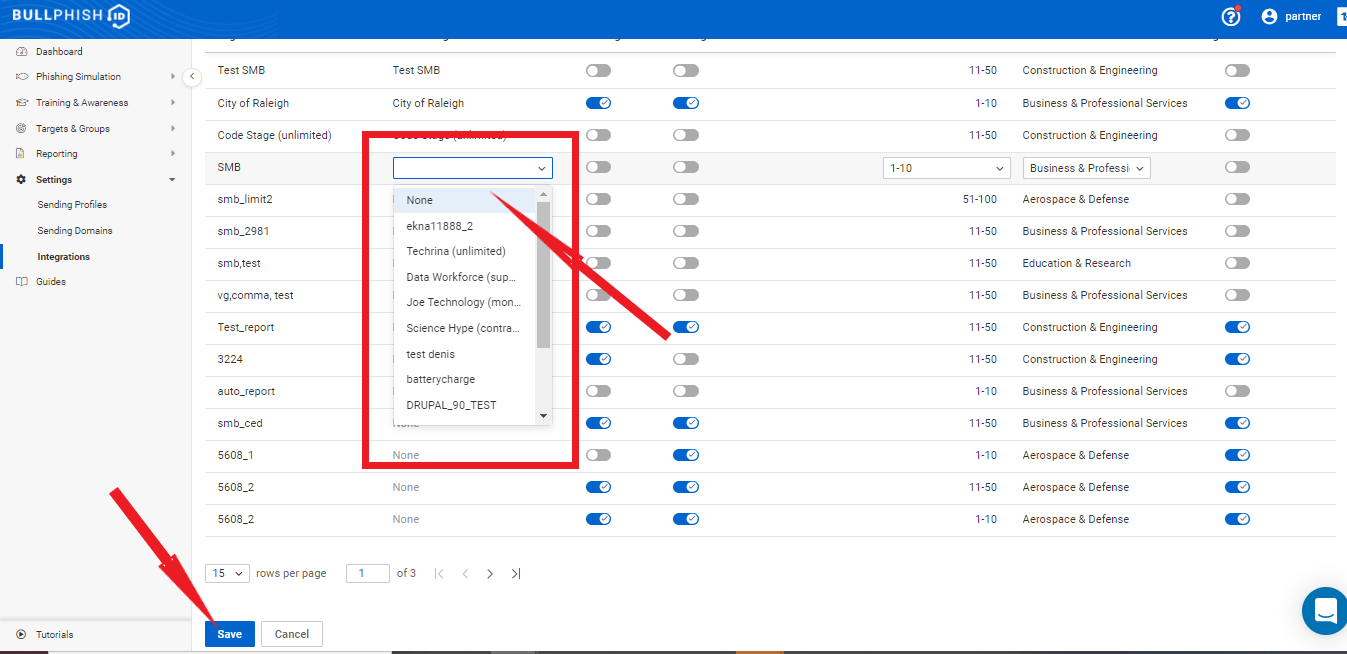
- If you want to remove the existing IT Glue organization link with a BullPhish ID organization but not link to another IT Glue organization, select None from the drop-down and click Save.
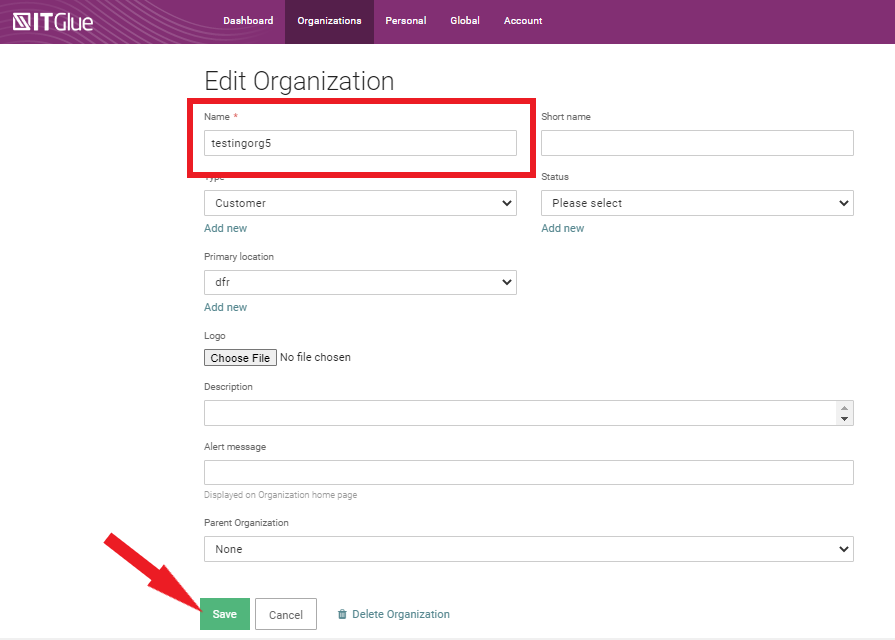
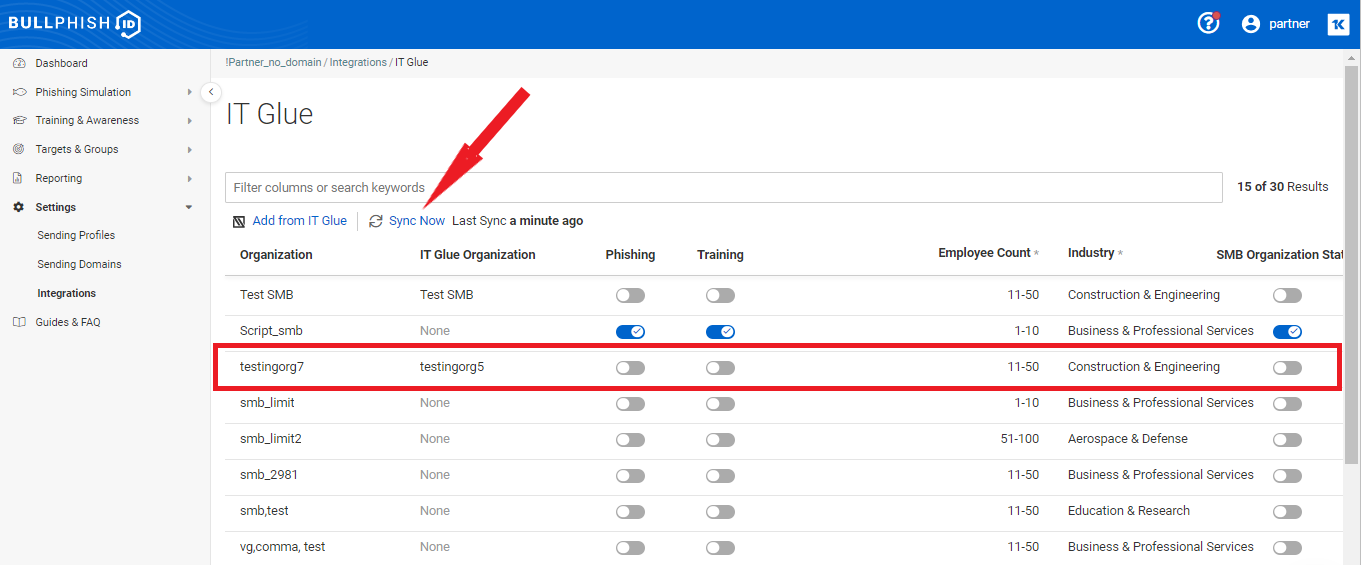
If you log back into the IT Glue account and edit an SMB organization name, for example, testingorg7 to testingorg5, the organization name of BullPhish ID changes on the integration page.
To do so:
- In IT Glue, select Organizations > Edit Organization.
- Edit the organization's name and click Save.
- In BullPhish ID, on the Integrations > IT Glue page, click Sync Now to trigger a manual sync.
As per the changes made in the IT Glue account, the BullPhish ID organization name is updated.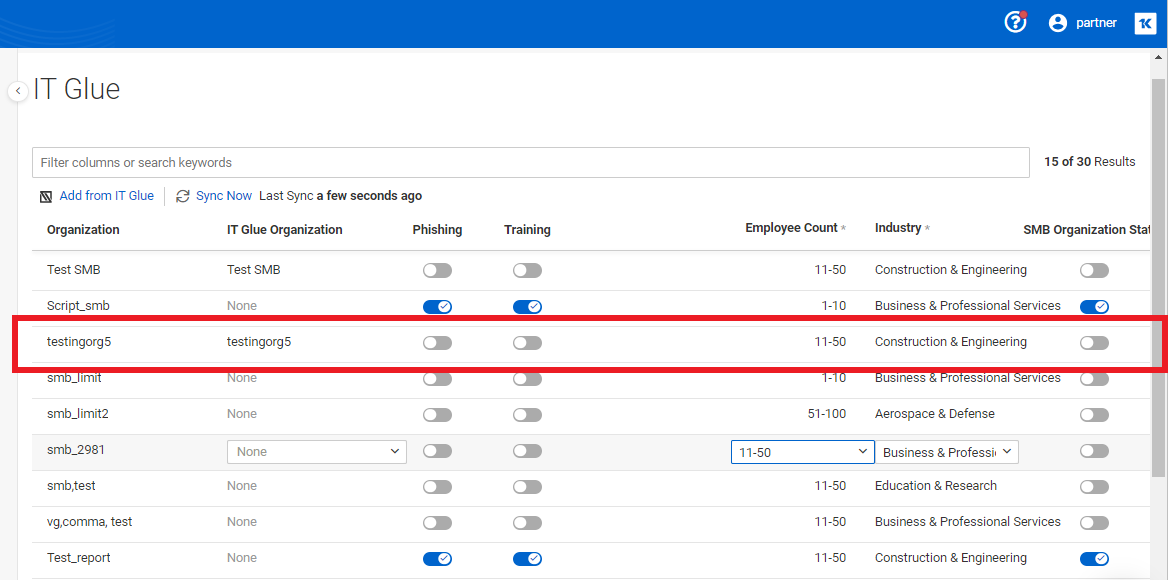
Note:
- Automatic sync occurs every day at midnight Eastern Standard Time (EST).
- You can sync manually using the Sync Now button.
- The Last Sync time will be updated after the sync is completed.
- Sync settings: Updates made directly in IT Glue involving organizations, organization types, organization statuses, and contact types will appear in BullPhish ID within one minute.
When a partner admin logs back into the IT Glue account and deletes an SMB organization that is in sync with the BullPhish ID organization, the synchronization gets delinked between similar names of SMB organizations. For example, testingorg5.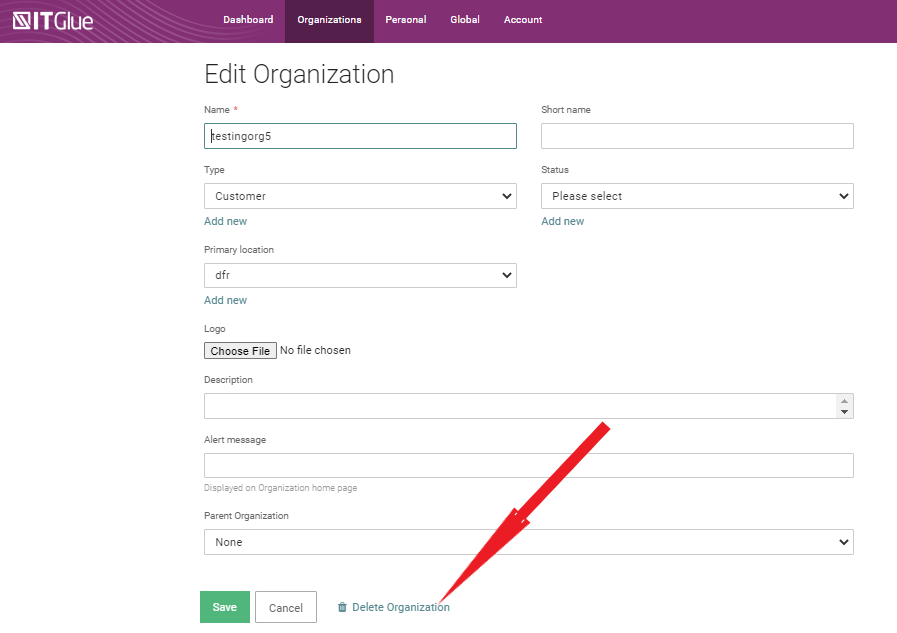
Once the organization is deleted on IT Glue account, the IT Glue organization column indicates None in BullPhish ID.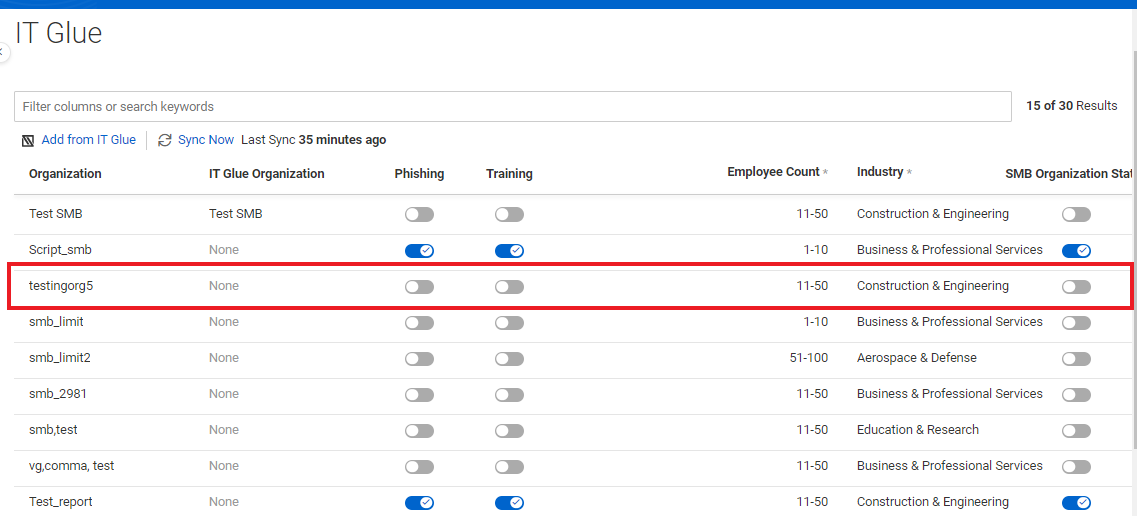
You can set up Sync Settings and filter organizations by organization type and status. 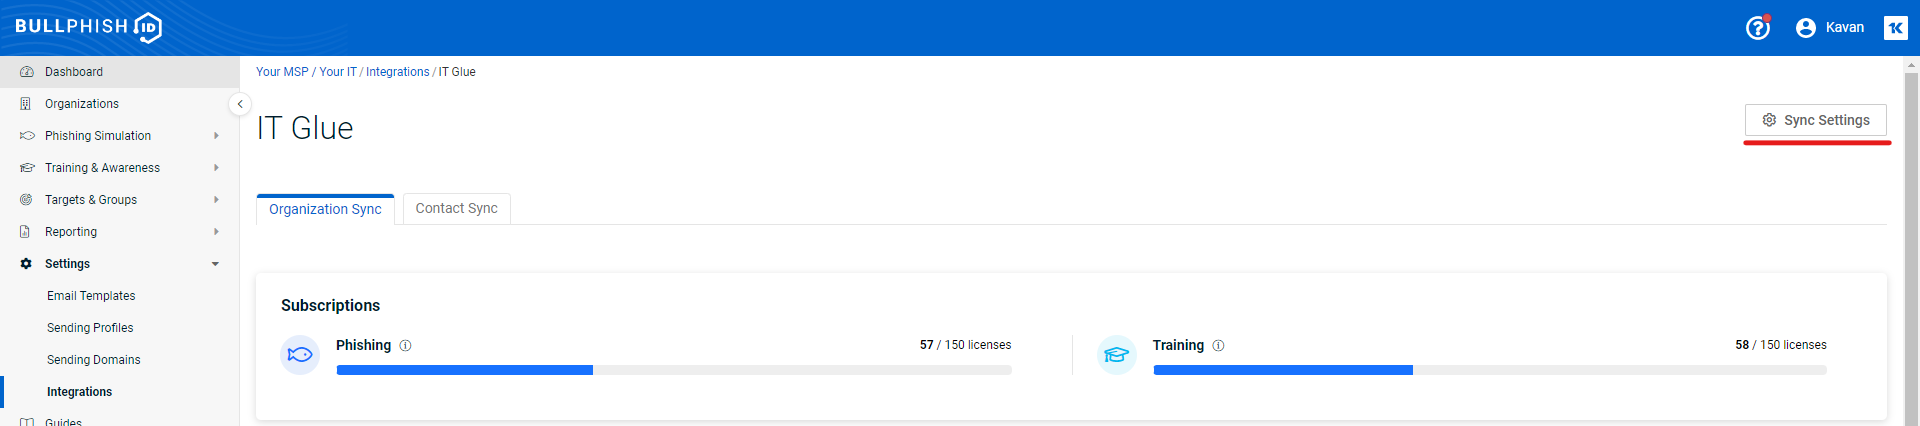
- Clicking sync settings opens the IT Glue Sync Settings modal window.
- All Organization Types and Organization Statuses are automatically connected and fetched from IT Glue to BullPhish ID. You can still manually update the selection between available statuses.
- Click Apply.
- To learn more about the contacts tab, see the article Syncing contacts - IT Glue
NOTE After you click apply, sync will trigger immediately.
You can manually sync and update the selection. For example, if you want to sync only Active status and specific organization types, make the selection accordingly. 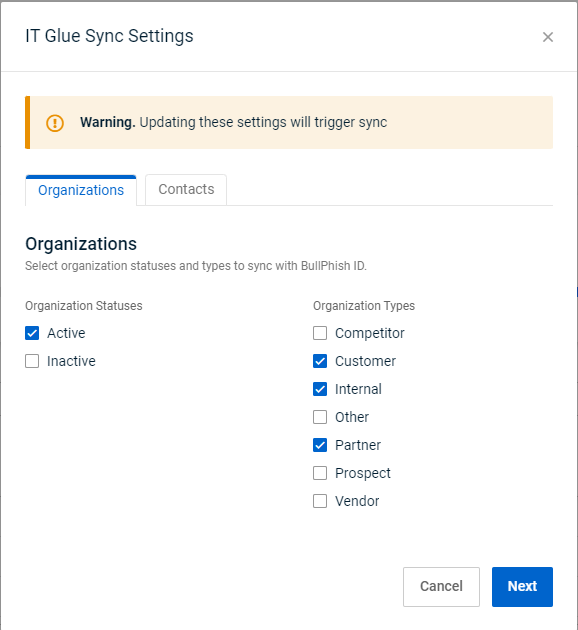
After clicking Apply, the sync settings will successfully configure IT Glue, and sync status is automatically triggered. All the inactive status links are removed on BullPhish ID. 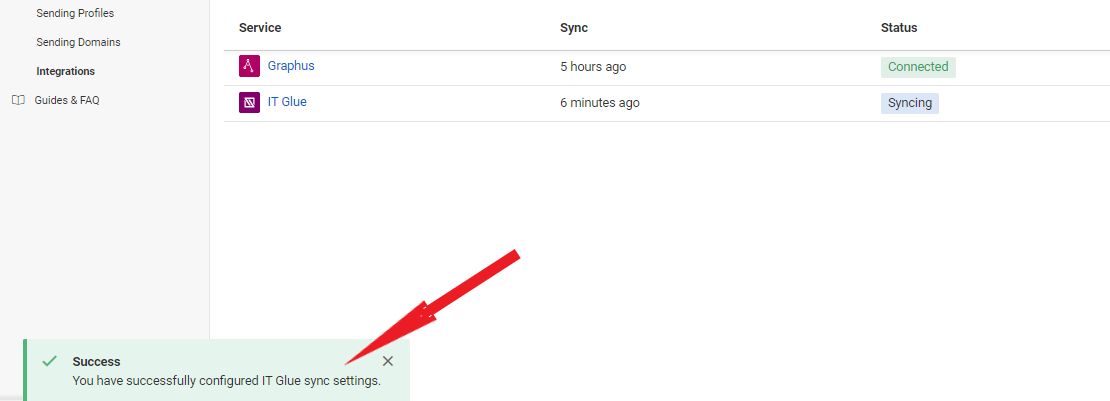
Once you deselect the Inactive organization type option from sync settings, all the inactive organization links will be removed from BullPhish ID.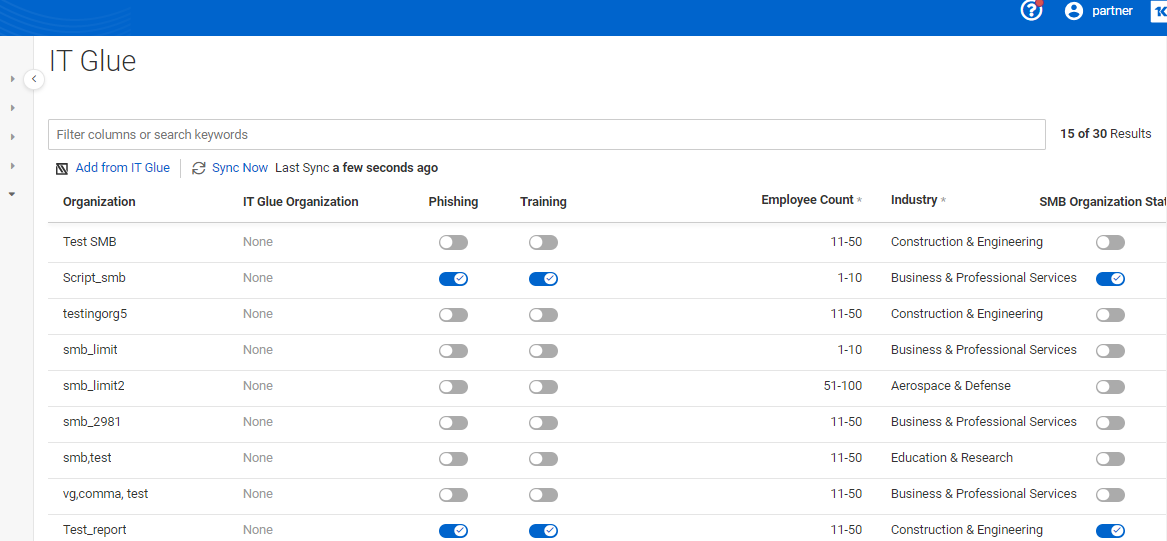
You can again go back and enable the sync settings, for example, active status with all available organization types. 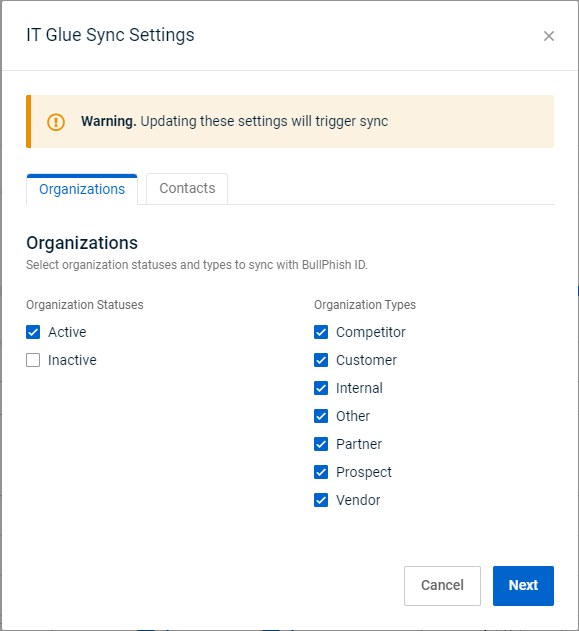
As per your selection, all active organizations are fetched from IT Glue. 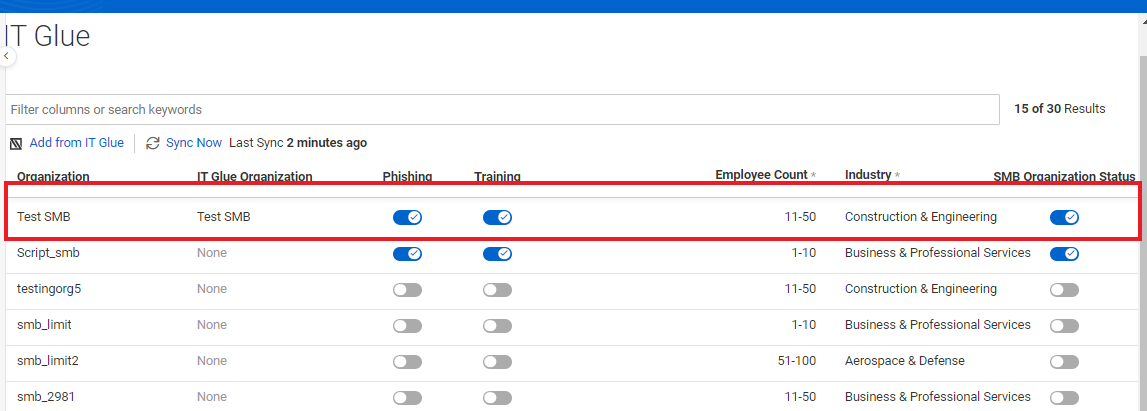
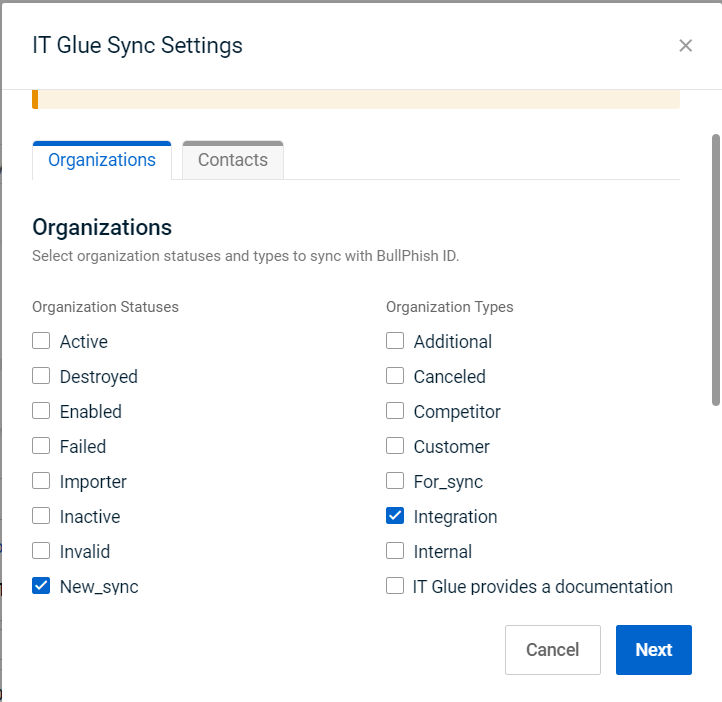
IT Glue users can create and define custom types and statuses.
- In IT Glue, select Organizations > New.
- Click the Add New button.
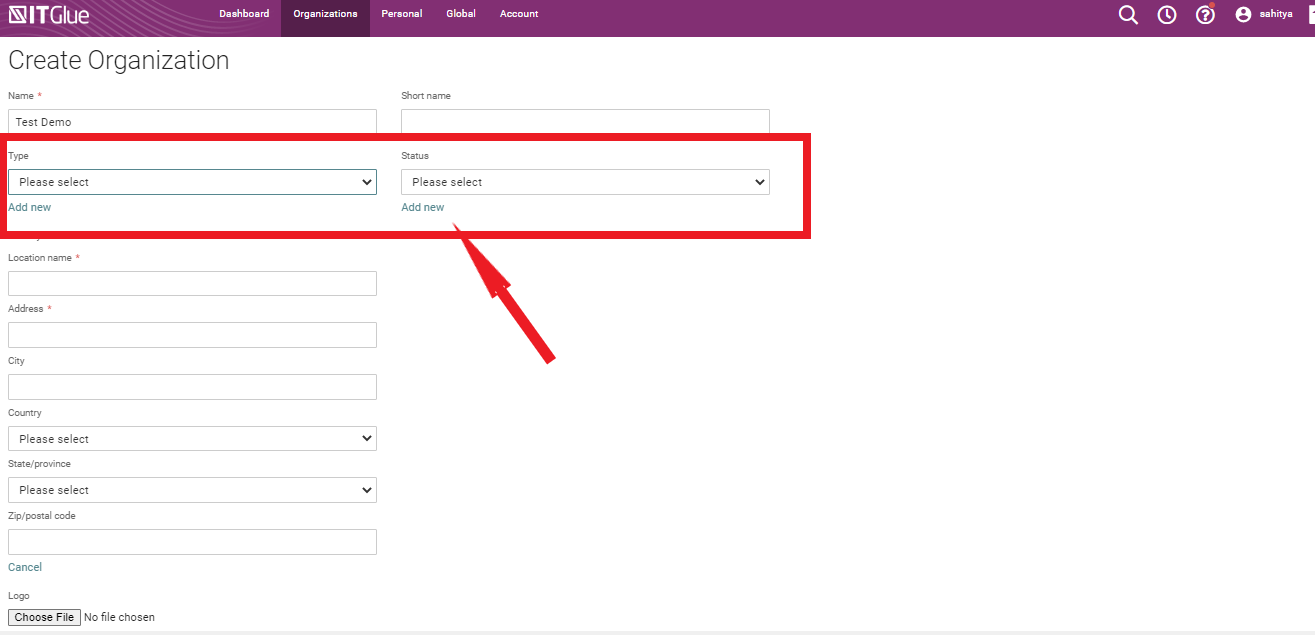
- Enter a custom organization type and status.
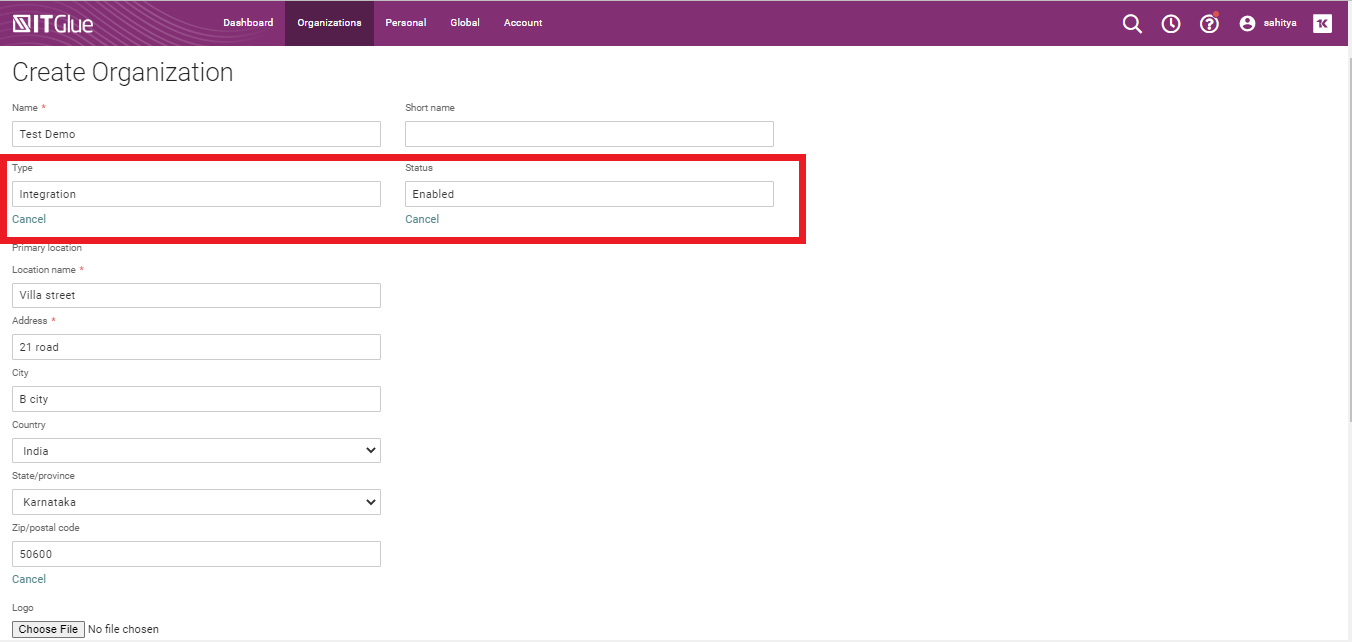
- Click Save. You can see the custom-added organization type and status from the sync settings. For example, New_Sync status and Integration type.
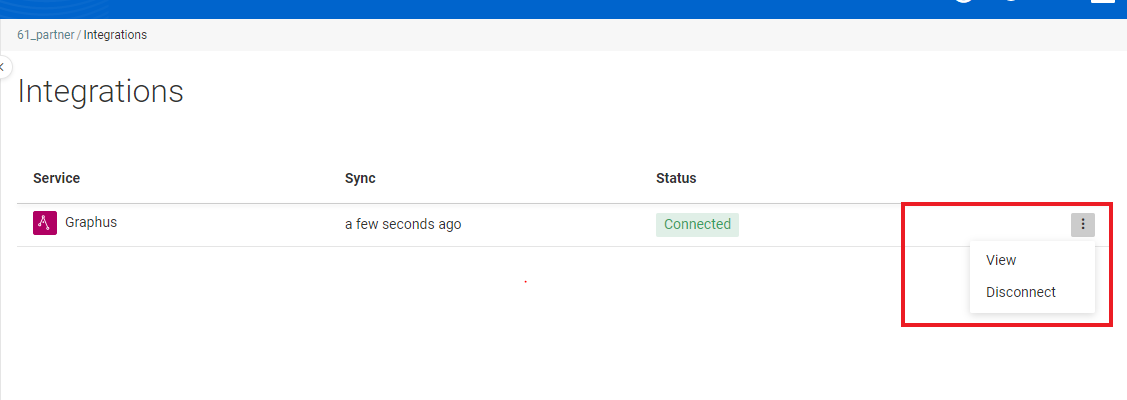
You can see the options menu on your active Integrations page and perform the following actions from the dropdown:
- View: It allows you to view the IT Glue Integration page.
- Sync Settings: Sync settings are customized for each user. Clicking Sync Settings will fetch all available statuses on IT Glue to BullPhish ID.
- Disconnect: It disconnects the active integration with Graphus.
A pop-up appears on the screen with the following message: Are you sure you want to disconnect integration with IT Glue?. To proceed, click Disconnect.
The following Statuses are indicated on the Integrations page:
- Connected: This status is available when integration is live and connected with IT Glue.
-
Disconnected: This status displays when you manually disconnect the integration, or your API key is changed on the IT Glue portal.
- Syncing: This status appears when sync is in progress with IT Glue. This message is displayed: Syncing in Progress. This might take a while. Refresh the page in a few minutes.


