Configuring a custom domain
NOTE A video tutorial is available at the end of this article.
Prerequisites
Ensure that all the following requirements are met:
- You should be any one of the following user(s) - Partner Admin/Partner Agent/SMB Privileged User(s).
- You own or control the domain.
- You cannot create the same domain if the domain name already exists in the system.
Sending domains
Sending Domains is a flexible feature that allows you to add custom domains. These custom domains can be used to send phishing and training campaigns. You can create custom sending domains on the Sending Domains page, which can be found under Settings in the left navigation pane.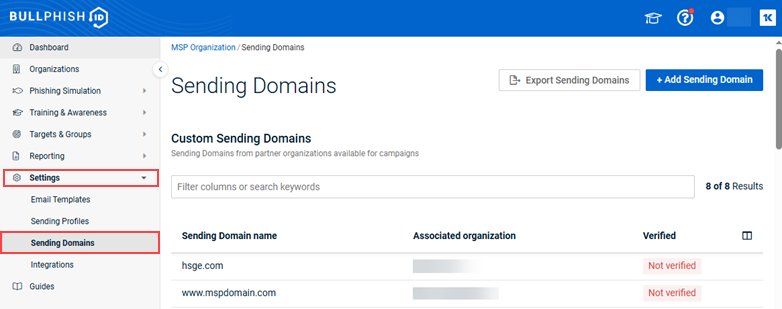
- If you are a Partner Administrator or Partner Agent and configure a custom domain for your own account, that domain will automatically become available for all of your client (SMB) organizations. This is helpful if you want to standardize the sending domain across all clients.
- You cannot use the same name that has already been taken.
- After creating a sending domain, you cannot change the name of the sending domain or the associated organization.
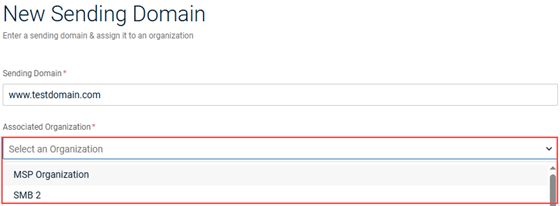
IMPORTANT When creating a sending domain, you select an organization in the Associated Organization drop-down list. The first organization in the list is your organization (your partner account). 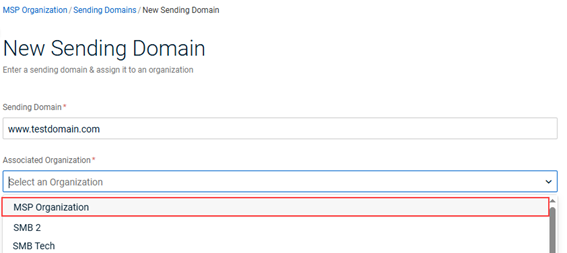
Make sure to select the correct organization based on how you intend to use the domain.
NOTE Global sending domains are domains provided by BullPhish ID and are available for use by all MSPs and SMBs. They are listed in the Global Sending Domains table on the Sending Domains page.
Add a custom domain
- Log into the BullPhish ID portal.
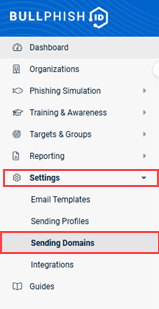
- Click Sending Domains under the Settings tab.

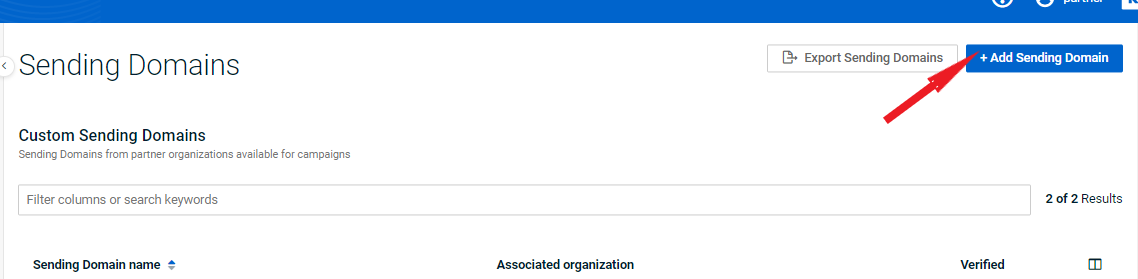
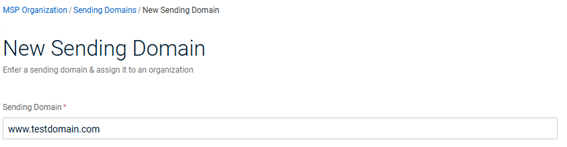
- On the Sending Domains page, click + Add Sending Domain.

- Enter your domain name in Sending Domain field. For example, www.domainname.com. If you enter an invalid domain, an error message is displayed.

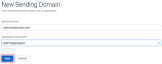
- Select an Associated Organization from the drop-down list:
- To configure a custom domain that will automatically be available to all of your client (SMB) organizations, select your parent organization, which is the first organization in the list.
- To configure a custom domain that will be available only to a specific SMB organization, select that organization from the list.

- Click Next.
Once the domain is created, the page will take you to the Custom Sending Domain page.

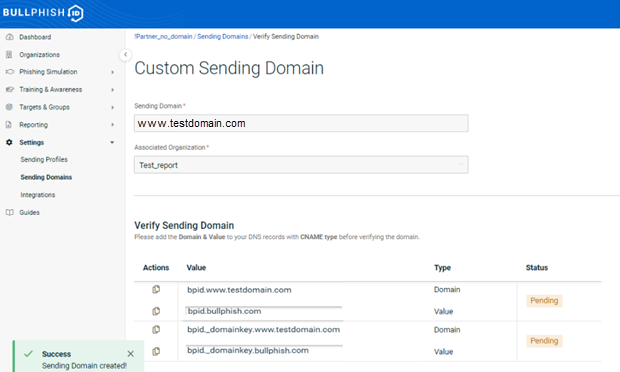
- Before you verify the domain, please add the Domain & Value to your DNS records with CNAME Type.
- Click the Copy icon
 under the Actions column to copy the DNS values. When you do so, the value will be copied to the clipboard, and you should add the record to the DNS service provider.
 - Go to your specific DNS service provider and add copied values to the records.
- Click the Copy icon

NOTE Go to the Custom Domain Authentication section to learn how to add specific DNS records on your DNS server to allow our SMTP server to send emails using custom domains.
- Once you add DNS values to the DNS server, select the Yes, I've added these records check box.
- Click Verify.

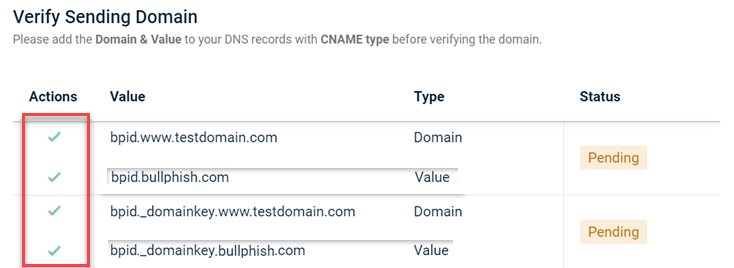
NOTE The application gives a warning message when you miss copying one or more records.
Verification Sending Domain DNS records can have the following statuses:
- Pending:
- It is an application waiting time for the user to finish their action tasks for the domain.
- This status appears when you (referring to the user) are in the process of adding values to the DNS server and taking the following steps, such as clicking the Checkbox and Verify button.
- Failed:
- This status appeared when errors were made in adding records.
- Your domain server might take up to 48 hours to reflect the changes.


- Verified:
- This status appears when you successfully added all your records to the DNS provider, selected the Yes, I've added records check box, and clicked Verify. (The background application collects all these records from DNS for verification).
Once the domain is successfully added, you can view the Verified or Not Verified status on the Sending Domain landing page. 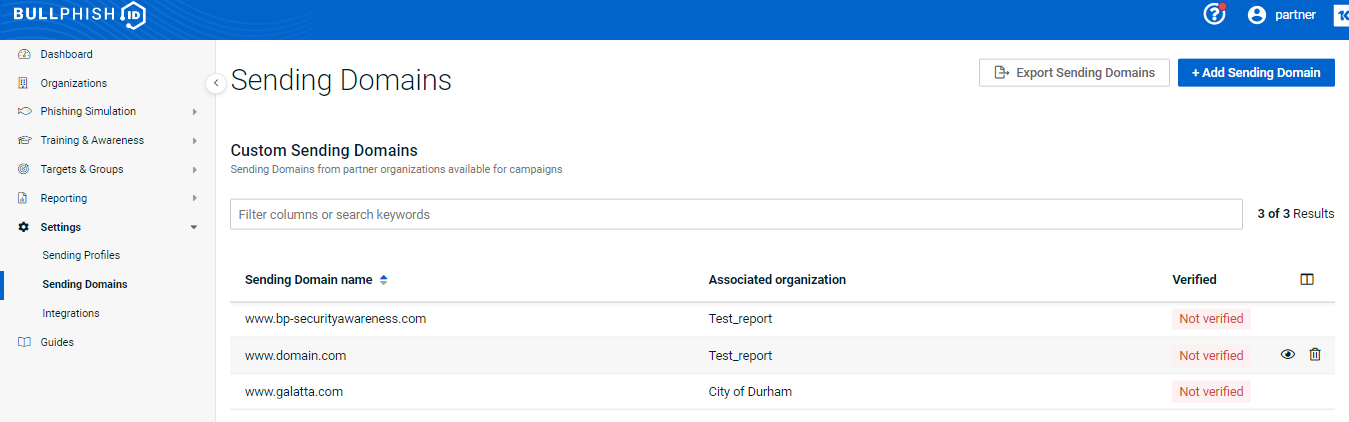
- Verified:
- You will see the Verified status once the domain is added successfully and verified and can be used to create sending profiles.
- Not Verified:
- This status appeared when errors were made in adding records to the domain DNS service provider.
- The sending domain cannot be used to create sending profiles.
NOTE
- You will not be able to use Not Verified domains to create sending profiles.
- If a domain is not verified, the campaigns will be automatically canceled.
The view icon  will redirect you to the verification page.
When you click the delete icon  , the page opens a modal window, as shown.
Select a Sending Domain from the drop-down and click Delete And Replace if you wish to continue.
NOTE The deleted domain will be replaced with a new domain in all active/scheduled campaigns. Also, this action will not affect your DNS configured and must be manually removed.
You can customize columns on your wish. To do so:
- Click the Customize Column icon
 .
. - A pop-up modal window appears on the screen with the available columns. Select the columns that you want to show on the table.
- Click Apply.

Once you apply changes, your changes are saved. You can click Restore Defaults to revert to the default settings.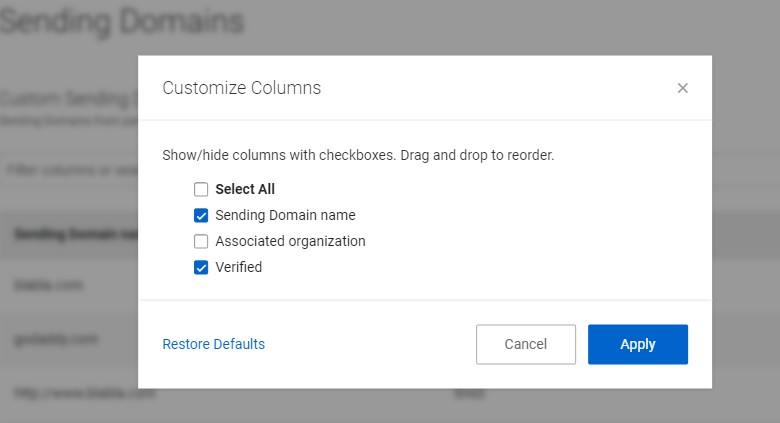
You can sort filter columns using Sending Domain Name, Associated Organization, and Verified. 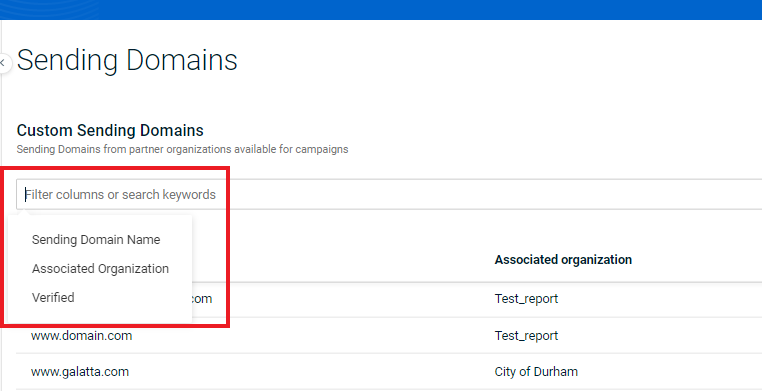
If you want to fetch sending domain information using the Sending Domain Name filter:
- Place the cursor in the filter search box.
- Enter the sending domain name. Or, select the Sending Domain Name filter then enter the sending domain name filter.
- You can directly provide the sending domain name in the search field without an additional pop-up box.
- Click Apply.
You will get the following search result as per your applied filter.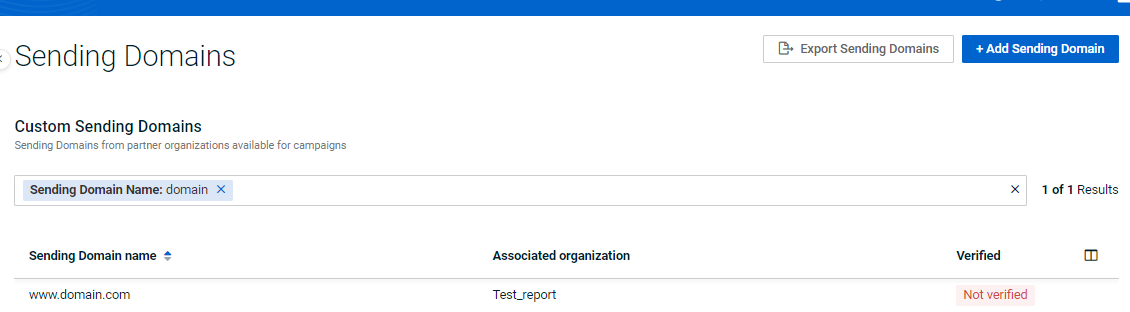
If you want to fetch only Verified/Not Verified results:
- Place the cursor in the filter search box.
- Select the Verified filter.
- A Verified pop-up opens. Select Yes to view only all verified domains or select No to view only Not Verified domains.
- Click Apply.

You will get the following search result as per your applied filter.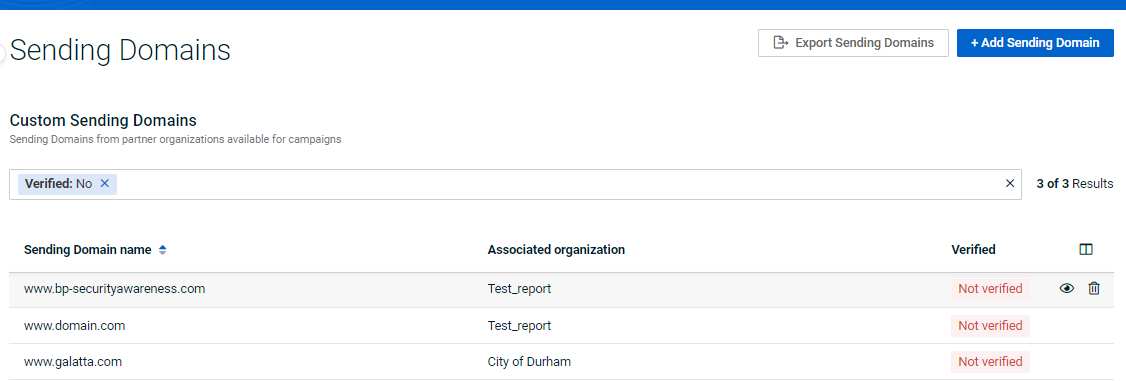
Once you create Sending Domain, you can create a new Sending Profile with the new sending domain. See the article, How do I create a Sending Profile?
Export Sending Domains
You can Export Sending Domains from the Sending Domains page. See the article, How to export a list of your sending domains
Custom domain authentication
Domain authentication, formerly known as domain Whitelabel, shows email providers that BullPhish ID has your permission to send emails on your behalf. To provide BullPhish ID permission, you must point DNS entries from your DNS provider (like GoDaddy, Rackspace, or Cloudflare) to BullPhish ID.
Even though this is a slight change from your recipient's perspective, this change has a substantial positive impact on your reputation as a sender and your email deliverability. It is essential because email service providers distrust messages that don't have domain authentication set up as they cannot be so sure that the message comes from you. Explicitly stating that it comes from you increases your reputation with email service providers. Making it much less likely that they will filter your mail and not allow it to get to your recipient's inbox, increasing your deliverability. You also explicitly show your recipients that this email comes from you, making them less likely to mark your mail as spam.
Setting up domain authentication
To set up domain authentication, you must submit the DNS records provided by BullPhish ID to your DNS or hosting provider (for example, GoDaddy, Hover, CloudFlare, etc.). Firstly, determine who your hosting provider is and if you have access. If you don't have access to your DNS or hosting provider, you should get the information on who in your company has this access before setting up domain authentication.
Next, you must add all the CNAME records from the 'Verified Sending Domain' screen to your DNS host. This process varies depending on your DNS host. The following table instructs you on how to add CNAME records for various DNS providers.
| DNS provider | Link to the documentation |
| GoDaddy | https://godaddy.com/help/kak-dobavit-zapis-cname-19236GoDaddy |
|
Amazon Route 53 |
https://docs.aws.amazon.com/Route53/latest/DeveloperGuide/resource-record-sets-creating.html |
|
Cloudflare |
https://support.cloudflare.com/hc/en-us/articles/360020348832-Understanding-a-CNAME-Setup |
|
ClouDNS |
|
|
DSN Made Easy |
https://support.dnsmadeeasy.com/support/solutions/articles/47001001393-cname-record |
|
DNSimple |
|
|
Alibaba Cloud |
|
|
Google Cloud |
https://cloud.google.com/dns/docs/quickstart#create_a_cname_record_for_the_www_subdomain |
|
Jimdo |
https://help.jimdo.com/hc/en-us/articles/115005537866-How-do-I-add-a-CNAME-entry- |
|
Namecheap |
|
|
NS 1 |
https://help.ns1.com/hc/en-us/articles/360020258073-Create-a-DNS-record |
|
DNSPod |
|
|
Dyn |
https://help.dyn.com/standard-dns/adding-a-resource-record-in-standard-dns/ |
|
easyDNS |
If you couldn't find your DNS provider in the list, you can contact support or create a feature request so that we supplement this list and help you find documentation.
Verifying your DNS
Once you add the CNAME records to your DNS host, return to the Verified Sending Domain page and click the Verify button.
Two cases get placed when you do so: either half of your CNAME records get verified - this usually means you need to wait a bit longer, or it is also possible that you incorrectly entered one of your records. For other troubleshooting information, see the section Sender authentication troubleshooting.
Sender authentication troubleshooting
Where is my domain hosted?
If you aren't sure what DNS provider hosts your domain, use this command to find out:
dig <<your_domain.com>> ns
My DNS records aren't validating
After you add your CNAME records to your DNS host, you need to validate them in the BullPhish ID UI. If your DNS records aren't validating, try the following steps.
- Allow your DNS records to propagate: Some DNS providers take longer than others to update your DNS records with the CNAME files we ask you to add. Please give it up to 48 hours to validate.
When the user does not add some records to the domain, the application displays a warning message: 'One or more values were not added. Please copy all values to your records.' Though records were added correctly, DNS takes some time to update them.
- Auto appending: Some DNS hosts will automatically add your top-level domain to the end of DNS records you create, which can turn a CNAME for "email.domain.com" into "email.domain.com.domain.com."
Be sure to follow the convention on existing records in your DNS panel when adding new ones, as sometimes you will only need to add what is to the left of the top-level domain.
For example, a CNAME for "email." becomes "email.domain.com"

My DNS doesn't accept underscores
BullPhish ID requires underscores for sender authentication, but some DNS providers do not support underscores in zone file entries.
If your provider does not allow you to use underscores in zone files, consider changing your DNS hosting provider.
Manually validating records
Sometimes there is no other option but to validate your DNS records manually. It can be caused by certain DNS providers or by customizations you add to your records.
To validate a DNS record manually, use the Unix command DIG. The following examples use the Terminal on a Mac platform. The tables show specific validations. If the ANSWER section of the dig return is empty, this usually means that either the record does not exist or has yet to propagate.
| Command | Type | Answer |
| dig cname bpid.<yourdomain.com> | CNAME | 25d3b1577f2c421b844fa47370297a95.bullphish.com |
| dig cname bpid._domainkey.<yourdomain.com> | CNAME | 25d3b1577f2c421b844fa47370297a95._domainkey.bullphish.com |
If you can successfully verify your DNS changes manually, but it won't validate in the tool, contact support, and we can help you investigate. You can also use the DNS lookup tool provided by MxToolbox.
| Version # | Implemented By | Revision Date | Approved By | Approved Date | Notes |
| 1.0 |
Sahitya Kalva Author |
24-03-2022 |
Latika Verma Product Owner |
31-03-2022 | |
| 1.1 |
Sahitya Kalva Author |
12-04-2022 |
Latika Verma Product Owner |
12-04-2022 | Sending Profiles section is added. |
Terms and Abbreviations
| Term | Abbreviation | Descriptive |
| BPID | BullPhish ID | BullPhish ID is a fully-featured cybersecurity training & awareness software platform. It is designed to serve Enterprises, SMEs, and Startups. By using our Training & Awareness courses and Phishing Simulation Campaigns, you have the power to save money and time in preventing cybersecurity attacks on your organization. |
| SMB | Small & Medium-Sized Business | Small and medium enterprises are privately owned businesses. A business with 100 or fewer employees is generally considered small, while one with 100-999 employees is medium-sized. |
| DNS | Domain Name System | It is a naming system for domains on the internet. When BullPhish ID refers to your DNS, we discuss the domain name you wish to send emails to targets. When we talk about your DNS provider, we talk about the service that hosts your domain name. For example, GoDaddy, Rackspace, or Cloudflare. |
| DKIM | DomainKeys Identified Mail |
It is designed to help email providers prevent malicious email senders by validating emails from specific domains. DKIM is one of the most popular email authentication methodologies that works by using cryptographic technology that adds a digital signature to your message header. This DKIM signature validates and authorizes your domain name in the eyes of the receiver. The DKIM signature is created using a unique string of characters stored as a public key. When your email is received, the public key is retrieved through the DNS and decrypted by the receiver to verify your domain's identity confidently. |
| SPF | Sender Policy Framework | It is an email authentication standard developed by AOL that compares the email sender's actual IP address to a list of IP addresses authorized to send mail from that domain. The IP list is published in the domain's DNS record to provide more information about SPF. |
| CNAME | Canonical Name | It is a record in the DNS database that indicates the true hostname of a computer associated with its aliases. It is essential when running multiple services from a single IP address. |
| SMTP | Simple Mail Transfer Protocol | The SMTP protocol is used for sending e-mails over the Internet. |
Tutorial: Configure a custom sending domain
| Revision | Date |
|
Added tutorial video. |
8/23/24 |
| Added Important note: Associated Organization list. |
4/11/25 |
|
PR: Add a custom domain: Edited step 5 |
4/15/25 |


