Adding and editing targets
This article includes the procedures for adding and editing targets in BullPhish ID.
NOTE A video tutorial is available at the end of this article.
Prereqs:
-
A partner administrator, partner agent, and privileged user can add, edit, activate, deactivate, and delete targets.
Target
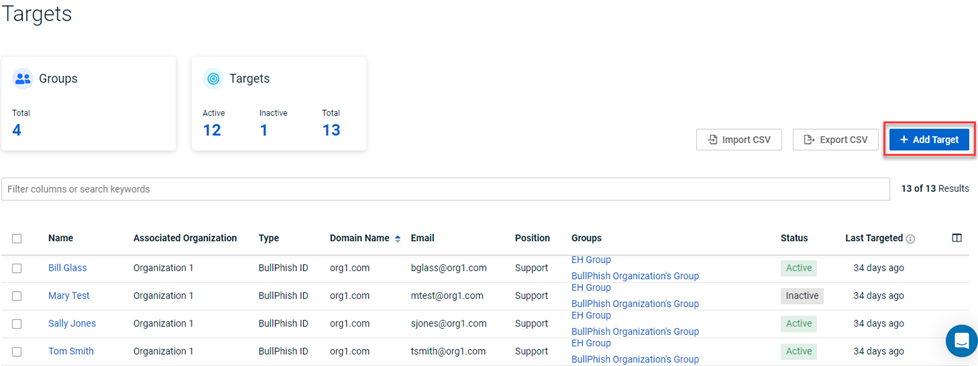
In BullPhish ID, the employees to whom you send phishing and training campaign invitations are called targets.
Before you can conduct a phishing or training campaign, you have to add your targets to BullPhish ID and then add those targets to a group.
There are three ways to add targets to BullPhish ID:
-
One at a time from the Targets page or Groups page (refer to the article Creating a group).
-
All at once from the Targets page or Groups page, using a CSV file. Refer to the article How do I use the Import CSV button?
-
All at once by creating a directory sync. Refer to the article Adding a directory sync.
This article focuses on adding targets individually from the Targets page and editing targets.
Target Status
The ability of a target to access the training portal or participate in a scheduled campaign is determined by the target’s status: Active or Inactive.
-
Active: Target can access the training portal and participate in scheduled campaigns. Active is the default status when a new target is added. You can deactivate (make inactive), delete, or edit a target whose status is Active.
-
Inactive: Target cannot be added to a group, access the training portal, or participate in scheduled campaigns. You can activate (make active), delete, or edit a target whose status is Inactive.
How to...
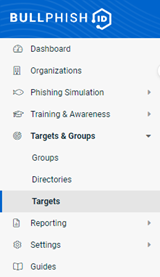
- In the navigation menu, select Targets & Groups > Targets.

- In the upper-right corner, click the + Add Target button.

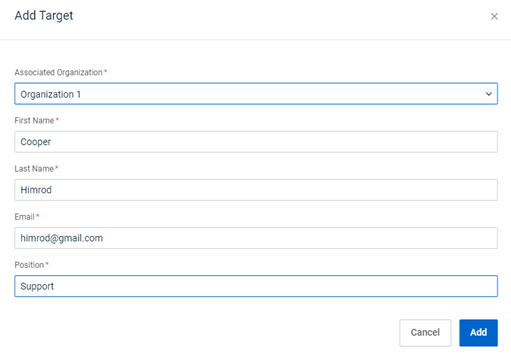
- In the Add Target modal, complete the following fields:
- Associated Organization: Select the name of the organization for which the target will be associated.
- First Name: Enter the target’s first name.
- Last Name: Enter the target’s last name.
- Email: Enter the target’s email address.
- Position: Enter the target’s position at the company.

-
In the lower-right corner, click Add.
- In the navigation menu, select Targets & Groups > Targets.
- In the Targets table, select the check box for each desired target.
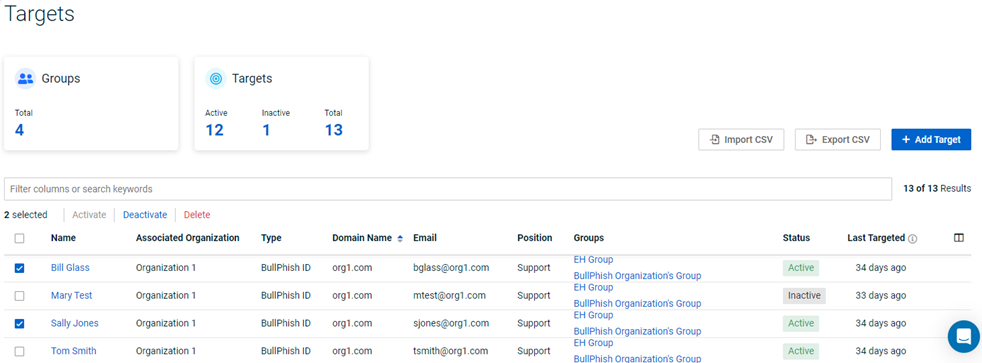
NOTE To select all targets, select the check box in the header row.
- Above the table, click the desired button.

- In the confirmation modal, click the Confirm button.
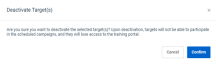


NOTE You can activate a target that you previously deactivated.
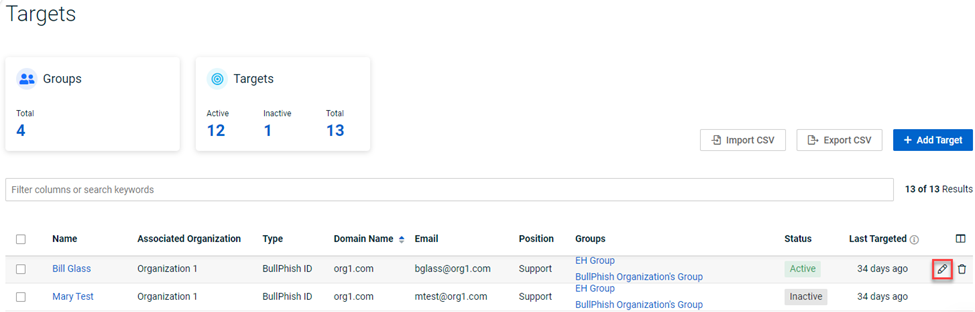
- In the navigation menu, select Targets & Groups > Targets.
- For the desired target, in the last column, click the Edit icon.

- Make the desired edits and click Apply.


Tutorial: Targets & Groups
Related articles
- How do I use the Export CSV button?
- How do I use the Import CSV button?
- How do I delete targets permanently?
- How do I identify targets/domains that do not belong to your SMB Organization?
- What are the different ways to add targets to BullPhish ID?


